Introduction
In other sections of the website we’ve shown how to start serrated and rounded edges for the pāpale pāʻole or garden hat. For some time, Iʻve wondered how to get the smooth edge that Iʻve seen on other weaversʻ hats. Now, Iʻve found one way of doing it that may be rooted in mat making from long ago.
Setting Up
In general I begin a new pāpale pāʻole by tying a string around the pahu or ipu. I used to use a waxed garden string but now have changed to string that I bought on Ebay (Palha dark gold) and have been very happy with it.
Tie the string tightly around the pahu or ipu. Tying tightly will make for less slippage later on when many koana have been added. In order to make it easier to slide the koana under the string, make a small wedge of 4-5 layers of lauhala and wrap it with painterʻs tape. See Figure 1 for string and wedge.
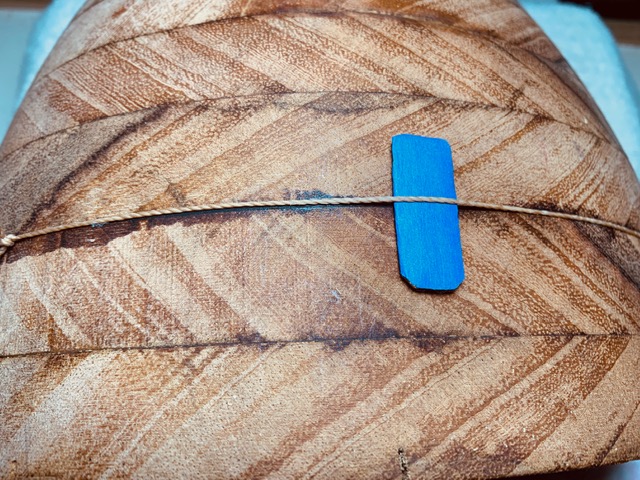 Figure 1. String and wedge in place.
The first time you try this weave, you may wish to use 1/4″ wide koana to make it easier to keep track of things. The koana in the following figures are a little over 1/8″ wide. I also suggest that you put the thin end of each koana under the string so that the future pairs of koana donʻt become too bulky during weaving.
It is most important to remember that this weave is being done on the inside of the hat. All koana must initially be placed under the string with the underside of the leaf facing up.
Youʻll need a lot of koana to do this weave because it uses twice as many as the standard approaches which usually fold the koana in half during the weaving process.
Beginning the Weave
As is true for many weaving projects we begin with two pairs of koana as shown in Figure 2. They are both underneath the string and criss-crossed.
Often koana in opposing directions are labeled moe and ku depending on whether they will be actively folded during the weaving process ( ku ) or just added into the weave matrix ( moe ). In the following, koana going in both directions will be folded ( pelu ) so I wonʻt be using the terms moe and ku. In using the term ulana ( weave ), we will mean that the koana which have been lain down and folded will now be woven into the matrix.
Iʻm also asking the reader to view each figure carefully rather than labeling each koana. Iʻve made an effort to make successive figure show small steps, so please bear with me.
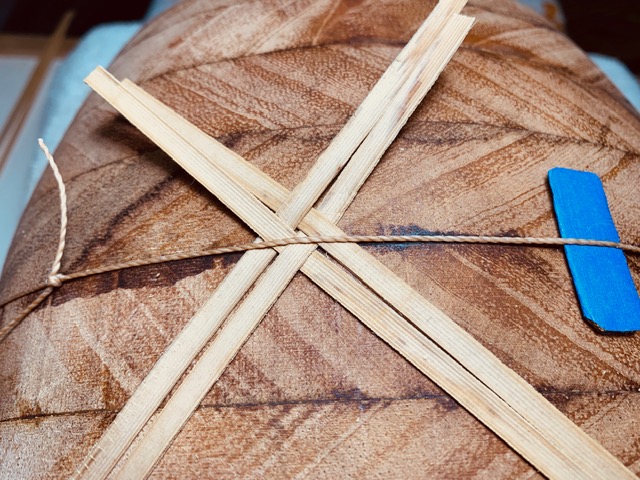 Figure 2. Initial four koana in place.
Figure 3 shows the next step in weaving. One of the koana has been folded back ( pelu ) and another added at right angles to it. Leave about 3″ showing above the string. The excess will be trimmed off later but youʻll need these lengths to adjust the evenness of the edge of the weave after you have joined the ends of the overall weave together.
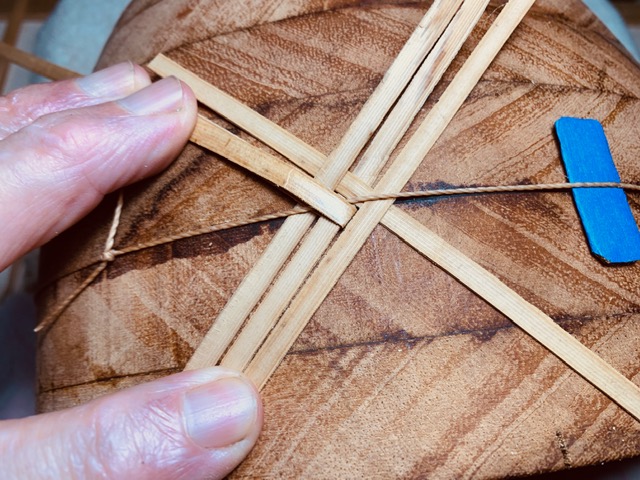 Figure 3. One koana folded back and a second put in place.
In Figure 4, the next koana is put in place, on top of the previous koana and under an earlier koana.
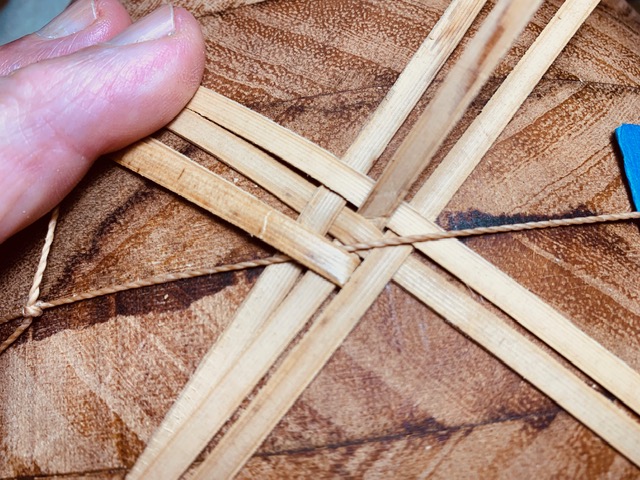 Figure 4. Putting the next koana in place
Now we are going to do a pair of folds which will end up looking like the smooth edge of a hat when you hiʻi. In each case, we will pelu downwards and at right angles. Figure 5 shows the first pelu. When you do this pelu, you now have a pair of koana which must later ulana together. Unfortunately in the subsequent figures this pair is slightly offset. Make sure that you keep the pairs together.
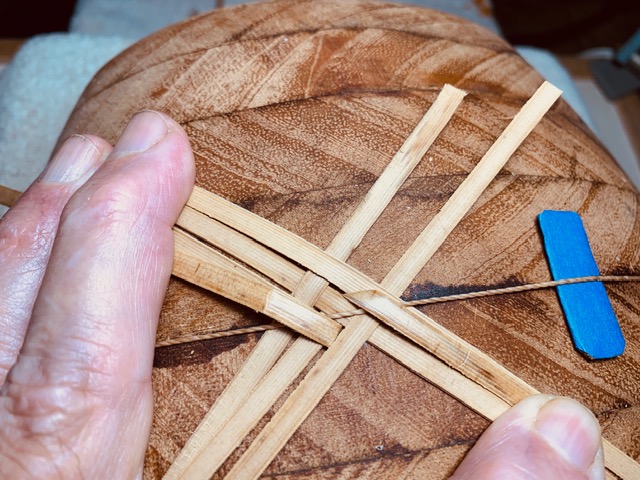 Figure 5. Showing the first pelu.
Figure 6 shows the next pelu which covers the first pelu. Again, you now have a pair of koana which must ulana together. This will become more clear in successive figures. This pelu locks the two in place after ulana.
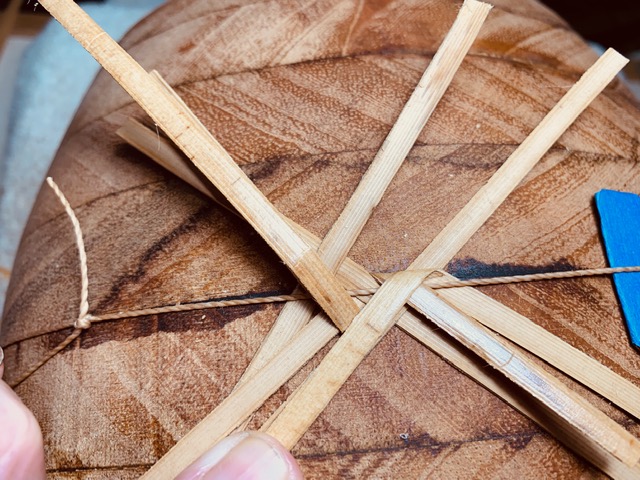 Figure 6. Showing the second pelu, covering the first.
Figure 7 shows a simple ulana which prepares the way for the next pair of koana.
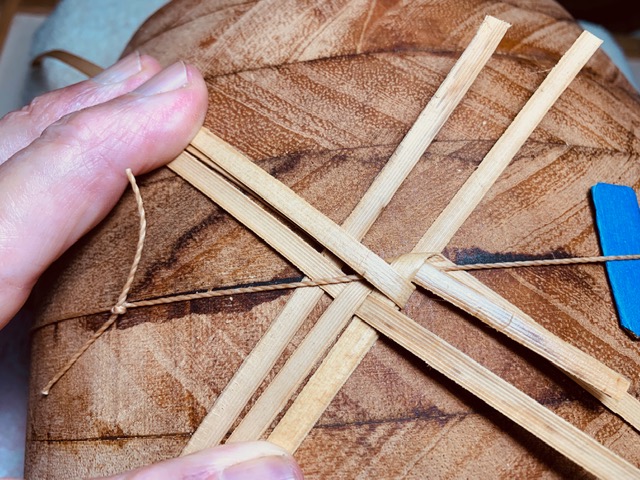 Figure 7. This ulana locks in the first pair and prepares for the next pair.
Figure 8 shows the next pair of koana in place ready to pelu.
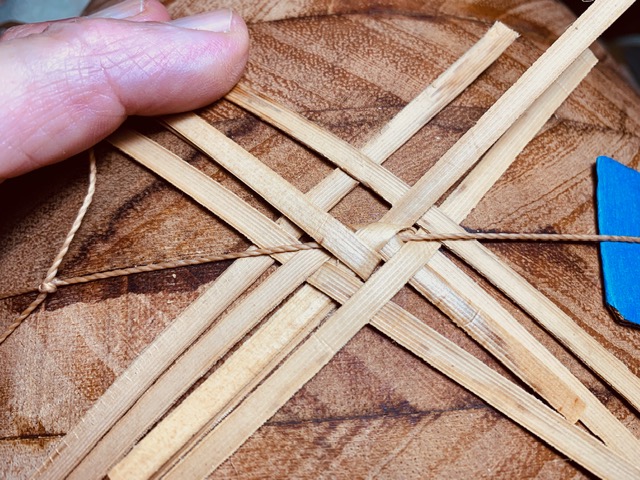 Figure 8. Insert both koana under string
Figure 9 shows both koana after pelu and ready for ulana.
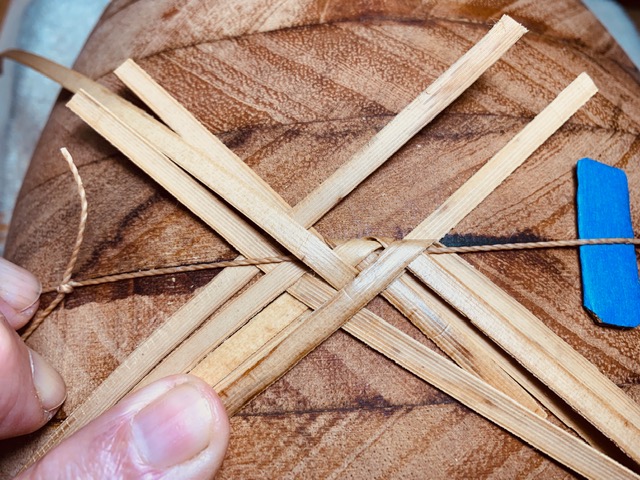 Figure 9. Pelu both koana
Figure 10 shows an ulana now locking in the two koana shown in Figures 8 and 9.
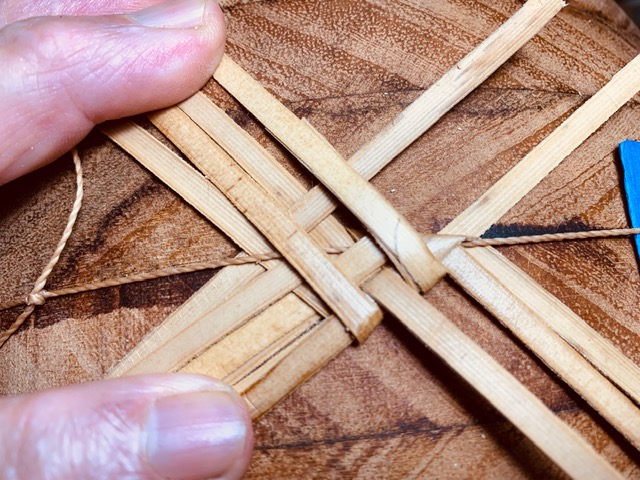 Figure 10. Ulana to lock in koana
Figure 11 shows the smooth edge forming with all the koana lain down for visibility.
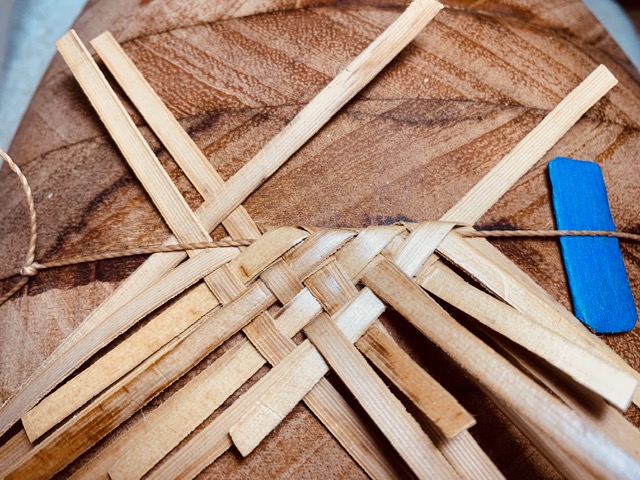 Figure 11. Progress thus far
Figure 12 shows koana lain back and ready for two more koana to be put down.
 Figure 12. Ready for a new pair of koana
Figure 13 shows two more koana in place and ready for pelu.
 Figure 13. Koana in place, ready to pelu
Figure 14 shows both of the new koana after pelu and ready for ulana.
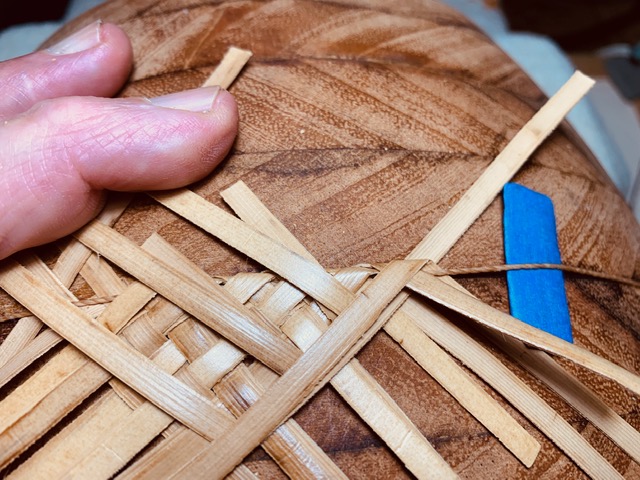 Figure 14. Both pelu finished, ready for ulana
Figure 15 shows more progress on weaving the smooth edge.
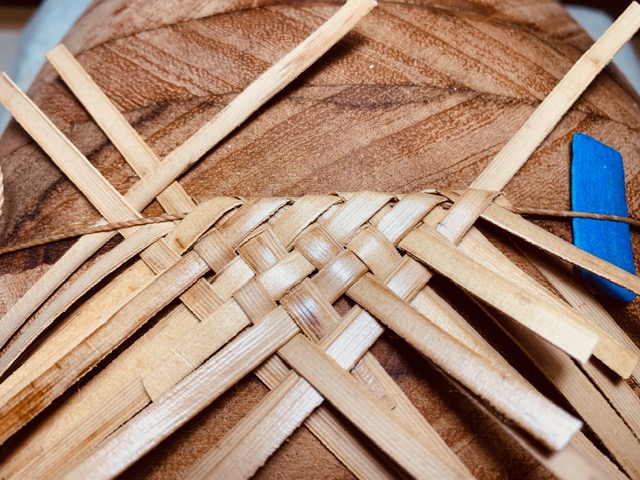 Figure 15. Another progress picture
Now is also good time to begin tightening the weave as you go along and make sure that the koana are at right angles to one another making the maka squares rather than “diamonds”.
Continue on until nearly puni (finished). Go back and again tighten what youʻve woven so far so that you add the correct number of pairs of koana for making a nice fit at the end. Then join the two ends as shown in Figures 12-19 on these pages.
Now go back and trim all the ends to about 3/4″-1″ length. This length will still be enough to make adjustments but wonʻt be as much in the way when youʻve turned the work inside out and begin to work on the rest of the crown.
Figure 16 shows a portion of a pāpale pāʻole with the smooth edge.
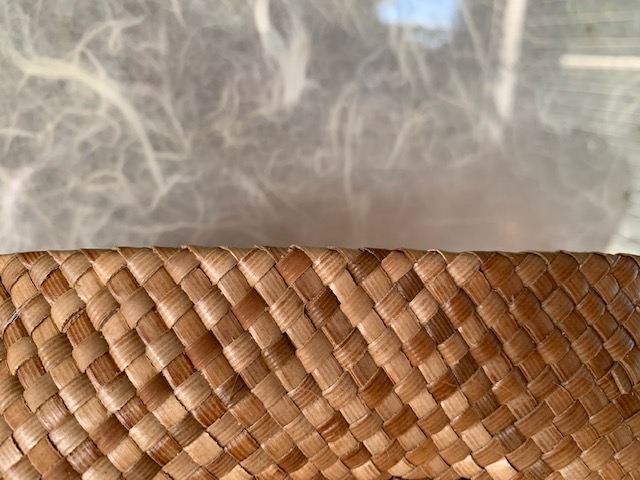 Figure 16. Portion of a pāpale pāʻole showing the smooth edge in place
Figure 17 shows the string on the inside of the hat – barely noticeable when the weave is finished.
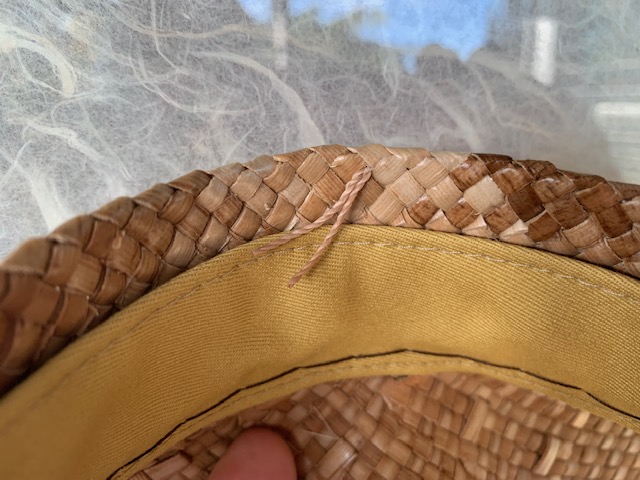 Figure 17. Shows the string peeking out from the weave on the inside of the hat.
There are two ways to turn the crown inside out to begin weaving. Can you imagine which is easier?