Introduction
Let’s make a lauhala trivet using check weave. Trivets are usually thicker in order to protect a table top from a hot coffee cup or plate.So we’ll be making this one thicker. We’ll be showing a third way in the future. The approach shown below differs from the first Project in that we will make a pocket as we weave. In larger trivets, the pocket can hold corrugated cardboard to act as an additional insulator. Also the front and back are more nearly the same with respect to the weaving pattern.
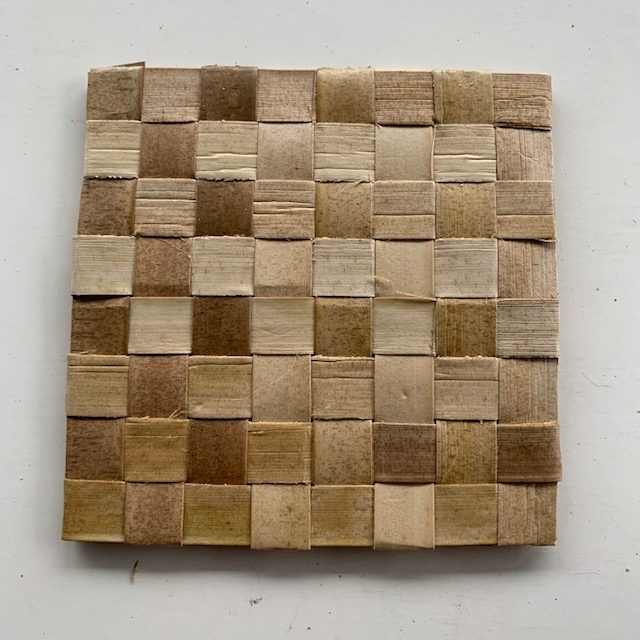
The project will also require some patience. If things don’t seem to be going just right, take a break. Here’s what the finished product looks like:
The basic structure of each project will involve a materials list, a tools list and a set of sequential instructions.
Materials List
You will need 16 koana 1/2″ wide and 14-15″ long.
Tools List
A tool for softening the koana before weaving
Either a pin stripper or a box stripper to cut the koana from the lauhala
Scissors for cutting the koana to length and trimming
A spray bottle ( a small one from the travel section is good )
1/2″ wide painter’s tape
Small hair pins ( those about 2″ long work well for me )
A tool to help push one end of the koana underneath another
A 12″ or longer ruler
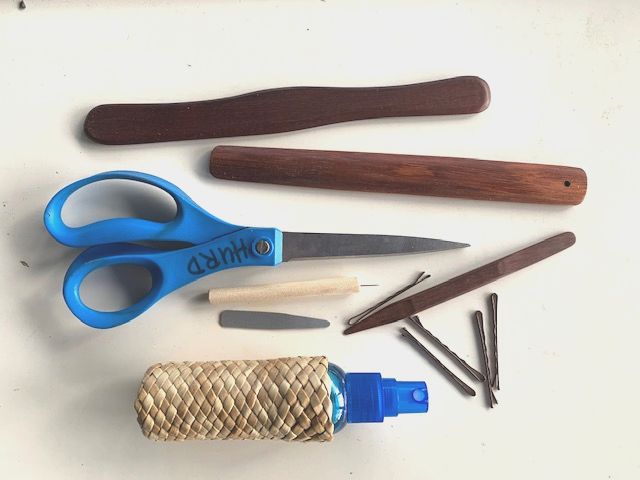 Figure 2. From top to bottom: softening sticks, scissors, pin stripper, tools for weaving the koana, small hair clips and small spray bottle.
Cutting the Lauhala Strips (koana)
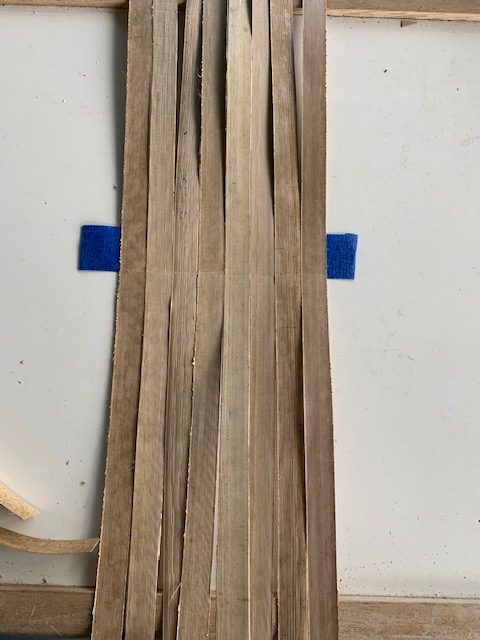
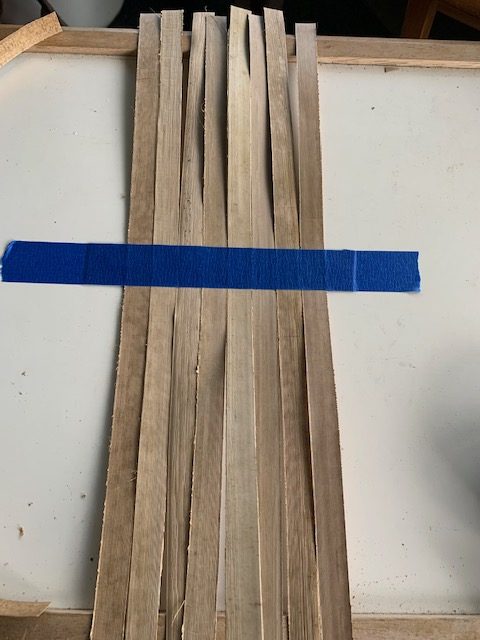
Using a pin stripper or a box stripper, cut the 16 koana into 1/2″ wide, 14-15″ long pieces. Then soften each piece by drawing it across the edge of a softening tool or the back edge of a knife as shown in the Wong-Gary video at about 8 minutes into the video. Do this firmly but gently. If the koana delaminates or tears, strip another one to replace it. Now fold each koana in the middle of its length and unfold it.
Beginning the Weave
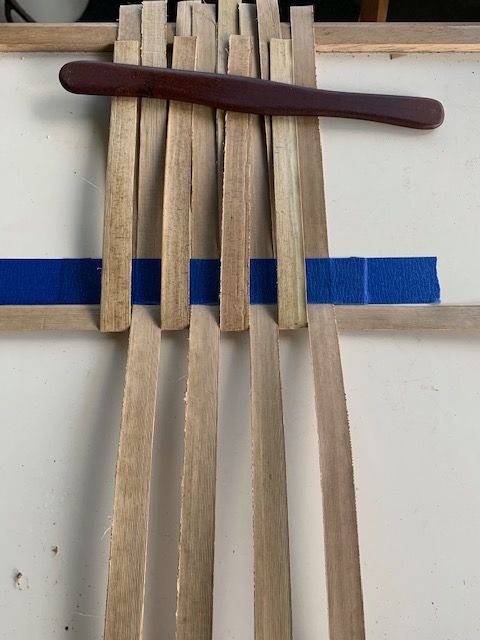
Take a 6″ long piece of painter’s tape, fold 1/2″ under each end with the sticky side up and put it on your working surface. Beginning ~1/2″ in from one end put 8 koana side-by-side with the fold of each piece lined up with the bottom edge of the tape. The shiny side of the koana should be facing down. The reason for this is that you are now going to moisten the koana with the spray bottle and the “not-shiny” side will allow water to enter more easily. Water will make the koana more flexible and less likely to break while you are bending it. The koana should be moist but not wet. If there are beads of water, spread them out.
Now take another piece of tape ~8″ long and place it over the 8 koana on top of the first piece of tape. At this point you have the 8 koana lined up with each other and also held firmly in place on the table. Lightly mist the lower sections of the 8 koana and wait a few minutes for the water to sink in. I usually cover the tape with something like the ruler so that it doesn’t soften when the koana are sprayed.
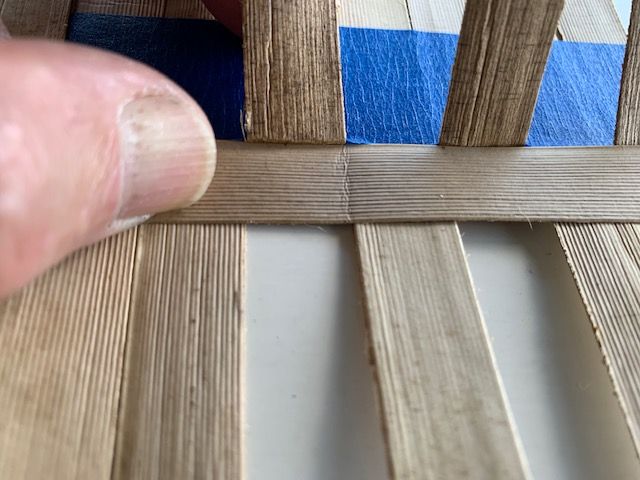
Now fold every other strip back at the bottom edge of the tape. Make each fold as sharp as possible. Lay the first horizontal koana across the first 8 with the middle of the strip halfway across, pressing against the edge fold.
Begin to bring the folded pieces back down starting from one side or the other. It is extremely important to lift each of the folded pieces up slightly before pressing the horizontal piece against it. You should see a slight gap when lifting up between the folded piece and the horizontal piece which disappears as you are putting the folded strip down.
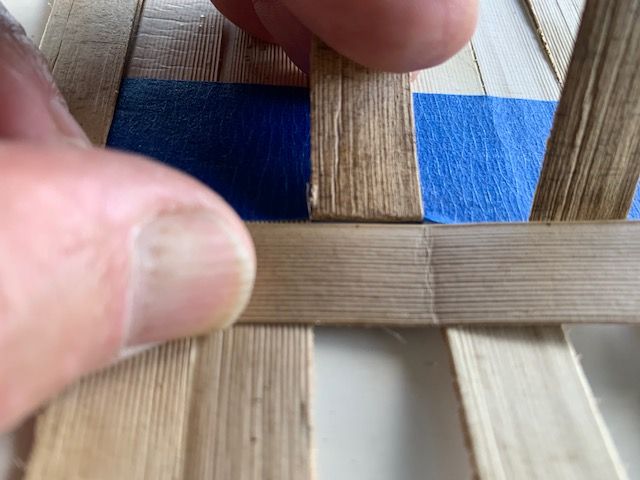 Figure 5. The vertical koana is lifted up for the horizontal koana to be pushed firmly against it.
As you put each folded piece down, fold the koana next to it back. when you are finished with the first row, you will again have 4 koana folded back and 4 lying down. It’s often convenient to use something to hold the folded back koana down.
Repeat the process three more times so that you have 4 horizontal koana.
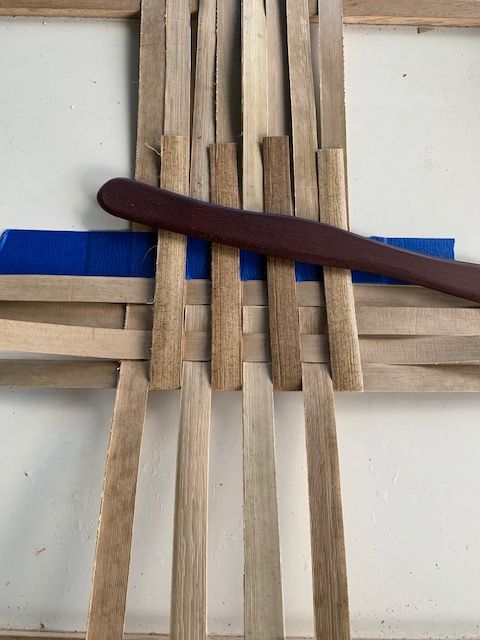
Now use the small hair pins to pin each corner. Notice how tight the weave is because we were careful to lift and push the top koana and then tightly fold the bottom koana as they were becoming the top ones.
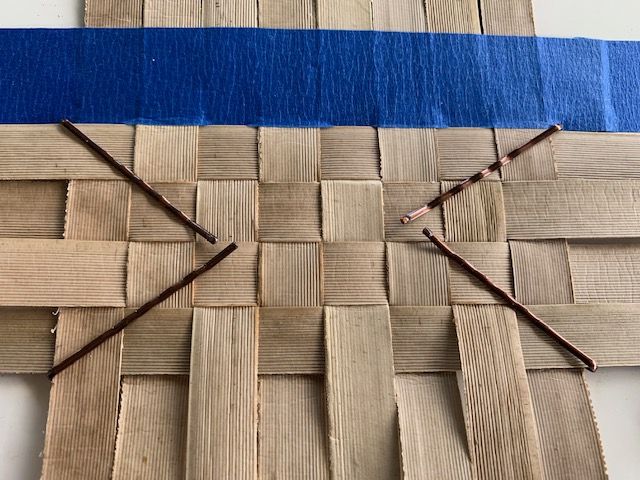
Remove the painter’s tape and add in the next four koana beginning where the painter’s tape edge was (also the location of the original fold in the middle of the koana). When you’ve finished, you will have a square with equal lengths of koana all around it. Move the clips so that they are now at all four corners.
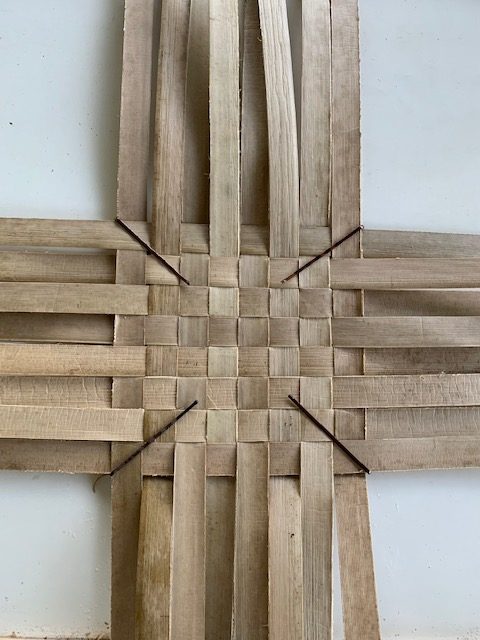
The second way of making the small trivet diverges from the first one at this point. We’re going to make a pocket rather than weaving directly into the front face.
Beginning the Weave on the Second Side of the Trivet
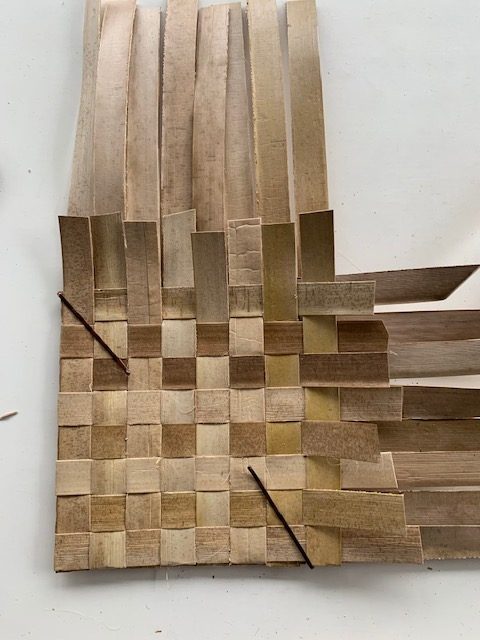
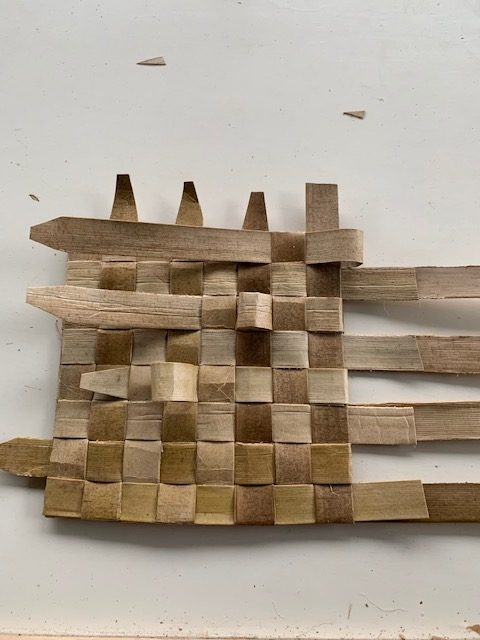
The image below shows the new beginning. We’re going to start in a corner and begin as though we’re making a new front using the left side and bottom koana.
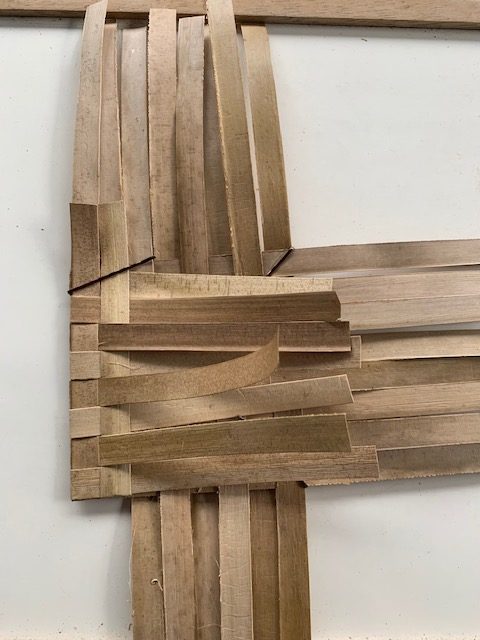
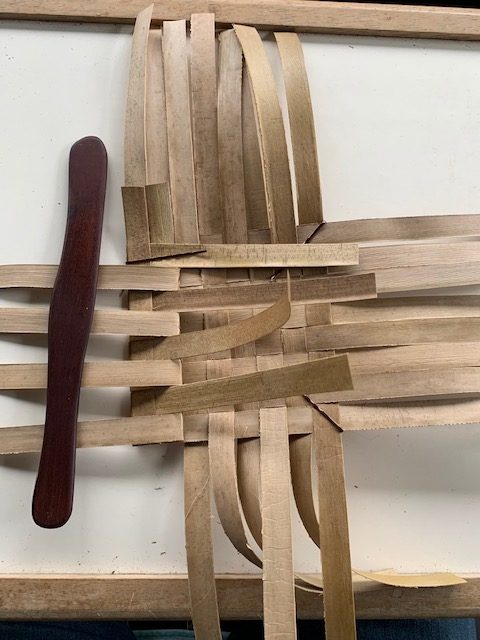
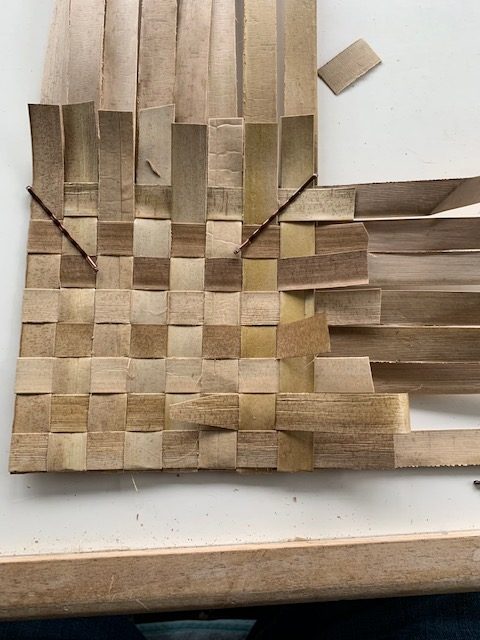
We have finished weaving from left to right. Now we need to weave from right to left to make the pocket. Carefully trim off the ends of the horizontal koana so that we can begin to weave in the other direction. The figure below shows the first strip being woven in. The end pieces haven’t been trimmed yet in this figure. As these pieces are woven in, remember to tighten the overall weave by gently but firmly tugging on each koana as it settles in to the weave.
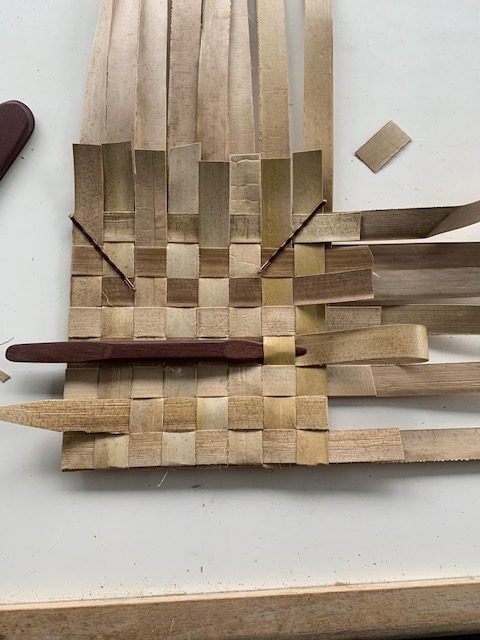
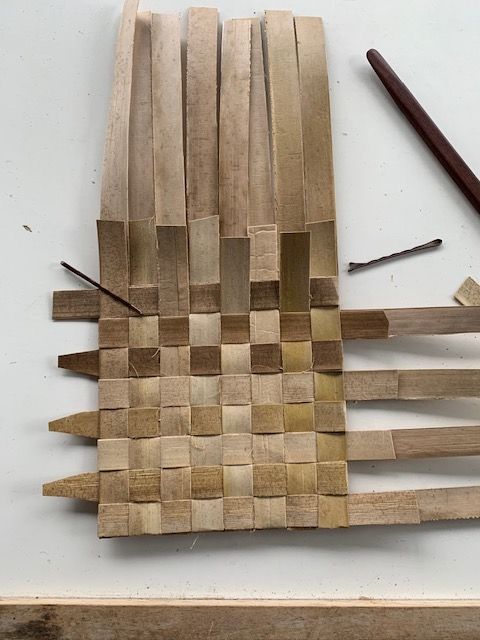
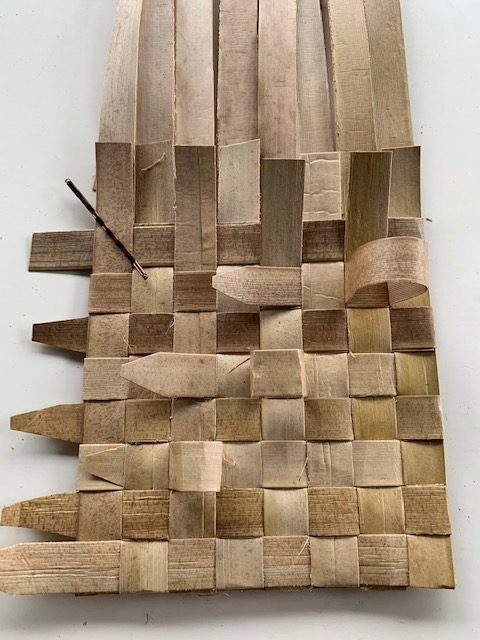
When the next set of right to left koana are woven in after trimming the left to right koana to size, they must first go underneath the vertical koana on the right edge as shown in the figure below.
Adding the Insulation and Closing the Pocket
At this point, we have closed three of the four sides and made a pocket. Now is the time to add an extra layer of insulation such as a piece of cardboard inside, cut to fit the pocket. Doing this will also close up the edges of the trivet. It’s easier to do this if the trivet is larger. OK, on to closing up the pocket.

We’re now finished after all the trimming off of loose ends is done. Here is a picture of the back.
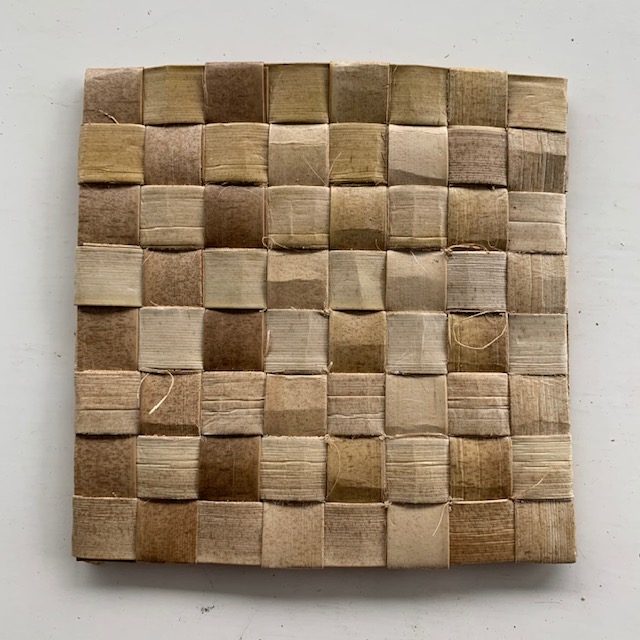

The back does look a little lumpy but this can be fixed. Take a steam iron and making sure that there’s enough water in it, put it to the cotton setting. Wait a few minutes and then gently but firmly press the back side of the trivet several times. In nearly all cases, the wrinkles will disappear.
I enjoy writing these pages and hope that they are interesting and useful to the reader. I’ve stopped weaving/building at this time and still need to generate some income in order to continue to expand this website with more useful articles. If this page was helpful to you and you would like to make a $10.00 donation in order to have more pages like it, please use the donation button below. Thank you.