Introduction
Iʻve noticed that some experienced weavers who have mostly used maka ʻoʻeno in a hat finish the edge of the brim (hiʻi) using maka moena (check). What follows is my approach for changing maka ʻoʻeno to maka moena. During this process, experienced weavers can also finish the edge of the brim; we are only going to suggest a way to do the transition process.
In the first transition (going from maka moena (check) to maka ʻoʻeno (horizontal two ply twill), we followed Jim Skibbyʻs approach for making a practice board (Chapter 3). This approach uses lauhala koana/mauʻu instead of plastic strips as I had done elsewhere. I do recommend using Jimʻs approach and find that the lauhala is surprisingly durable with respect to repeated folding and unfolding. I taped my lauhala strips to an old plastic cutting board.
After making the board, Jim then showed how to begin making the maka ʻoʻeno (horizontal two ply twill) pattern. After that exercise, the following one should be pretty easy.
Begin Weaving Texture Change from maka ʻoʻeno ( horizontal twill ) to maka moena ( check )
Weʻll continue using the moe, ku and ulana terminology in Jim Skibbyʻs book. These are common terms used by weavers and are defined HERE.
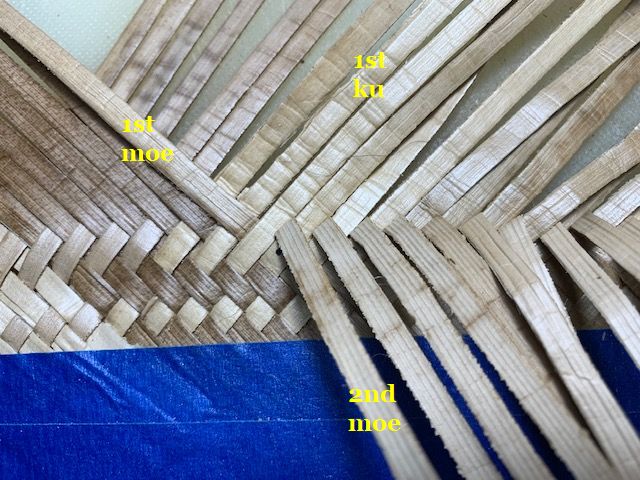 Figure 1. We begin.
Figure 1 shows the beginning of the process. Weʻve labeled the beginning ku and several moe.
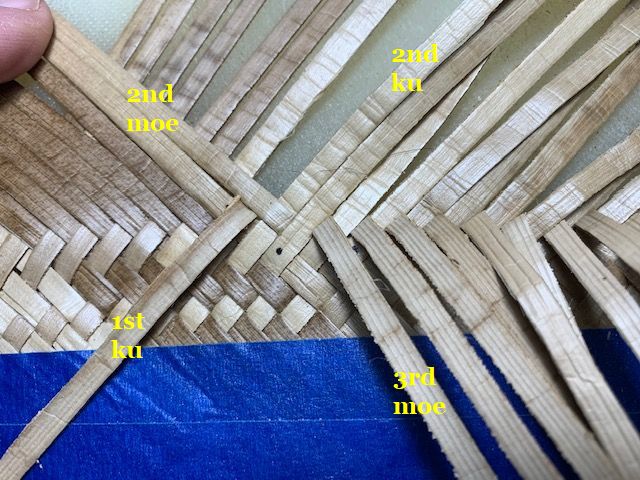 Figure 2.
Figure 2 shows the first ku folded down over the first moe and the second moe folded down after that.
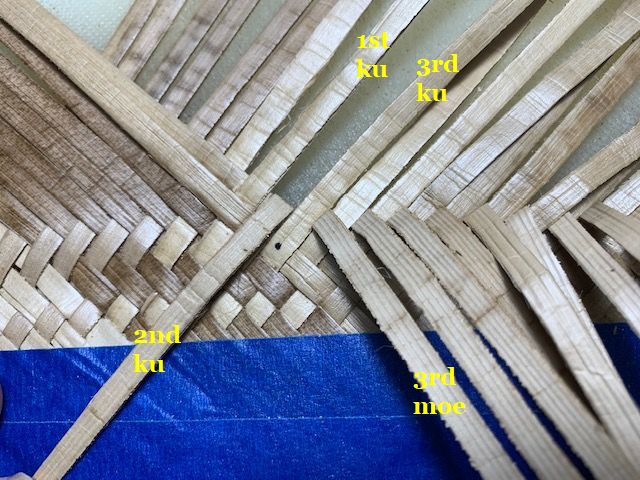 Figure 3.
Figure 3 shows the ulana of the first ku folded up and the second ku folded down over the second moe. After that weʻre ready for the third moe to be folded down.
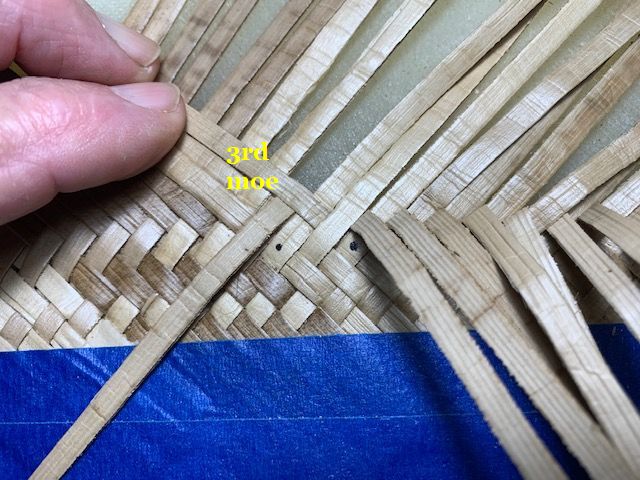 Figure 4.
Figure 4 shows the third moe folded down. Time to ulana.
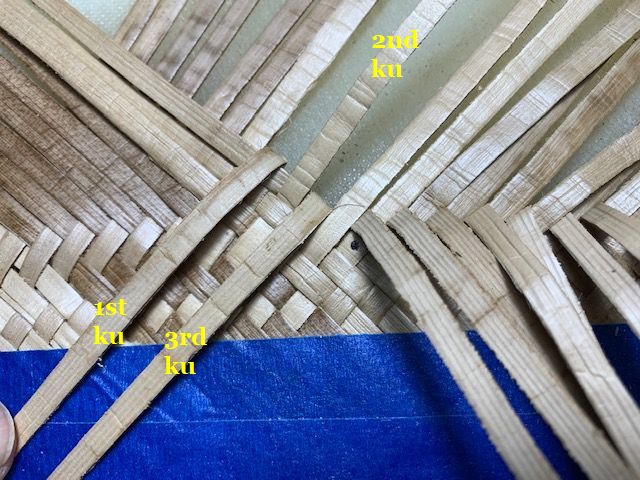 Figure 5.
Figure 5 shows the ulana with the first and third ku folded down and the second ku folded up. Time to moe.
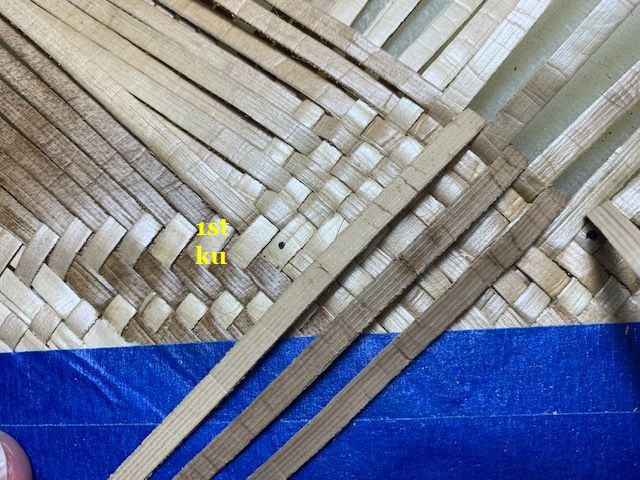 Figure 6.
Continue the process of moe then ulana until you have reached the width of maka moena that you wish. In Figure 6 the maka moena are three maka deep depending on whether you begin with the tip of the end of the maka ʻoʻeno koana or the face.
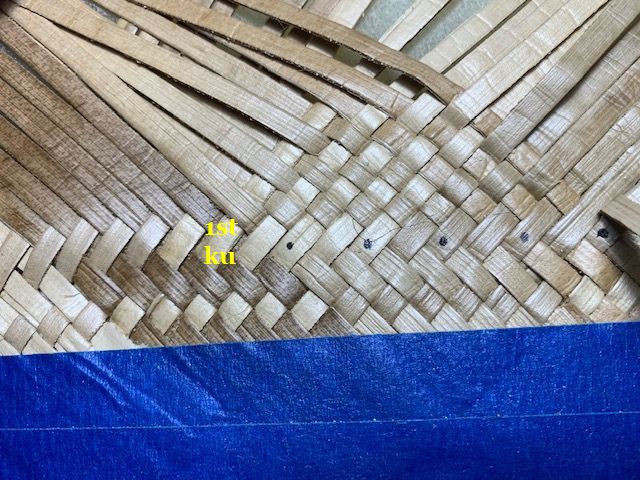 Figure 7.
In Figure 7 we have folded all the ku back so that you can see both the beginning ku and the result of carrying on for 8-9 moe additions.
I enjoy writing these pages and hope that they are interesting and useful to the reader. I’ve stopped weaving/building at this time and still need to generate some income in order to continue to expand this website with more useful articles. If this page was helpful to you and you would like to make a $10.00 donation in order to have more pages like it, please use the donation button below. Thank you.