Introduction
About 40 years ago when my wife Helen and I were learning to weave lauhala, her Aunt Rosie came to visit. Auntie was very good at lauhala weaving, feather lei making and other Hawaiian crafts.
When she saw what we were doing she asked to see if she could show us something. Fortunately we had a hala tree in the back yard and auntie chose several leaves, split them to size with her thumbnail, borrowed a small drinking glass and in about 10-15 minutes made two small sleeves for the glass. See Figures 1 and 2.
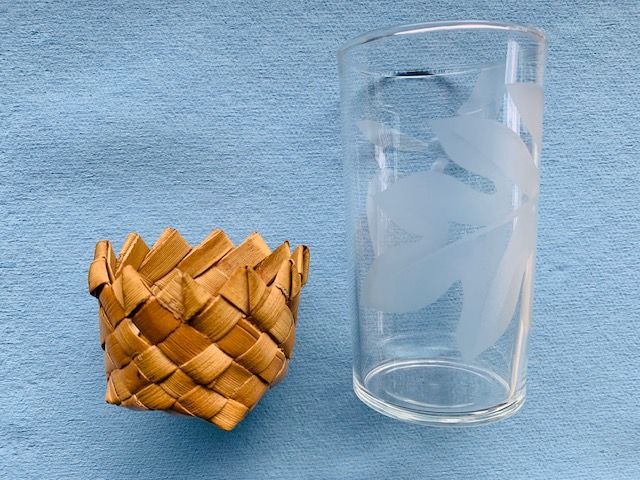
Figure 1. Showing Auntie Rosie’s lauhala sleeve and
a glass of the size comparable to the one she used as a model.
|
|
|
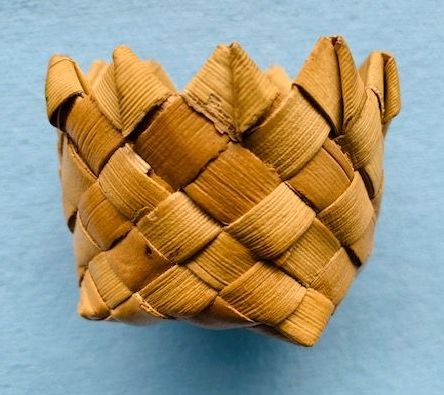 Figure 2a. Side view of the glass sleeve
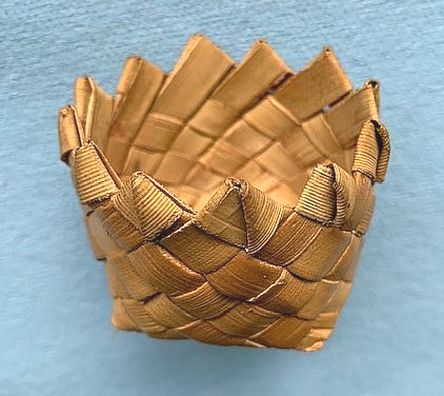 Figure 2b. Angled view of the glass sleeve
I think this is a great project because we’ve already made a small basket. The drinking glass sleeve is just a small box made to fit a drinking glass. It’s also an interesting project because she also showed us how to make a nihoniho edge with a different “twist”. In this case the koana in both directions are woven on the outside of the sleeve instead of the inside.
Materials Needed
Auntie Rosie made the koana about 3/8″ wide. This may seem a little large but let’s try it for our first one. We can always make the koana more narrow later on when we feel more comfortable with the process.
But how long should the koana be and how many to cut for the glass we are choosing?
To obtain the number of koana needed we first we measure the width of the bottom of the glass and then divide that number by the width of the koana. In this case, the bottom with is 2 1/8″. Let’s use decimal notation for measurements. So the koana width is about 0.38″ and the glass width is about 2.13″. Glass width / koana width = 2.13 / 0.38 = 5.6. Let’s round up the 5.6 to 6 even and have that be the number of koana across the bottom of the glass in both directions. So we’ll have six in one direction and another six at right angles for a total of 12 koana.
To obtain the length of the twelve koana, we again use the distance across the bottom of the glass along with a couple of other measurements. For this first try, let’s also make the sleeve about 2″ high. Looking at Figures 1 and 2 we can see that because the koana are running diagonally around the glass, that they will need to be longer than the two inch height. In fact they will be a little less than 1.5 times as long as the height. We’ll also need some extra length for doing the finishing up, perhaps another three inches or so.
Let’s write things out: glass width + (1.5 x glass height one side) + (1.5 x glass height the other side) + extra length one side + extra length other side =
2 1/8″ + (1.5 x 2) + (1.5 x 2) + 3 + 3 = about 14″
In summary, we’ll need 12 koana 3/8″ wide and 14″ long to make a sleeve about 2″ high for the glass we’re choosing.
I know that this is a little long to do things but if we follow the logic above, we can make a sleeve for any sized glass or thermos or whatever.
Making the Sleeve Base
Similarly to what we have done before, we now make a rectangle that will be six koana by six koana.
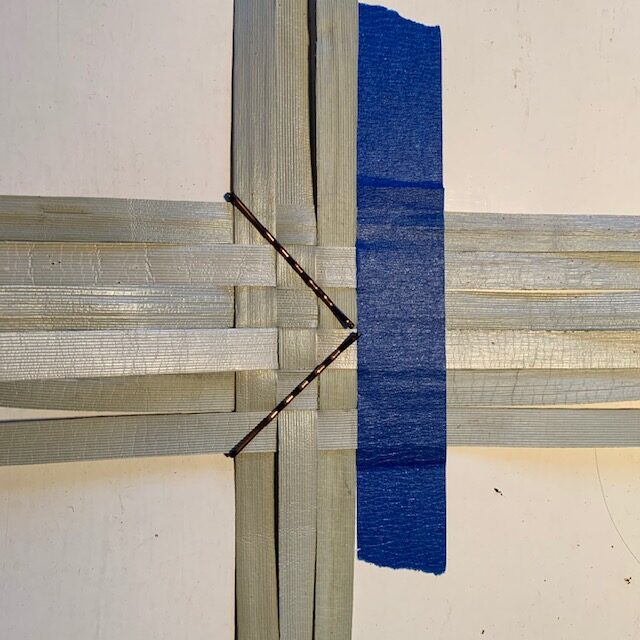 Figure 3. Half of the koana have been woven into place.
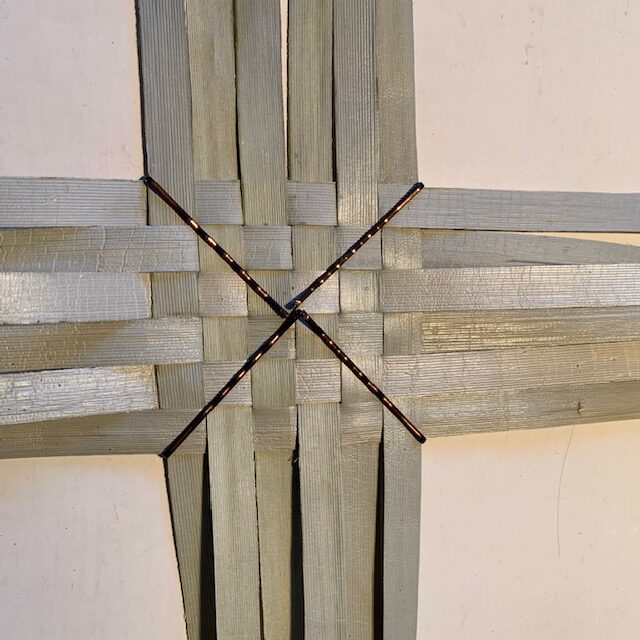 Figure 4. The remaining koana have been woven into place and pinned.
Turning up the Sides
Referring back to the project where we made a small basket, we now follow similar steps (described in the figures) for turning up the sides of the drinking glass sleeve.
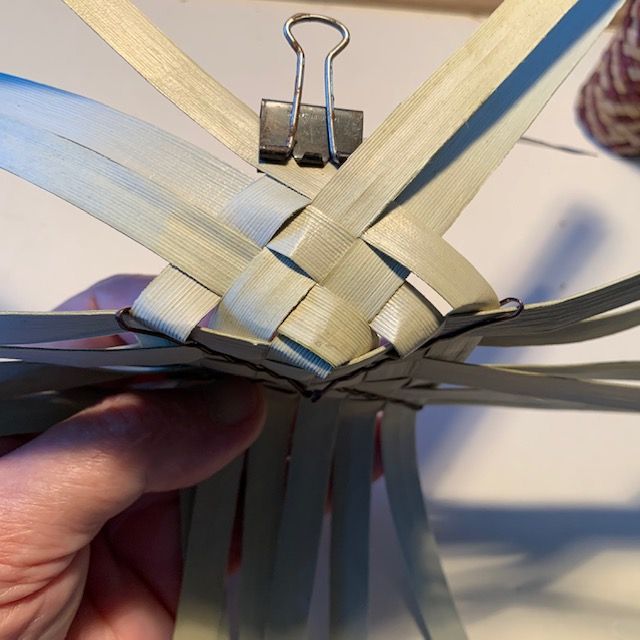 Figure 5. Like making a small basket, we’re now beginning in the middle of an edge,
weaving up and holding in place. A large paper clip might do as well as the binder clip.
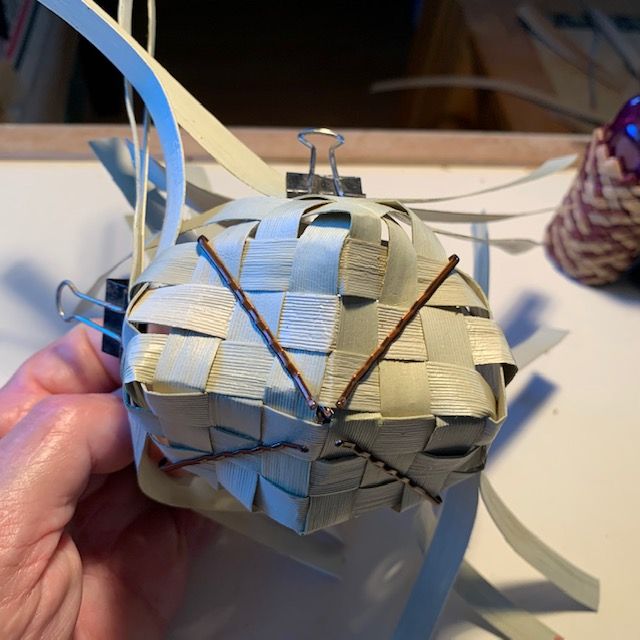 Figure 6. We’re now moving around from edge to edge and weaving up about the same distance.
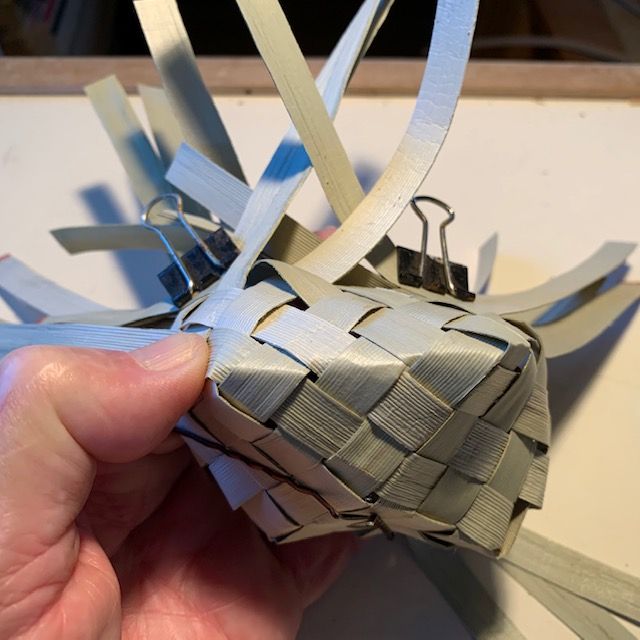 Figure 7. Now is a good time to crease the bottom, going from corner to corner.
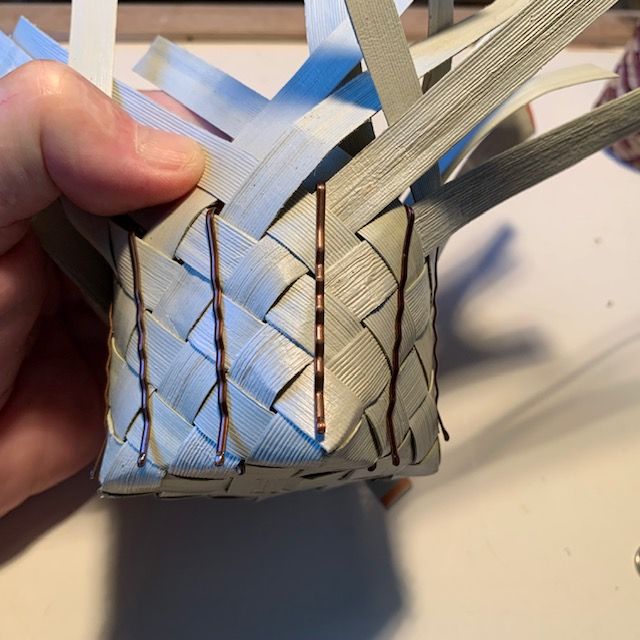 Figure 8. I use a lot of the small bobby pins to hold things temporarily in place.
The weave is loose but we’ll go through several tightening steps as we go along.
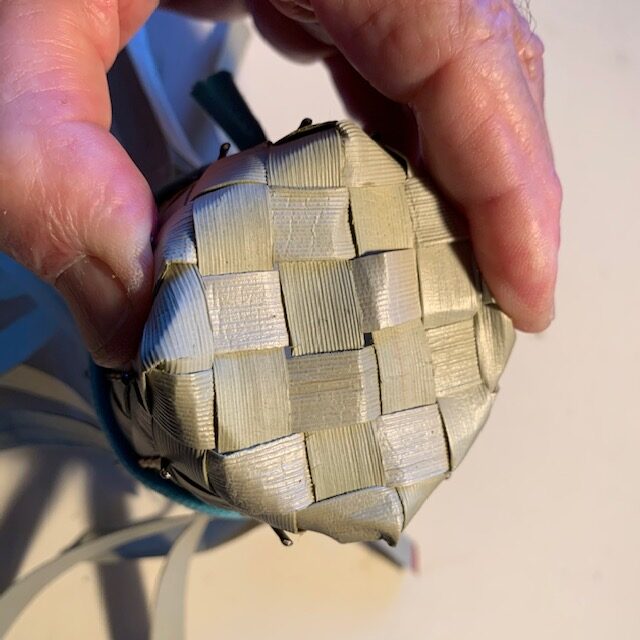 Figure 9. We need to work on the bottom weave which
has become loose during weaving. Pinch across the bottom
and pull the loose koana to remove the kink. Do in both
directions until the weave is tight.
Starting and Finishing the Opihi Nihoniho Edge
We’re now at the point where the sides are all up and somewhat tight. When we do the edge we’ll have the chance to really firm things up. What follows are several steps which seem counter intuitive until the actual weaving process begins. Figure 10 below shows an inside koana skipping over what would seem to be a proper weave. But that step is necessary later on when we weave in the opposing koana.
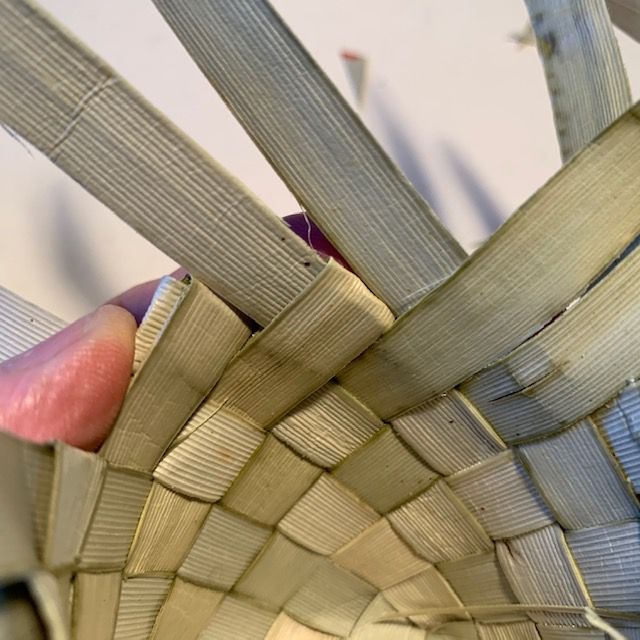 Figure 10. Two inside koana are shown skipping a
normal weave and folding over an opposing koana.
 Figure 11. Now we’re on the outside of the sleeve showing the folded koana
beginning its first outside weave. As you weave, you must pull the koana
to firm up the rest of the side and fold sharply over the opposing koana.
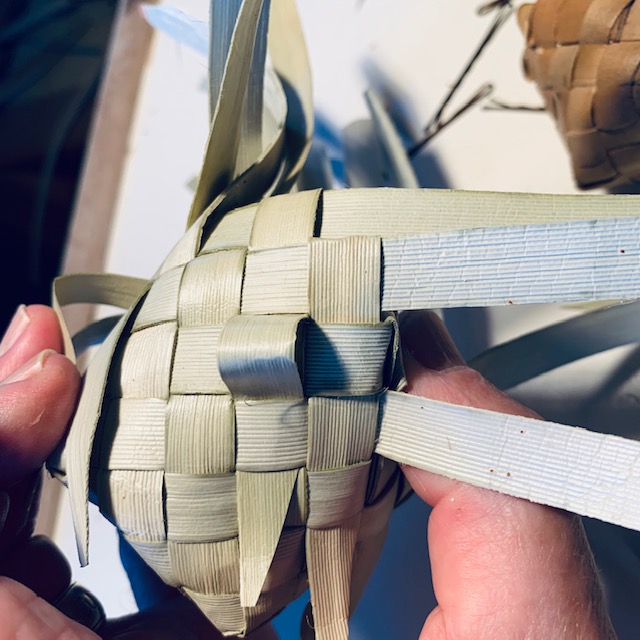 Figure 12. The koana on the right has been woven
and the one on the left is just finishing up.
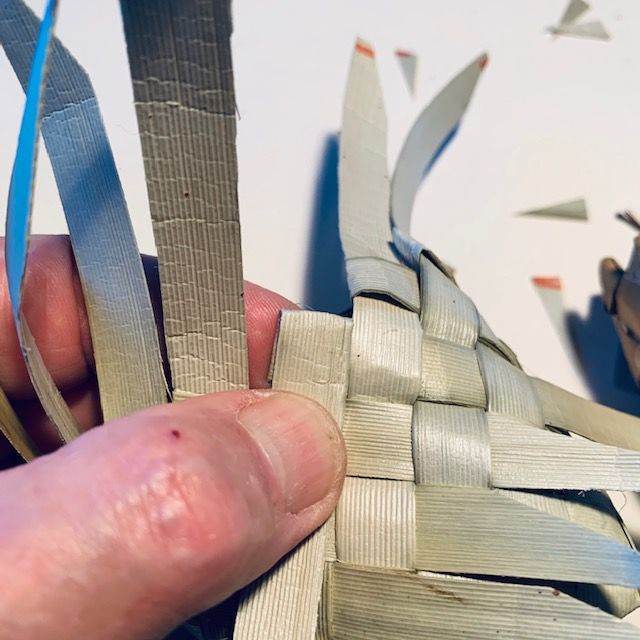 Figure 13. Now for the opposing koana under my thumb.
Again, pull firmly to firm up the weave and make a fold.
 Figure 14. Now fold the koana under to make the “opihi”.
 Figure 15. Then weave under the opposing koana just below the opihi.
 Figure 16. Continue weaving under the next opposing koana.
You will now have two koana woven under the same opposing koana.
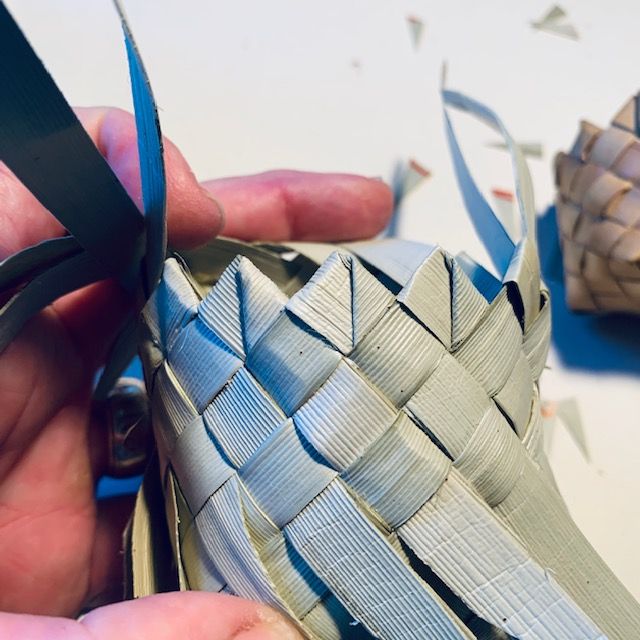 Figure 17. Moving around the edge.
Cleaning up the Excess Koana Ends
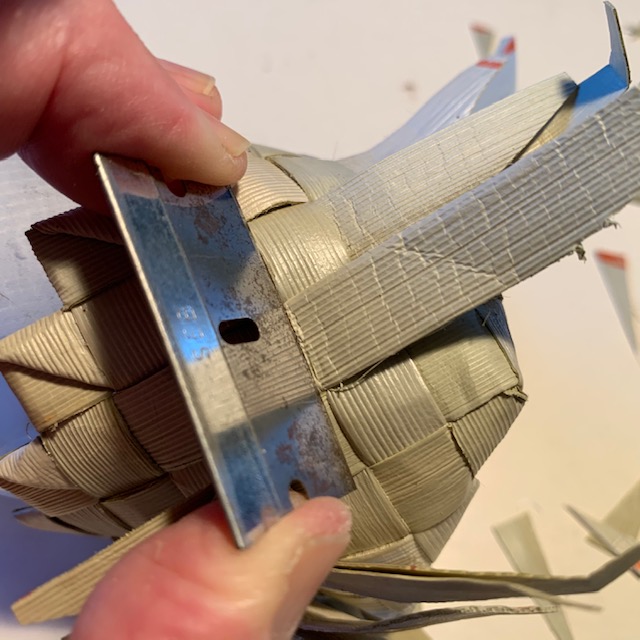 Figure 18. As we have done before, we press a single-edged razor blade
against the edge of the koana and pull the opposing koana across the blade edge.
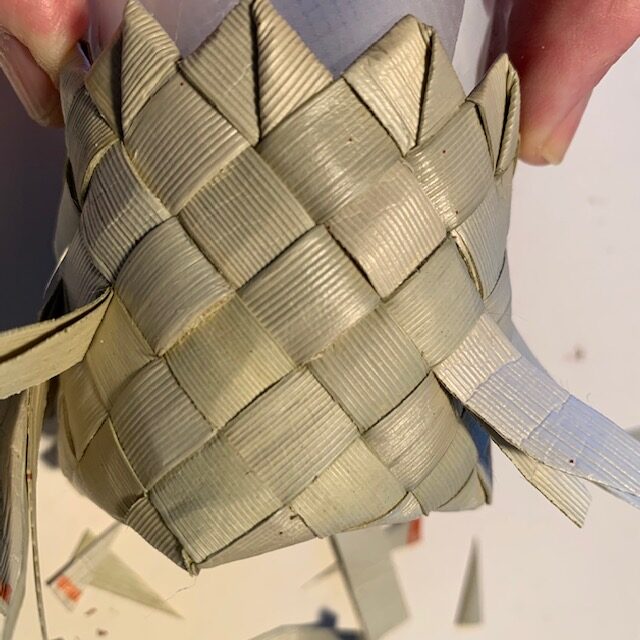 Figure 19. Showing a couple of the trimmed edges.
The Finished Product, Ready for an Adult Beverage
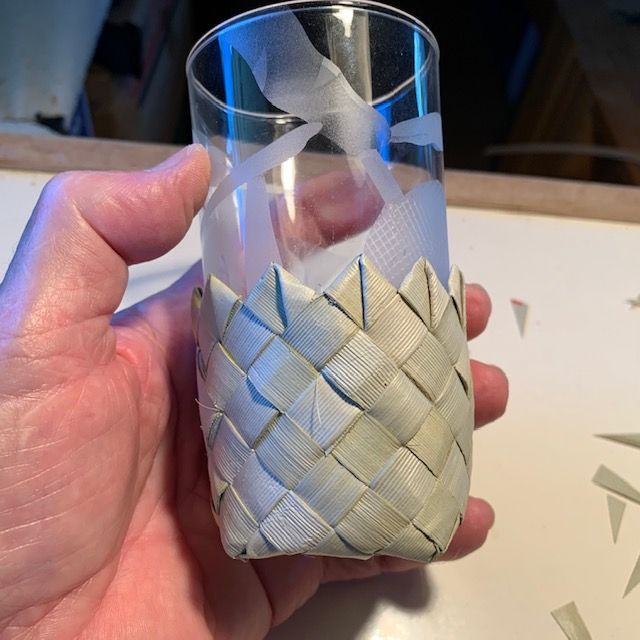 Figure 20. The finished product. We hope Auntie Rosie would be proud.