Introduction
There are many ways to weave a pāpale pāʻole or garden hat and this is just one. Comparing with other weavers, you will surely find that some steps are quite different, yet the final article works and will please the new owner. Examples of these types of hats can be found here , and here , and here . Below is an early one of mine.
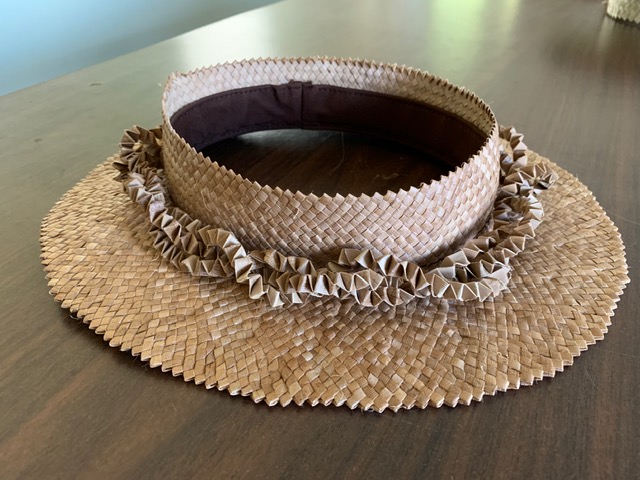 Figure 1. First pāpale pāʻole or garden hat made by the author
There are many steps in making this sort of hat. I intend to go through each step only for making the crown because I have already gone through the steps involving putting in the string and making the brim. I hope the approach below will provide enough information so that someone who has had at least basic weaving skills can complete this project.
Choosing and Sizing Materials
Although you could weave this project with any sort of lauhala, given the amount of work involved it makes sense to use the at least good quality material. By that I mean that the lauhala koana should be free from obvious defects, mildew marks on the underneath of the leaf and so forth. During the softening process, leaves which are brittle and delaminate during the softening must be discarded. Some weavers choose to have the koana be a single color and others like a variety of colors. Weaverʻs choice.
If this is your first hat, I suggest that you begin with 1/4″ wide koana. The project will go a little faster and the end result will still be good. I will be using 1/8″ for this exercise because I’m going to add love knots as an embellishment. Since the crown height will be 2″, 1/4″ koana would be too large to fit in the love knots and still have room for the hat band below, IMHO. But if you decide to exclude love knots for your first hat, 1/4″ koana would be just fine.
Choosing an Ipu or hat mold
You will also need to know what size the hat will be so that you can either buy or make your ipu or hat mold. The simplest way to do this is to take a tape measure and measure the circumference of the personʻs head above their ears. The tape should be firm but not tight when making the measurement. Then add another 1/2″ to the measurement because itʻs better to have the hat be a little loose than too tight. The measurement Iʻll use for this exercise will be 21 1/2″. This will be the size for the ipu.
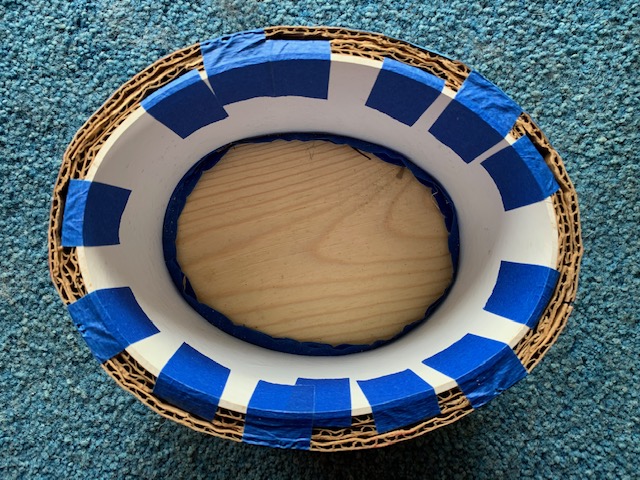 Figure 2. Shows the underside of the ipu
Figure 2 shows the underside of the ipu. Partially flattened corrugated cardboard has been added until the circumference of the hat reached 22 1/2″. The shape of the ipu has also been changed from a circle to an ellipse as described earlier.
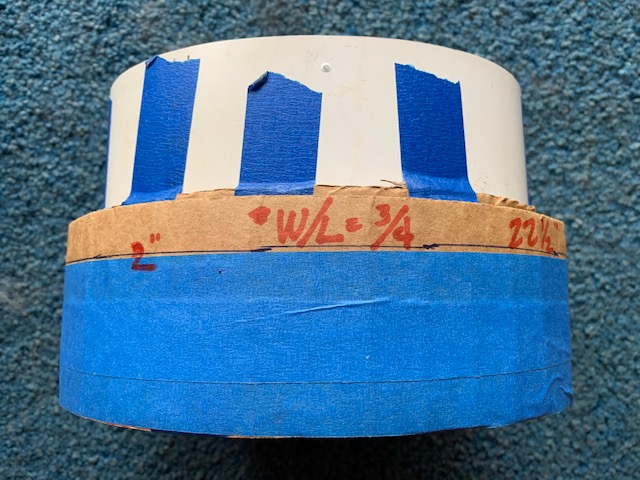 Figure 3. Side view of the ipu
Figure 3 shows a side view of the ipu. A line 2″ from the bottom edge has been marked by the upper edge of the blue tape to act as a reference for the crown height.
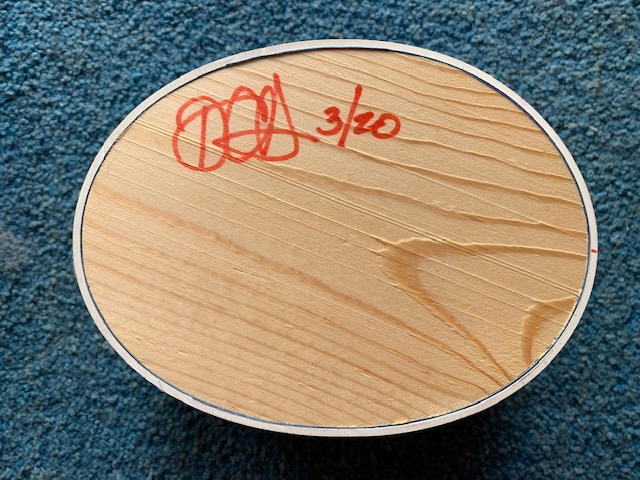 Figure 4. Ipu top
Figure 4 shows the top of the ipu with a wooden insert. The insert helped to hold the shape of the ipu after it had been heated and was soft. Small finishing nails hold the wooden insert in place.
Choosing Koana Width and Amounts
Letʻs first calculate about how many koana will be needed to make the sides.
We will be weaving a simple check weave or maka moena, for this hat. The koana will be at a 45 degree angle when we are weaving so the squares of the check weave will have their corners at the top, bottom and sides. The distance from one corner to an opposite corner of a 1/8″ square is 0.19″. To estimate the number of koana needed we divide the hat size ( 21.5″ ) by 0.19 and get about 113. Weʻll probably use less than this number because the koana wonʻt fit perfectly against one another. In any case double this number so that you will have enough for the brim as well. I usually make another 10-20% because what I thought would be all good koana rarely are. So weʻll need about 300 koana to start out with. If you use 1/4″ koana, youʻll need about half that number or about 150 koana.
Now we need to calculate how long the koana should be. For this we need to know how high the sides will be and how wide the brim will be. For this exercise, the sides will be 2″ and the brim will be 4″. The straight line distance is from the top of the crown to the edge of the brim is 6″. But the weave will be going diagonally down the crown and brim of the hat at an angle of about 45 degrees. So the approximate diagonal distance from the top of the sides to the edge of the brim is 6″ x 1.4 = about 8.4″. When you are weaving, the koana will be folded in the middle to make a niho (tooth) which will be the top edge of the hat. So the distance from the middle fold to the edge of the brim must be at least 8.4″ in this case. And youʻll need 4″ extra on each end to fold in when you come the edge of the brim. Adding that all together we get an approximate length of ( 8.4″ + 8.4″ + 4″ + 4″ ) = 25″. The koana can be longer but shouldnʻt be much shorter. I usually use an iwilei distance which is the length of a koana from my chin to the end of the fingers of my outstretched arm.
Step 1 – Beginning the Crown
Unsurprisingly there are many ways to begin the crown of the pa’ole hat. Some folks weave the crown free handed until theyʻre ready to join the ends together. I begin with tying a length of waxed garden string around the ipu. I do this because itʻs much easier to keep the koana in place while Iʻm weaving. The string should have just a very little give to it when you are finished. I like waxed garden twine because the knot holds well when pulled tightly and the koana donʻt tend to slip sideways as much either.
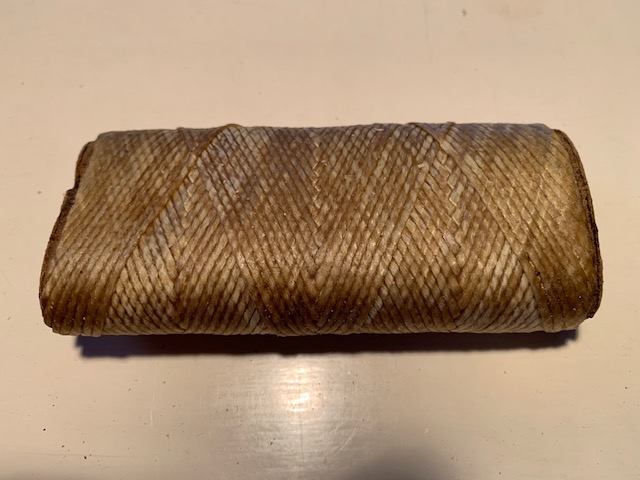 Figure 5. Waxed garden string or twine.
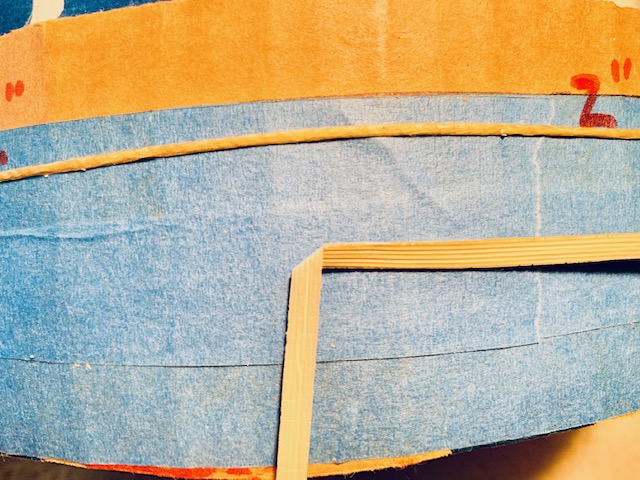 Figure 6. The first fold
Begin by taking a koana, gently soften and moisten it and find the mid-point. At the mid-point fold the upper side under itself the mid-point making a 90 degree angle. The vertical portion will show the upper side and the horizontal portion will show the underside. See Figure 6.
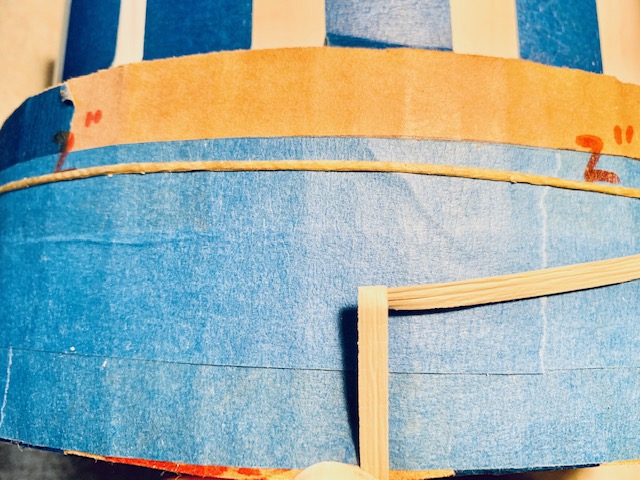 Figure 7. The second fold is complete and both good side are facing up
Now take the horizontal part and fold it back and under itself. Now both upper sides are facing up and another right angle is formed. When we tilt this to a 45 degree angle, a niho (tooth) with both halves with the good side up appears. See Figure 7.
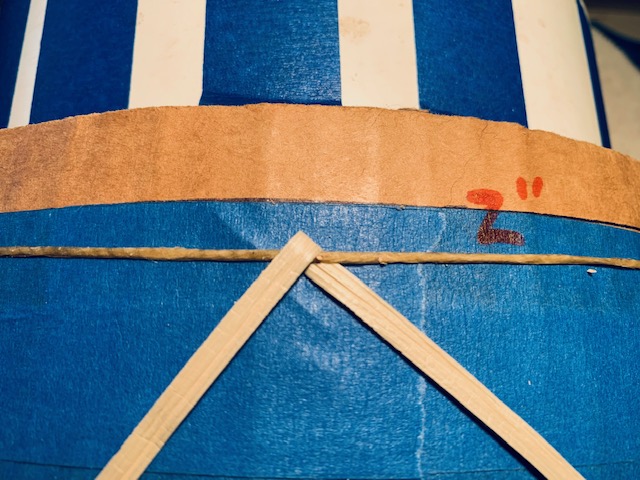 Figure 8. The lower koana is tucked under the twine
Now tuck the right hand half under the string and firmly place it against the string. The two halves should be pointing downward with each half at a ~45 degree angle to the string. See Figure 8.
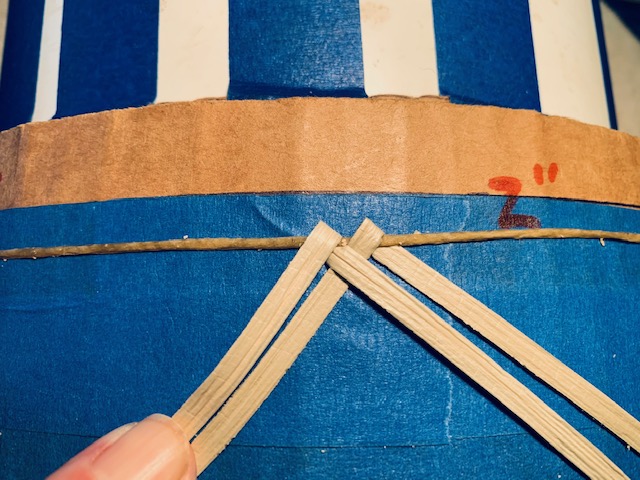 Figure 9. Two koana side by side
Repeat the process so that you have two koana side by side. See Figure 9.
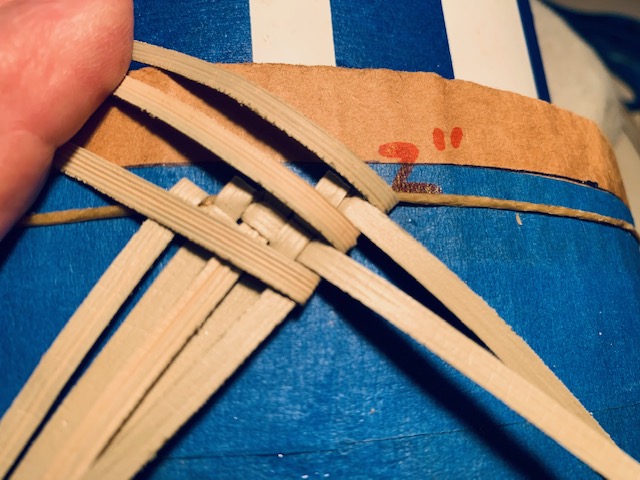 Figure 10. A weaving pattern of 3 down left and 2 down right.
We continue to add koana and weave in until we reach the depth of the first stopping point. Some folks will weave for a depth of an inch or so and then go all the way around the crown, join up to the starting point, and then finish adding another inch or so to obtain the final depth of the crown. In this case, Iʻm only going down a little over half an inch because Iʻm going to add the love knots. When Iʻm weaving I try to look for a pattern to repeat. The pattern above is that there are three koana folded down to the left and two koana folded down to the right when I have finished adding in a koana. If you were going to have a greater depth for the first set of weavings, your pattern would be different.
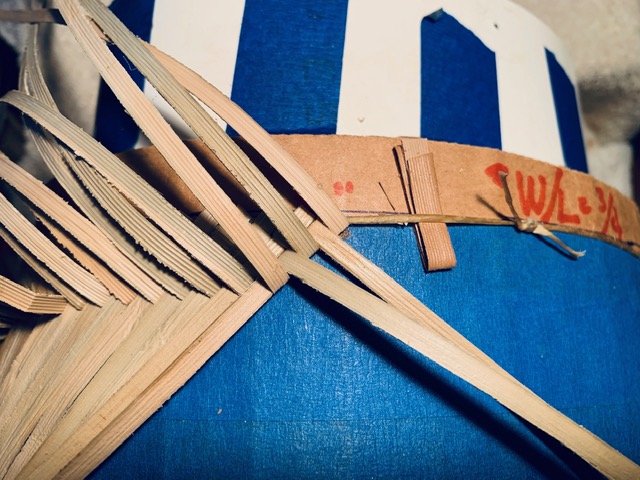 Figure 11. A little piece of koana folded over several times and put under the twine.
If the twine is a little too tight to put the koana easily underneath, a little spacer ( Figure 11 ) under the twine makes the process easier.
At this point, Iʻm going to use the weaving pattern in Figure 10 and continue around the rest of the hat. When I reach the beginning, weʻll look at how to join the two edges.
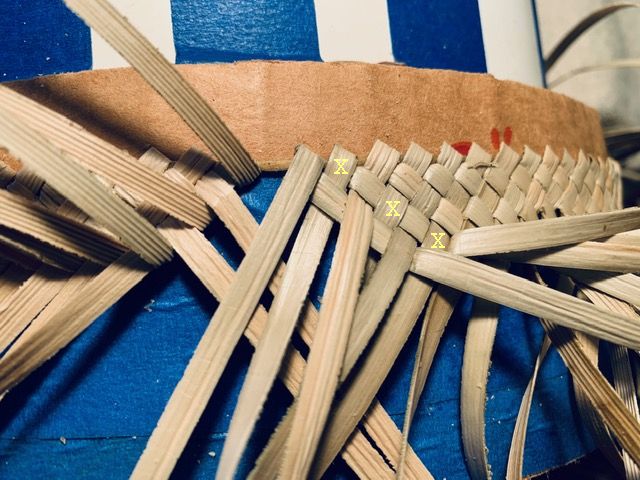 Figure 12. Ready to add the last koana
Figure 12 shows the point at which weʻre ready to add the last koana. Up to this point weʻve been weaving from left to right. In closing the circle, weʻll weave from right to left. The koana marked “X” will be folded back so that the last strip to be added can be woven in.
Iʻd like to point out at this point that joining the two edges together is easier to actually do than to describe how to do it. Up to this point youʻve been weaving in one direction; now you just need to weave in the opposite direction to join up the two edges. Keeping this in mind, letʻs begin.
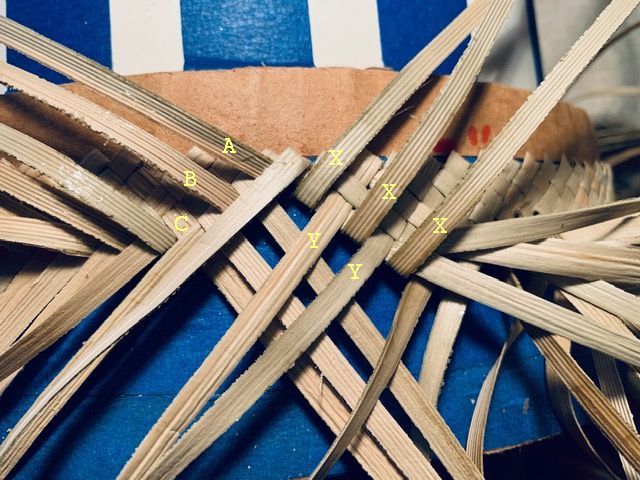 Figure 13. Beginning the closing weaving process
Figure 13 shows the beginning of the process. The “Xʻs” in Figure 12 have been folded back, the “Yʻs” are folded down and “A” the lower part of the last koana is ready to be folded down across the two “Yʻs”. When you have done that, itʻs only necessary to continue the normal weaving process from right to left as shown in the figures below.
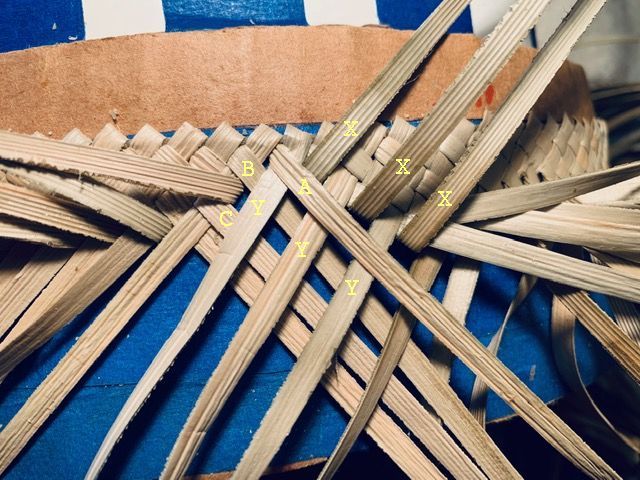 Figure 14. “A” folded down
Now the “Xʻs” need to be folded down and the “Yʻs” folded up. “B” will need to be moved so that it rests on the folded down “Xʻs” before the next folding occurs.
 Figure 15. “B” ready to be brought from below and woven in
 Figure 16. The next set of folds completed
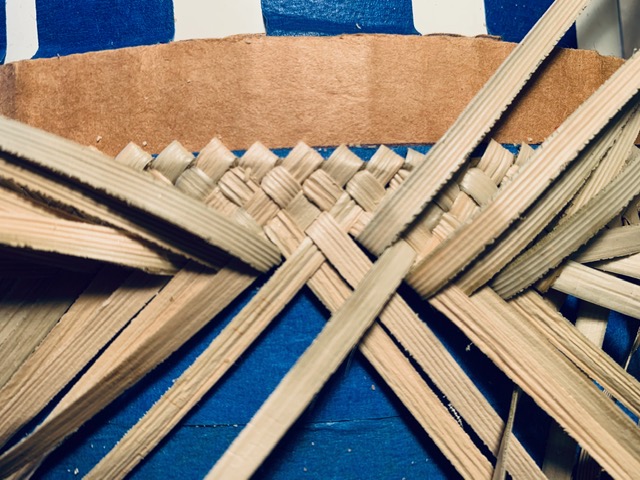 Figure 17. The last weaving ready to begin
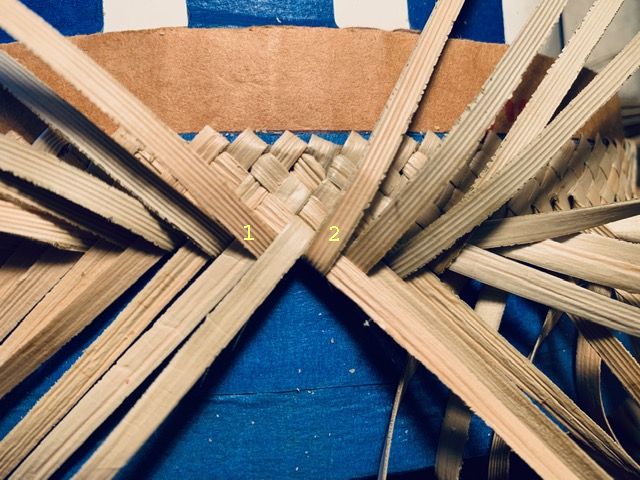 Figure 18. Joining the two edges done
Figure 19. Now “1” and “2” are folded to the length of the next additions and filled in to the right.
In Figure 19, “1” and “2” are woven back and forth and then filled in to the right until a pattern similar to Figure 10 is achieved. At that point you can continue weaving to the right until you have reached the beginning again. The usual height of a pāpale pāʻole is 1 1/2 to 2″ in my experience. So depending on how high you want the sides, you may need to put in another set of rows.
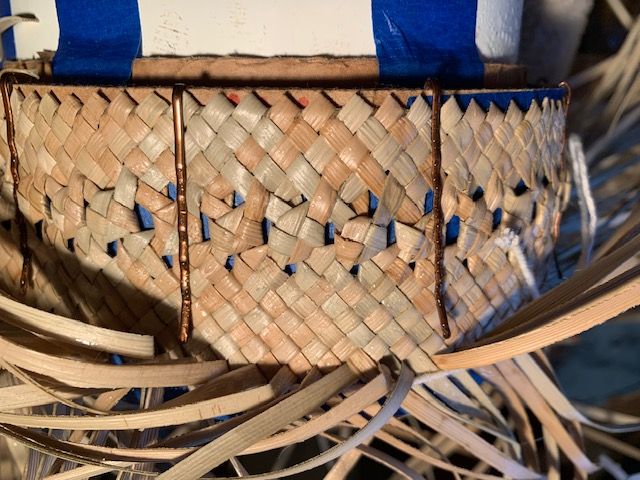 Figure 20. Finished sides for the love knot hat
Figure 20 shows the finished sides for my first love knot hat. The lower section of maka moena is wider than the upper one because Iʻll be putting a woven hat band there. The string has been inserted between the two sets of opposing koana and is ready to be woven in as described here.