Introduction
I couldnʻt find any written description on how to do this, so the following is my approach using trial and error. Another item for discussion with your kumu ulana…
In the first weave change (going from maka moena (check) to maka ʻoʻeno (vertical two ply twill), we followed Jim Skibbyʻs approach for making a practice board (Chapter 3). This approach uses lauhala koana/mauʻu instead of plastic strips as I had done elsewhere. I do recommend using Jimʻs approach and find that the lauhala is surprisingly durable with respect to repeated folding and unfolding. I taped my lauhala strips to an old plastic cutting board to keep them from moving around.
Once again, we will divide the instructions into two parts – first, fixing the height of the weave; second, weaving across to the right.
Stage One – Fixing the Height of the Weave
The following figures will look a little busy with all the labeling. It is my intent to give the reader a sense of clarity and progress which will allow ease of weaving after some amount of practice. The moe koana go from lower right to upper left; the ku koana go from low
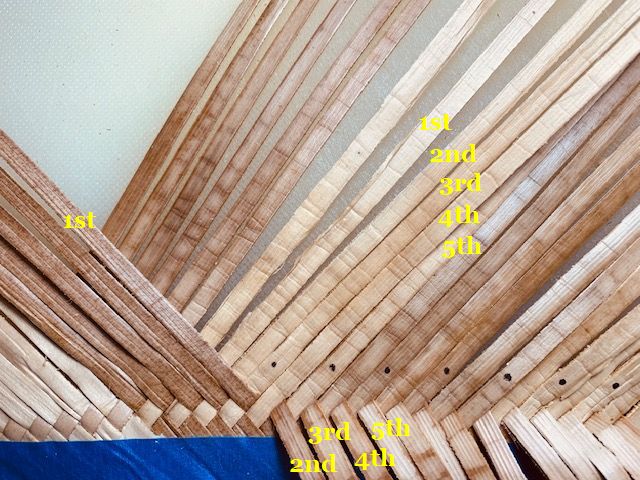 Figure 1.
Figure 1 shows the starting point of the process. The 1st moe is in place but no other koana have been moved.
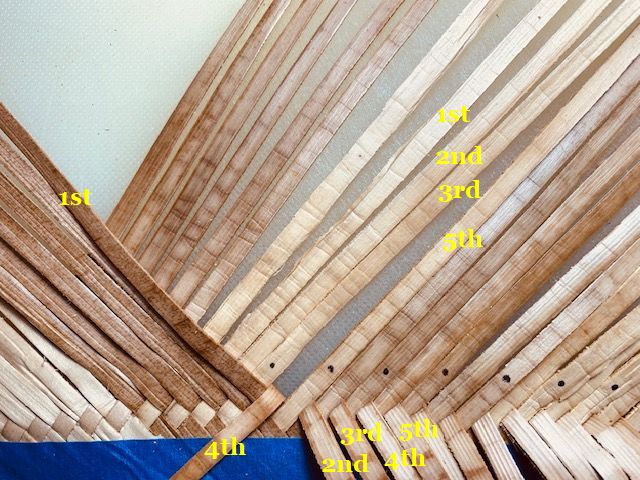 Figure 2.
Figure 2 shows the 4th koana pelu (folded) down. The reader may wonder why the 4th is folded first. In the first stage, weʻll be working from right to left for the ku, so it does make a little sense.
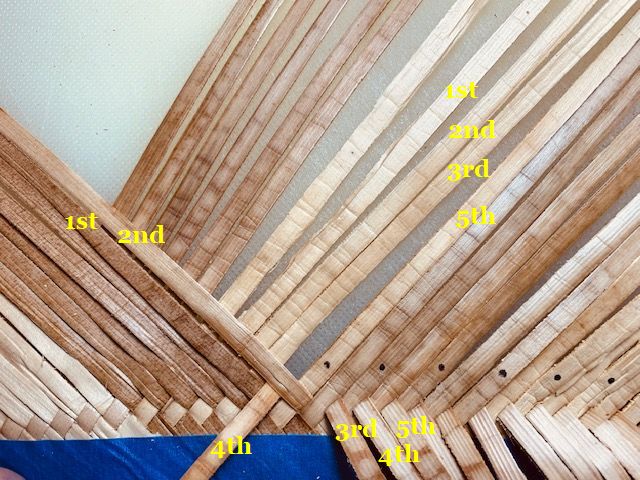 Figure 3.
Figure 3 shows the 2nd moe pelu down across the 5th through 1st ku.
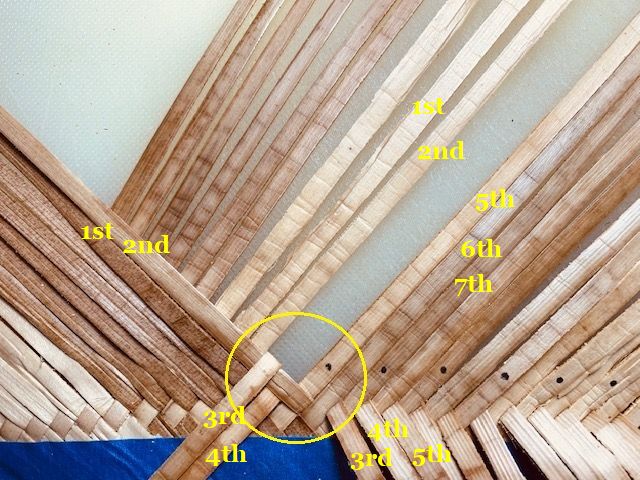 Figure 4.
Figure 4 shows the result of folding the 4th ku up and then the 3rd and 4th ku down. The circle shows the basic vertical twill pattern of “two up, two down” but unlike the horizontal twill, the third ku is higher than the 4th ku. Jim Skibby calls a basic “two up, two down” a maka. Weʻll continue to ulana until we have two of these maka.
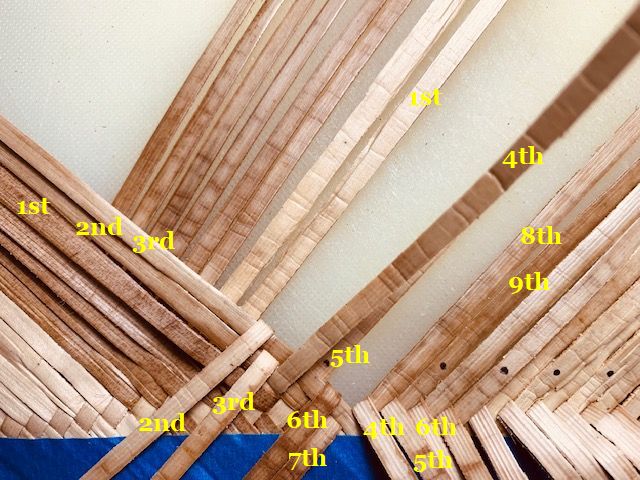 Figure 5
Figure 5 shows the 3rd moe pelu down. This is followed by an ulana of “two up, two down” with the 6th and 7th ku and the 2nd and 3rd ku ending up pelu down over the 3rd moe. For example from Figure 4, we pelu up the 3rd and 4th ku and pelu down the 2nd and 3rd ku.
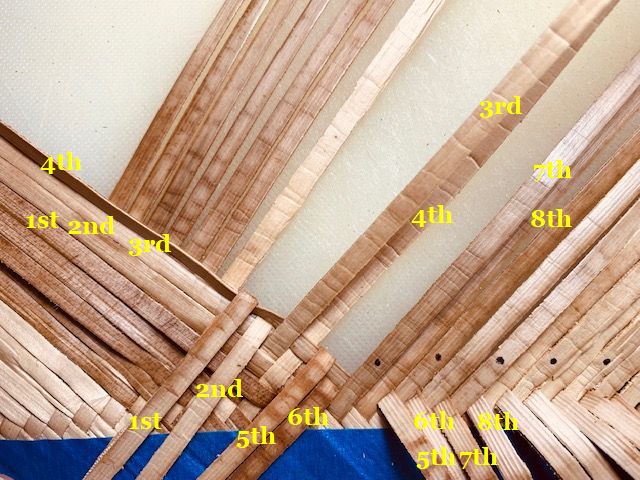 Figure 6.
Figure 6 shows the 4th moe pelu down. This is followed by the 5th and 6th ku and then the 1st and 2nd ku pelu down. Can you see now that there are two maka?
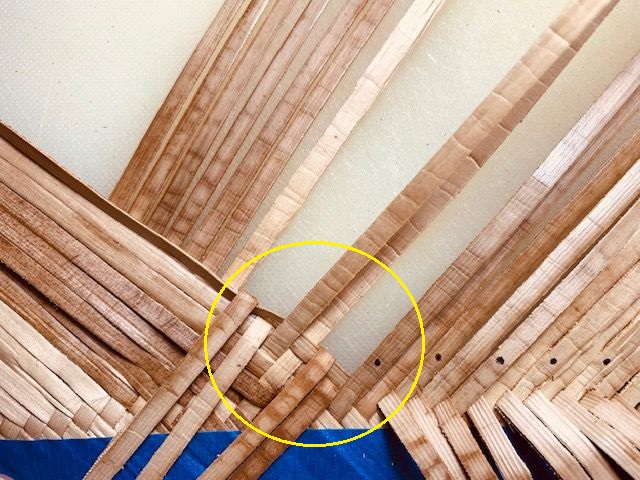 Figure 7.
The yellow circle shows the two maka unit. At this point weʻve finished stage one and will now move to the right in our weaving.
Stage Two – Weaving to the Right
OK, time to lauhala up. No labels for the rest of the instructions because there are only two steps to go from one basic two maka to the next one.
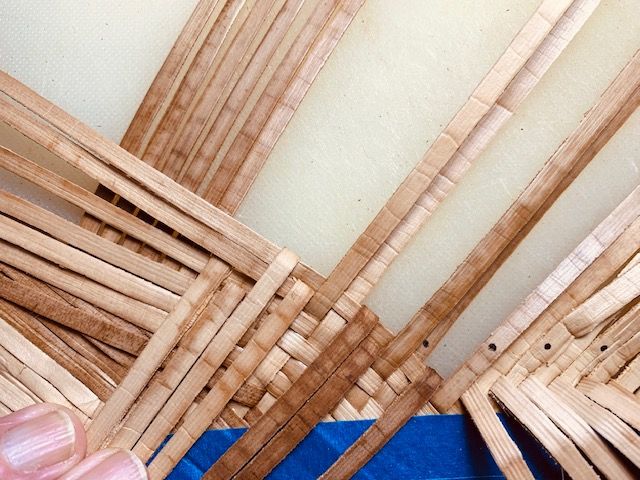 Figure 8.
In Figure 8 we have pelu down a moe, followed by 2 1/2 pairs of ku being pelu up and then down.
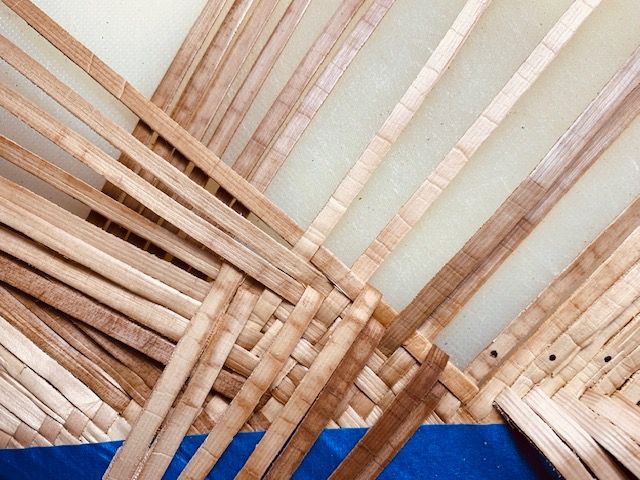 Figure 9.
In Figure 9 we have done another moe pelu down followed by 2 pairs of ku (“two up, two down”). Can you see the new two maka unit?
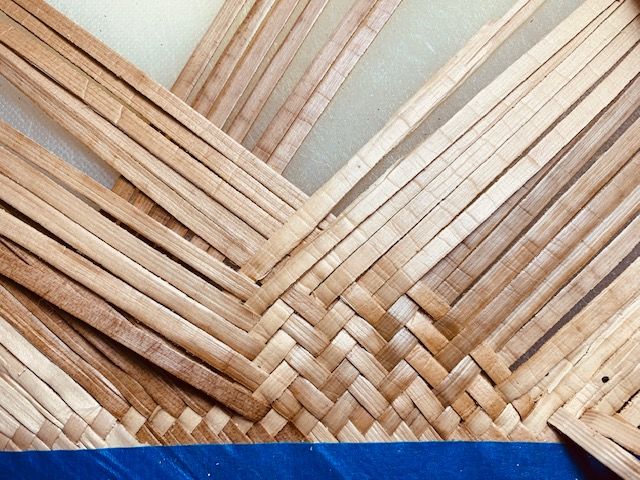 Figure 10.
Figure 10 shows the result of several more sets of maka being woven.
I enjoy writing these pages and hope that they are interesting and useful to the reader. I’ve stopped weaving/building at this time and still need to generate some income in order to continue to expand this website with more useful articles. If this page was helpful to you and you would like to make a $10.00 donation in order to have more pages like it, please use the donation button below. Thank you.