Introduction
When you get to the point in hat making where youʻve put the string in at the bottom of the side, you now need to decide what shape the brim will have: level or curved downward to some extent. On this page, Iʻm going to suggest a quantitative way of deciding how often to add in pairs of koana to achieve the desired effect.
You’ll need to dust off your high school geometry a little. As a quick review, a circle has two basic measurements that we are going to use: the circumference ( the total distance around the rim of the circle ) and the diameter ( the distance from one point on the circle to another point exactly opposite of the first one ). See Figure 1 below. If we divide the circumference of a circle by the diameter, we get a number called pi. For our use, we can round this number off to 3.14.
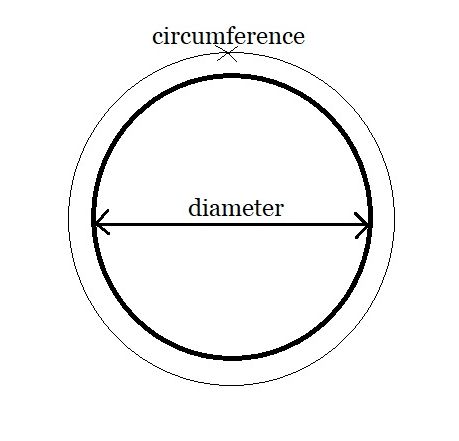 Figure 1. Basic Circle Measurements
Learning from a Hat that Looks like a Lampshade
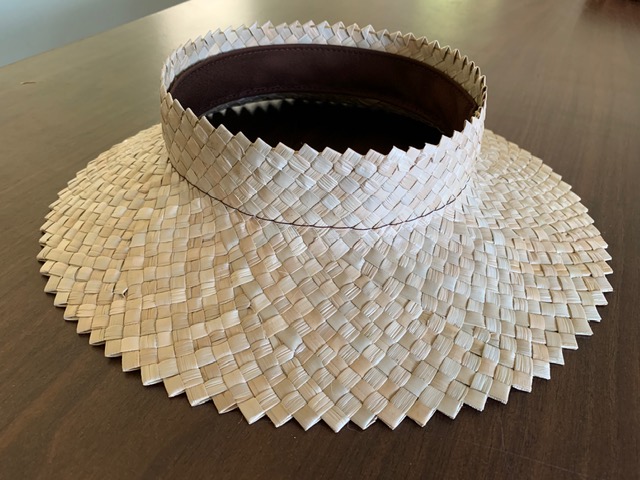
I wanted a hat brim that had a gentle downward slope across its four inch width. What I got was this:
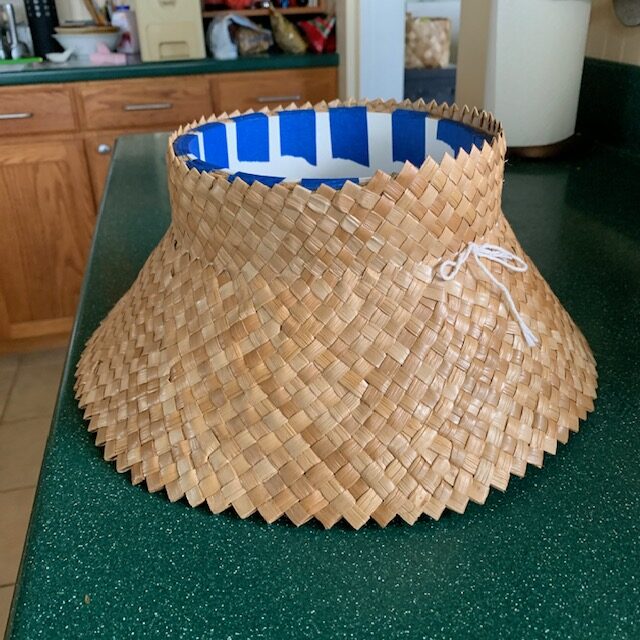 Figure 2. The hat that looks like a lampshade
I added in a total of seven koana pairs, one every seven maka beginning at the first row after the string line. Then I added in another seven koana pairs every six rows until I reached the brim.
So why didnʻt I get the gentle sloping brim that I wanted? I think the first thing to do is figure out how to get a level brim, and then go from there.
Adding in to get a Level Hat Brim (or nearly so…)
The first concept to understand is that as the brim becomes wider, you will need to add more koana. The second concept is that koana are added two at a time that is, two separate koana or a single folded koana. How many koana you add every few rows will determine the angle of the brim relative to the side of the hat.
For a level brim, you want the number of added koana to keep up with the increasing width of the brim.
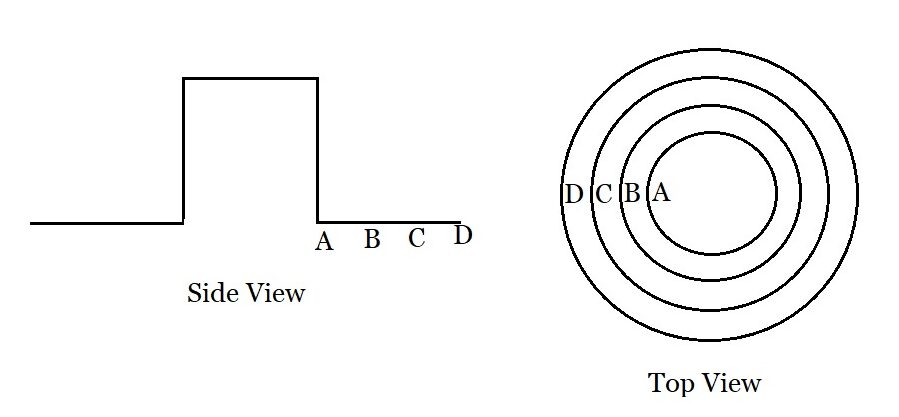 Figure 3. A schematic of a level brim hat from the side and the top
Letʻs begin by measuring the circumference of the hat at A in Figure 2 above. The circumference is 22.75″.
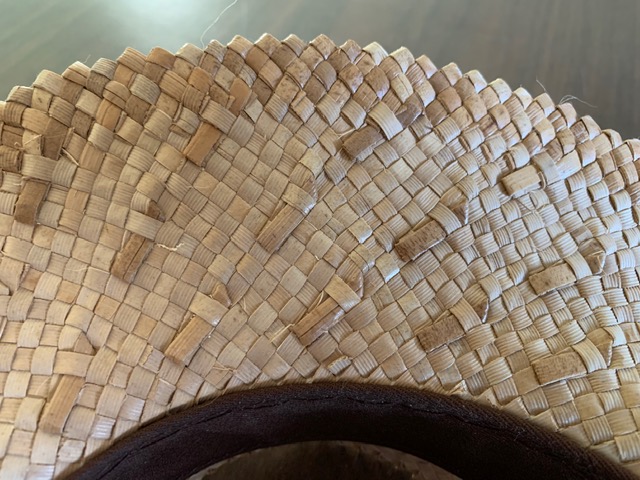
Now we measure along the string line from one corner of a maka to the opposite corner of the same maka including the bit of string that separates each maka. See Figure 4. For this hat, that measurement is ~0.38″.
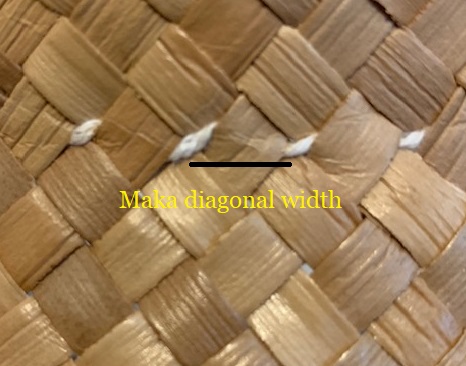 Figure 4. Measuring the maka diagonal width
If we divide this spacing into the circumference, we should get the approximate number of maka at the string line. So 22.75/0.38 = 60. The actual number of maka that I counted by hand is 57, so pretty close.
The diameter for this hat at the base of the side is (hat circumference/pi)~ 22.75/3.14 = 7.25″. If we increase the width of the brim outward from the string line by one inch, the new diameter will be ( 7.25 + 1 + 1 = 9.25″ ). There are two oneʻs because we are adding to both sides of the brim.
So the new circumference of the brim will be ~ 9.25 x 3.14 = 29″. The new circumference divided by the maka spacing gives a new total number of maka needed for the new circumference: 29/0.38 = 76 maka. So about (76 – 57 =) 19 new maka or about 9 pairs of koana will be needed one inch out from the string line.
If we have ~ 57 maka and we need to add in 9 pairs of koana, weʻll need to add in (57/9 ~ 6 ) about every 6 maka for the first row.
I usually weave two rows of maka after the string line before adding in so that I have some room to work with. Then I begin adding in with the koana pair attached between the first and the second row.
The table below takes you through the calculations as described above as we increase the width of the brim out to a total of four inches.
| Point on brim | hat circumference, inches | hat diameter, inches | ~ number of maka needed | difference |
| a | 22.75 | 7.25 | 57 | |
| b | 29 | 9.25 | 76 | 19 |
| c | 35.3 | 11.25 | 93 | 17 |
| d | 41.6 | 13.25 | 109 | 16 |
| (e) | 47.9 | 15.25 | 126 | 17 |
So the steps are in order:
- Measure the hat circumference at the string line
- Measure the maka diagonal width
- Count the number of maka
- Calculate the hat diameter (circumference/3.14)
- Add 2 to the hat diameter
- Calculate the new circumference (diameter x 3.14)
- Calculate the new number of maka needed (circumference/maka diagonal width)
- Continue the calculations until you have reached the desired brim width
If the above calculations are correct, by the time we reach the edge of the 4″ wide brim, we should have ~ 126 maka around the perimeter and the total hat diameter should be a little over 15 inches. Itʻs interesting that we can make a level brim hat by adding about the same number of koana ( about eight pairs ) every inch going outwards toward the edge of the brim.
Comparing the Level Brim Hat to my Hat
In contrast to the level brim example above, my hat has only 87 maka at the edge of the brim and an approximate diameter of 12.5 inches at the edge of the brim. That means (1) that either I should have begun with closer adding in spacing and kept the outward adding in distance the same, or (2) I should have kept the same adding in spacing and added in more often as I went out toward the edge of the brim.
Deliberately Curving the Brim to a Particular Shape
OK, this is a little hard. But in the same way that lofting the plans for figuring out the size and shape for the individual planks for small boats, we can make a full size drawing of what we want the shape to be. When weʻve done that, we can measure the drawing and figure out the approximate number of maka that we need to have along each diameter of the brim. Not perfect but probably a good approximation.
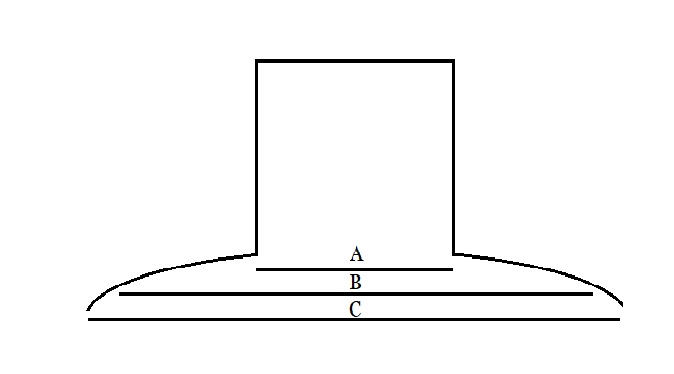 Figure 5. Drawing a hat full size, measurements to make
So we get out a piece of newsprint or butcher wrap large enough to sketch a full size side view of our hat. We then measure what the diameter of the sides will be and draft in a pleasant curve shape. Figure 5 approximates what you might do.
Lines A, B and C are meant to show the different diameters that the hat has as you go out the brim. Because you have the diameters you can calculate the circumference as you go out along the brim by multiplying by pi (3.14). With the circumference, you will then need to divide by the maka length of your hat. This calculation will then give you the number of maka needed at that particular point on the brim.
Of course, none of the above discussion is really meant to replace an experienced teacher who would guide you step by step through the process. But without such a person available, it is my intention that this would at least be a starting point.
Additional Hat Examples
Here are a couple of examples from several of my recent hats showing the number of koana added for each row and the resulting shape of the hat.
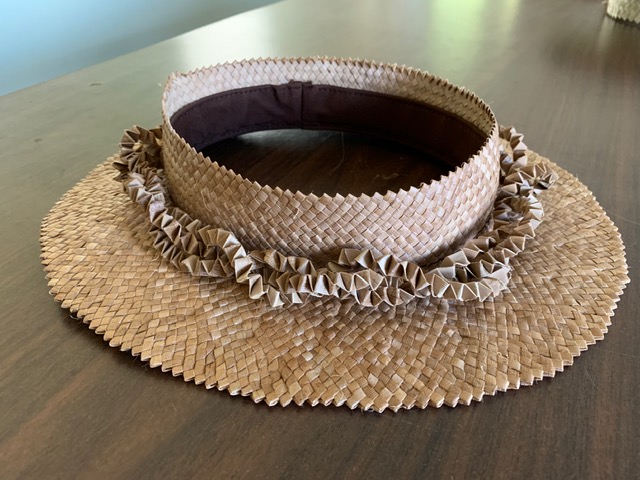
 For this hat, koana were added every sixth maka in the first row,
then stacked in sequence after additional rows were added.
 The resulting hat had a soft angle relative to the side of the hat.
 In this hat koana were added every fifth maka.
 The resulting hat brim was at right angles to the side of the hat.
I enjoy writing these pages and hope that they are interesting and useful to the reader. I’ve stopped weaving/building at this time and still need to generate some income in order to continue to expand this website with more useful articles. If this page was helpful to you and you would like to make a $10.00 donation in order to have more pages like it, please use the donation button below. Thank you.