Introduction
Many currently woven hats begin with some form of the piko shown here . Figure 1 shows the partially woven underside of such a piko with simple maka moena weave. Generally from this point, the weaver extends the sides of the piko to form a pā or flattened area of larger circumference before attaching the whole thing to an ipu or pāhu pāpale. The Hawaiian word pā is defined as “the flattened top of a hat” (among 10 definitions for the word pā).
After attachment to an ipu or a pahu pāpale, weaving continues down the crown to the point where the brim begins.
In this page I will describe one series of steps to make a pā which I have worked out by looking carefully at the pā of several of my wifeʻs auntʻs hats. The steps I show here donʻt exactly mimic what was done on those hats which used maka ʻoeno weave and bent koana add-ins. But the logic and sequence presented are such that a different weave ( maka moena ) and add-in ( folded koana or another type of add-in) can be used with essentially the same result.
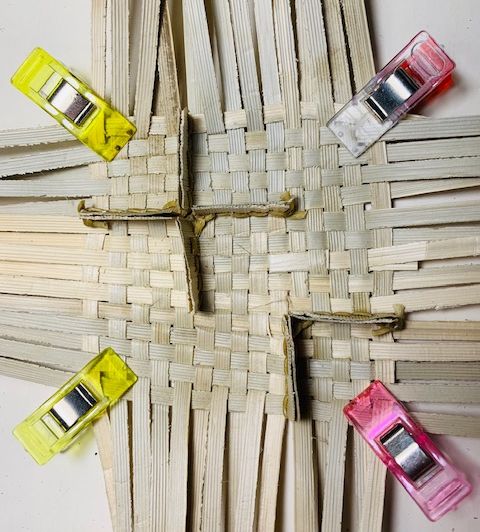 Figure 1. The underside of a modern piko
This is about where we left off at the end of the more complex piko tutorial. When we are finished with this tutorial weʻll be ready to attach the pā to an ipu ( Figure 2, below ) and continue with weaving the rest of the crown.
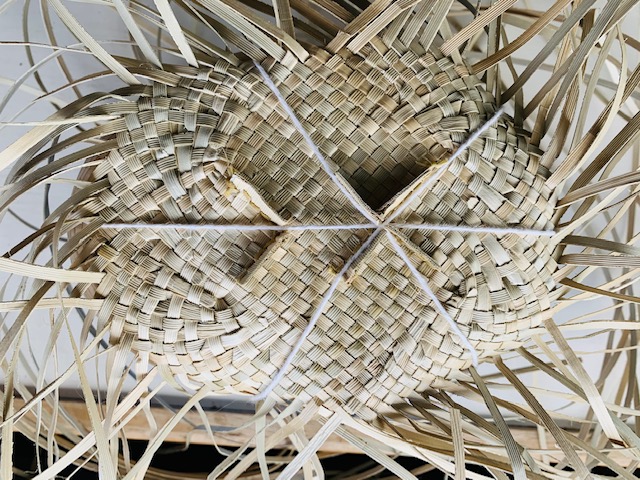 Figure 2. The nearly completed pā attached to an ipu – where weʻre headed on this page.
Looking Ahead
The first thing we need to do is finish the weaving in Figure 1 to make a square. Then we add two more rows on all four sides of the square to give us a little more room for beginning the process.
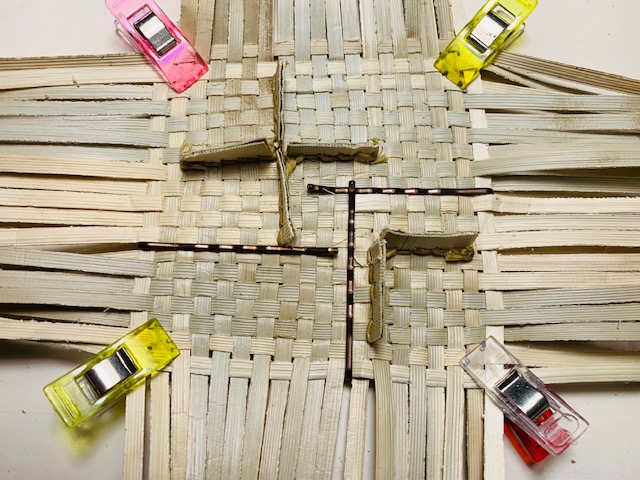 Figure 3. The completed square with two rows added all around
In some respects, weaving the pā is much like weaving the small basket . At the points at the end of the seams shown in Figure 4 ( A, B, C and D ), weʻre going to change from checkerboard weave to bias weave ( ulana papalala?). That is, the 12 vertical koana to the left of seam “A” will weave toward the right. And the 7 vertical koana to the right of seam “A” will weave toward the left. Similarly, the 7 horizontal koana above seam “B” will weave downwards (when we get there) and the 12 koana below seam “B” will weave upward.
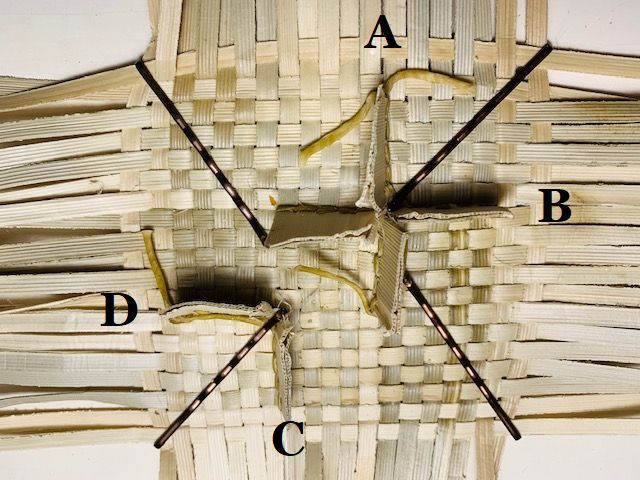 Figure 4. The four points where the koana change direction
But unlike the small basket mentioned above, we are weaving on a flat surface. And that means that, like adding koana to the brim as it became wider, weʻll need to add koana as we work around the perimeter of the piko. Figure 5 shows the approximate number and locations of the koana add-ins that we will make for one half of this example.
As usual itʻs important to point out that there are MANY ways to do add-ins. Some earlier examples on this website are here and here . Some tuck under a maka at the beginning while others do not and are trimmed later. Some folks use the two piece koana at the beginning and then switch to the bent koana later. The following approach is just one way and the reader is strongly encouraged to try different types of add-ins and find out the one(s) they are most comfortable with.
An additional important point is that if you donʻt make the length of each part of the folded koana the same length as the lengths that the piko was constructed of, then when you get to the brim of the hat, you may have to lengthen all of the add-in koanas in order to finish the brim. The is VERY tedious to do…
But itʻs very difficult to find koana of sufficient quality and length to do this. Although I have used a folded koana in the figures below, Iʻll be using two piece add-ins on the next hat because itʻs easier to find good quality koana in shorter lengths.
Beginning the Add-in Sequence
Now letʻs look at the repetitive sequence of actions that weʻll do for the add-ins. Figure 5 gives an overview.
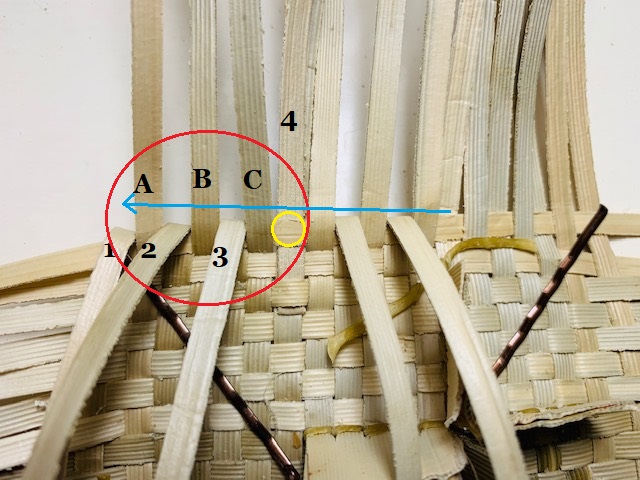 Figure 5. An overview of an add-in sequence
Well, Figure 5 is a little busy but here we go. First I begin by looking for a pattern of koana. The red oval contains the pattern which Iʻm using for this example. A, B and C are up, 1, 2, 3 are down and 4 is temporarily up. The yellow circle shows the maka that the folded koana will go under to begin the process in this example. The blue line shows the direction that the the first koana to the right of the seam will go to complete the first add-in. So hereʻs the sequence:
- Find the pattern
- Insert the folded koana under the maka with the horizontal part going across A, B and C.
- Fold down A, B, C and 4 (donʻt fold back half of folded koana); fold up 1, 2 and 3.
- Bring 1st koana from the right edge of the seam over and parallel to the folded koana strip
- Fold up A, B, and C; fold down 1, 2, 3 and back half of folded koana
- Repeat
You may be justifiably a little lost at this point, so hereʻs the sequence in pictures.
 Figure 6. Insert folded koana under yellow circle maka and fold back half over front half.
Tuck the koana under the yellow circle maka and fold up at the halfway point. Now fold the back half of the insert over the top half and to the left. We could also have folded the top half under the back half and to the left. This begins the sequence. The part of the folded koana which goes under the other part goes across A, B and C.
 Figure 7. Bring down A, B, C and 4; leave back part of the folded koana up
Now A, B, C and 4 are folded down and the other numbered koana are folded up.The vertical half of the folded koana stays up.
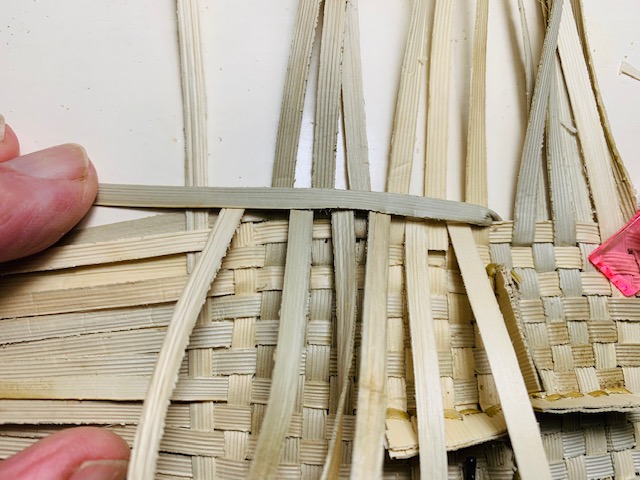 Figure 8. Bring koana from right of seam “A” over then weave all koana to left of seam “A”
Now bring the first koana to the right of the seam over to the left across all the vertical koana. Note that eventually, all the koana to the left of the seam will be woven to the right and those to the right of the seam will weave to the left.
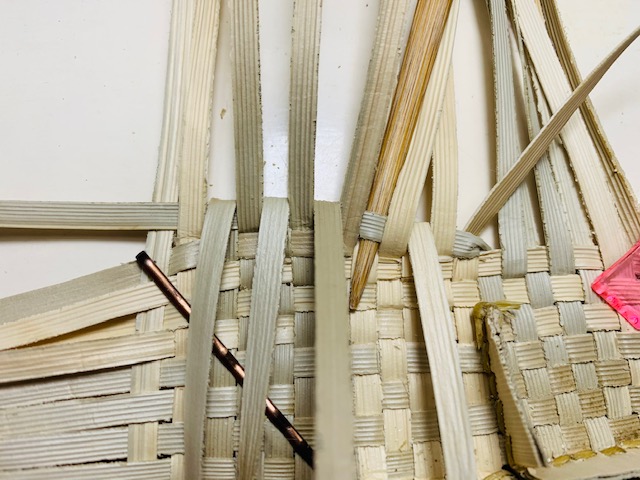 Figure 9. Begin new sequence one maka over and one up
We have moved over and up one maka and the second folded koana will be inserted under the new maka where the bamboo helper is. So weʻre ready to repeat the process again. This is a time to go slowly and be patient with yourself. Itʻs easy to make mistakes doing this (at least for me) so take your time. It took me two days to finish my first pā…
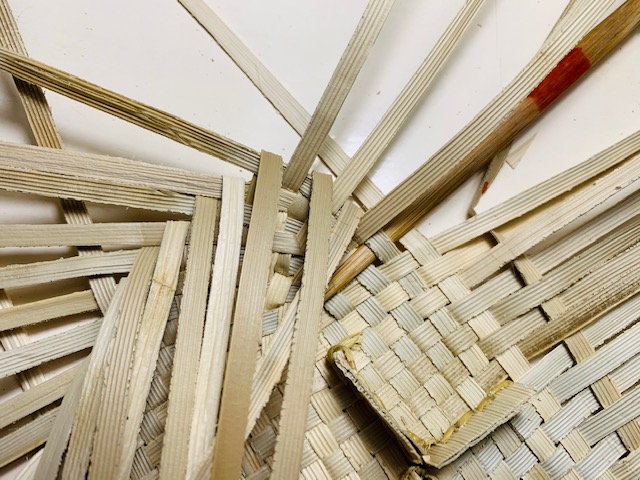 Figure 11. Eight add-ins done up to this point.
Figure 11 shows that eight add-ins have been made. I need to turn up the fourth koana from the left to reveal the maka where the next folded koana will go. When we run out of the seven koana to the right of the seam “A”, weʻll need to rotate the work further to the left and begin to take koana from the right side of seam “B” as shown in Figure 4.
Continue adding in until you have reached the opposite side from where you began as in Figure 4. You will still have several more koana to weave in ( but not add-in )before you reach the end of the first half.
Figure 12. Weʻre nearly there. This will be the last add-in for this half of the pā
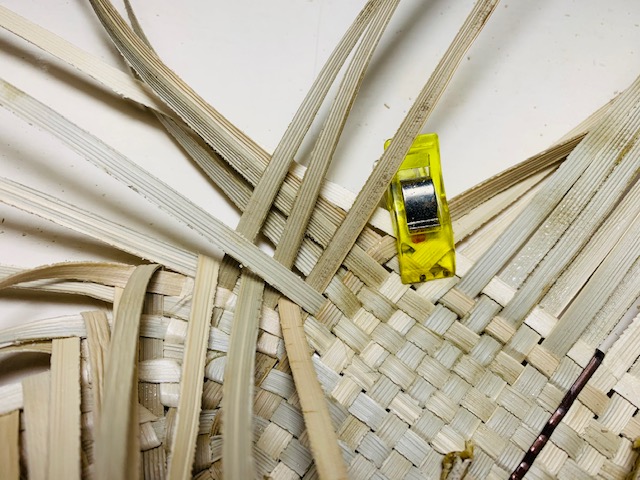 Figure 13. Itʻs now time to weave in the remaining koana until
we have reached the corner opposite the beginning
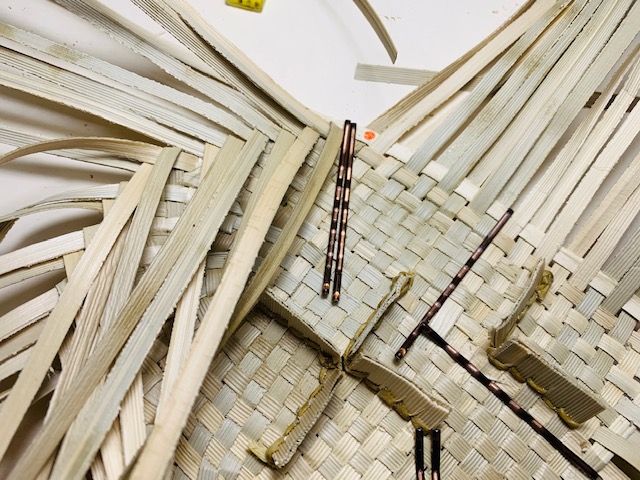 Figure 14. Koana woven in and stopped weaving at the corner point (red dot)
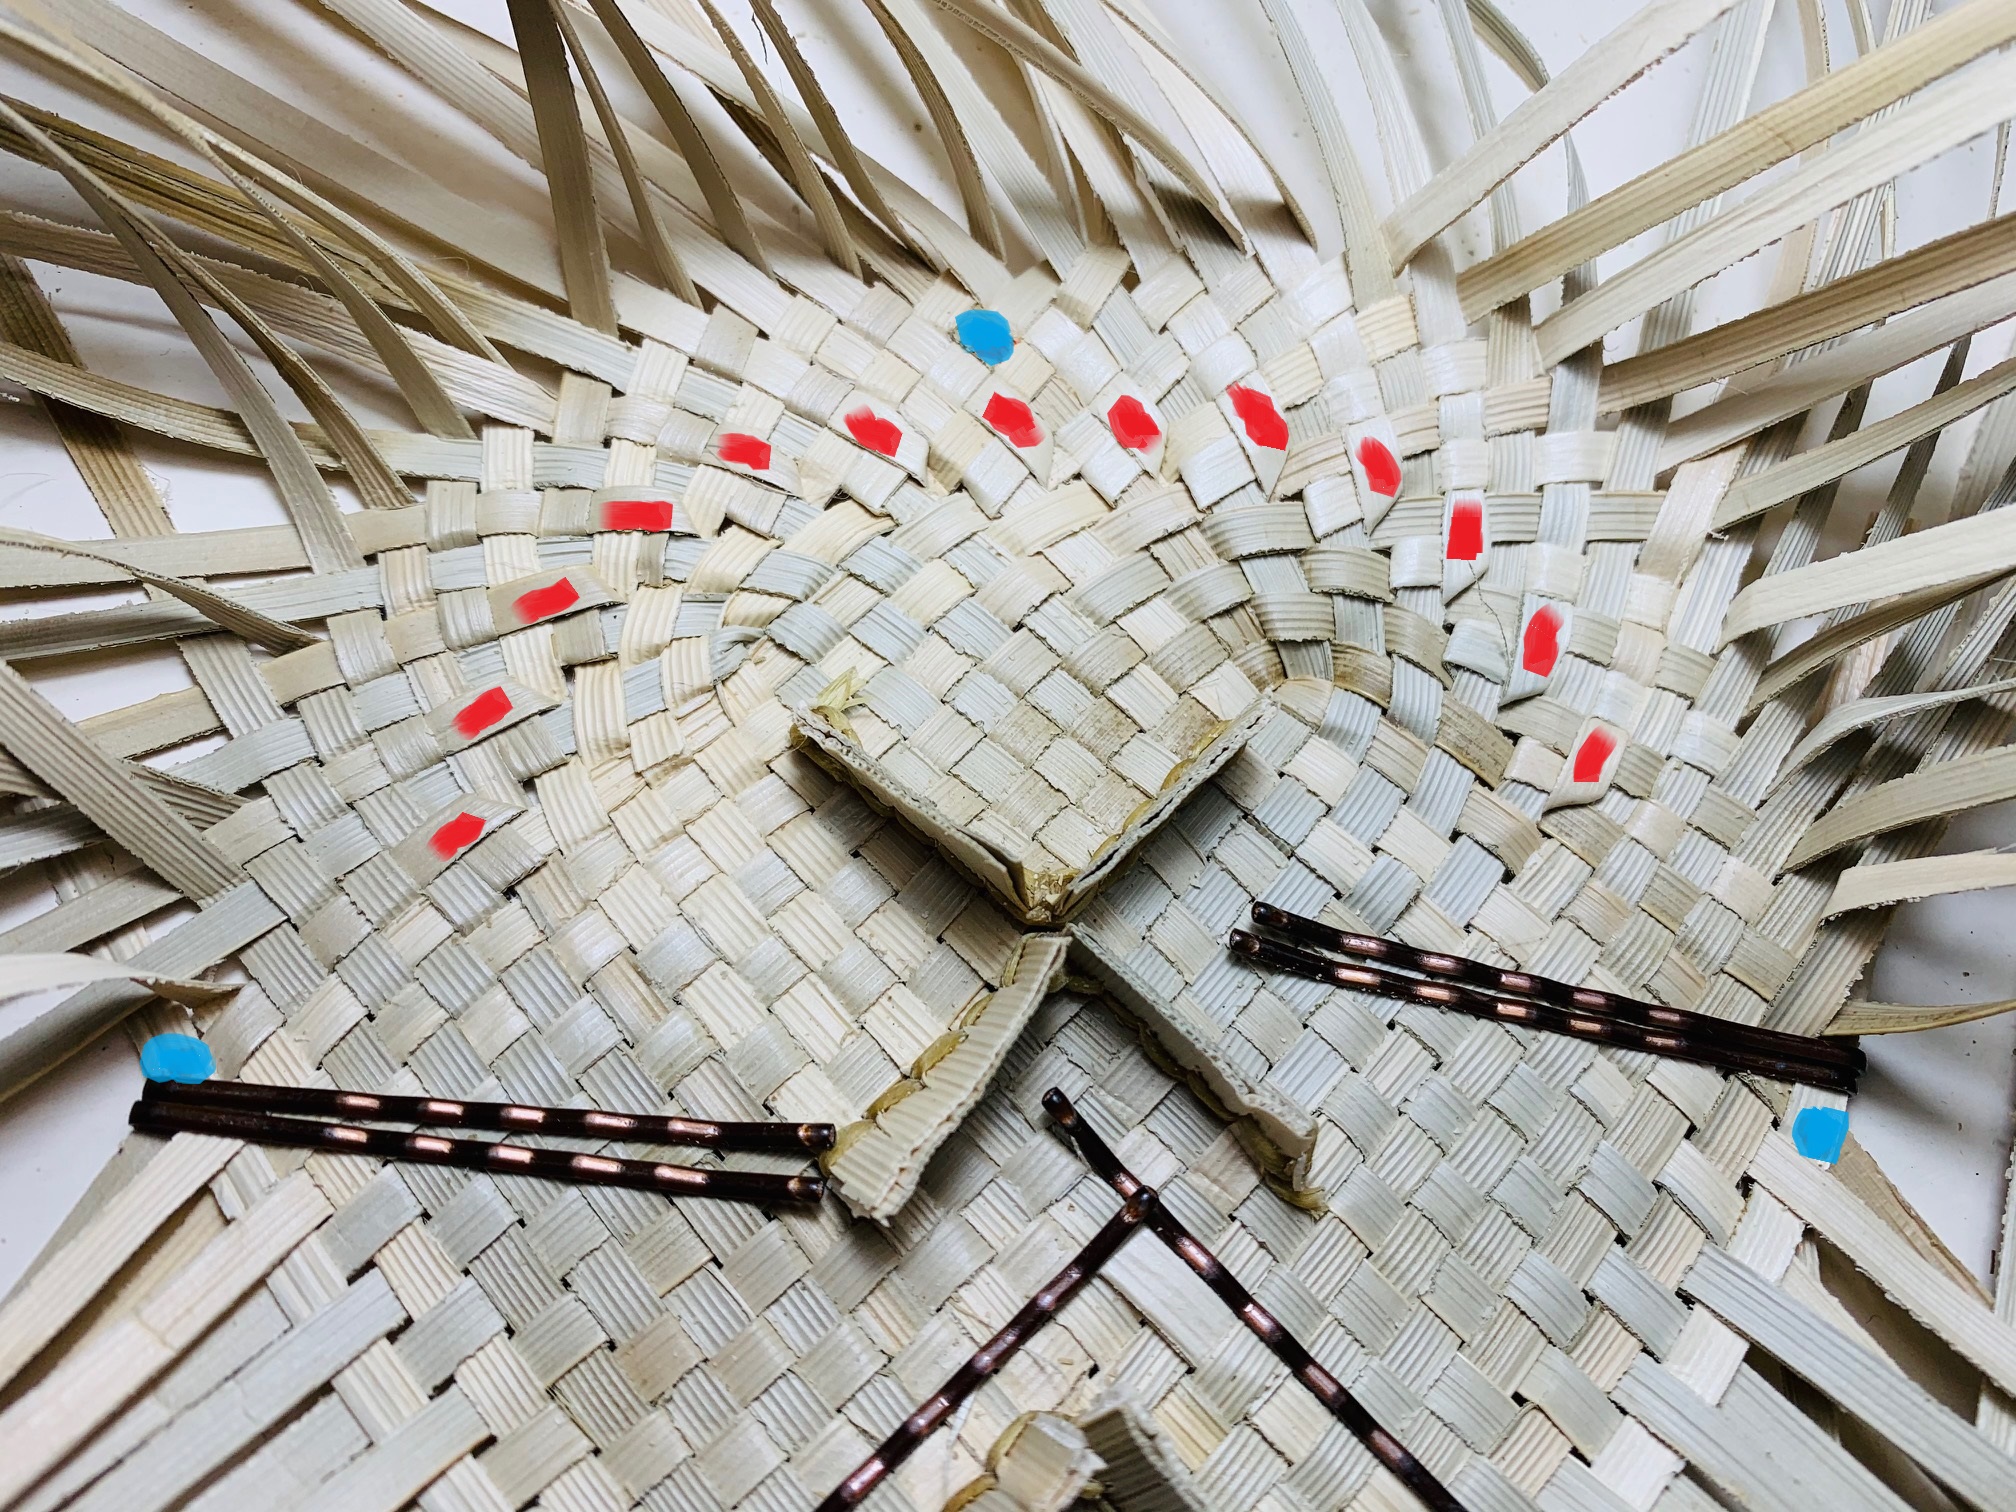 Figure 15. Halfway point showing 13 add-ins. Blue dots show three of original corners in Figure 3.
Now itʻs time to do the second half of the pā. Weʻll begin to the left of the “C” seam as shown in Figure 16 below.
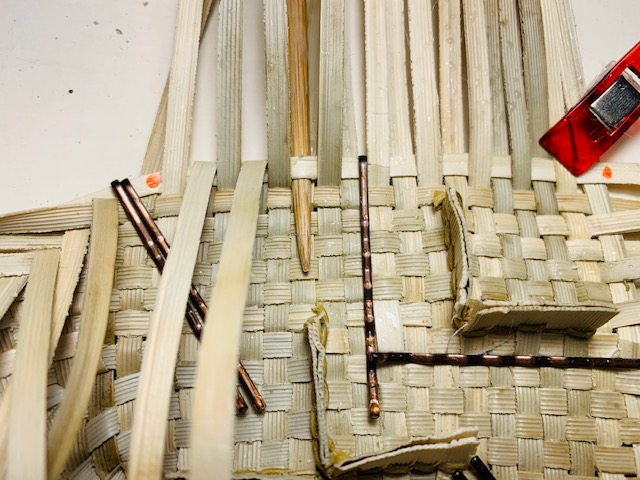 Figure 16. Bamboo “helper” shows the first maka for add-in
In Figure 16, weʻre starting on the other half of the piko. The bamboo “helper” shows the first maka for putting in the folded koana to begin the second half of the pā.
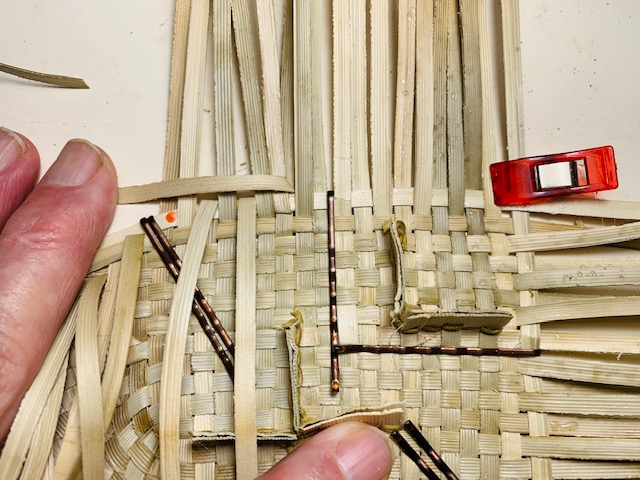 Figure 17. Folded koana inserted in maka.
The folded koana add-in inserted into the maka to begin the second half weaving.
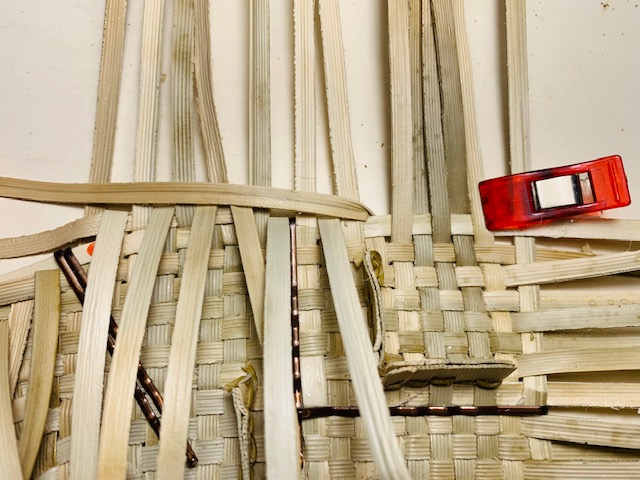 Figure 18. Koana from the right of seam “C” being used to continue the add-in process.
As we did in the beginning of the first half of the pā, we take a koana from the right side of the nearest seam (in this case “C”) and cross it over to the left to continue the first add-in sequence.
Now as you did in the first half, continue adding in until you have reached the other side (seam “D”). Then finish up the weaving (without adding in) until you reach the original piko corner.
Turn the weave over to see if there are any koana that werenʻt woven in. For this example I DID find one and took a minute to reweave it.
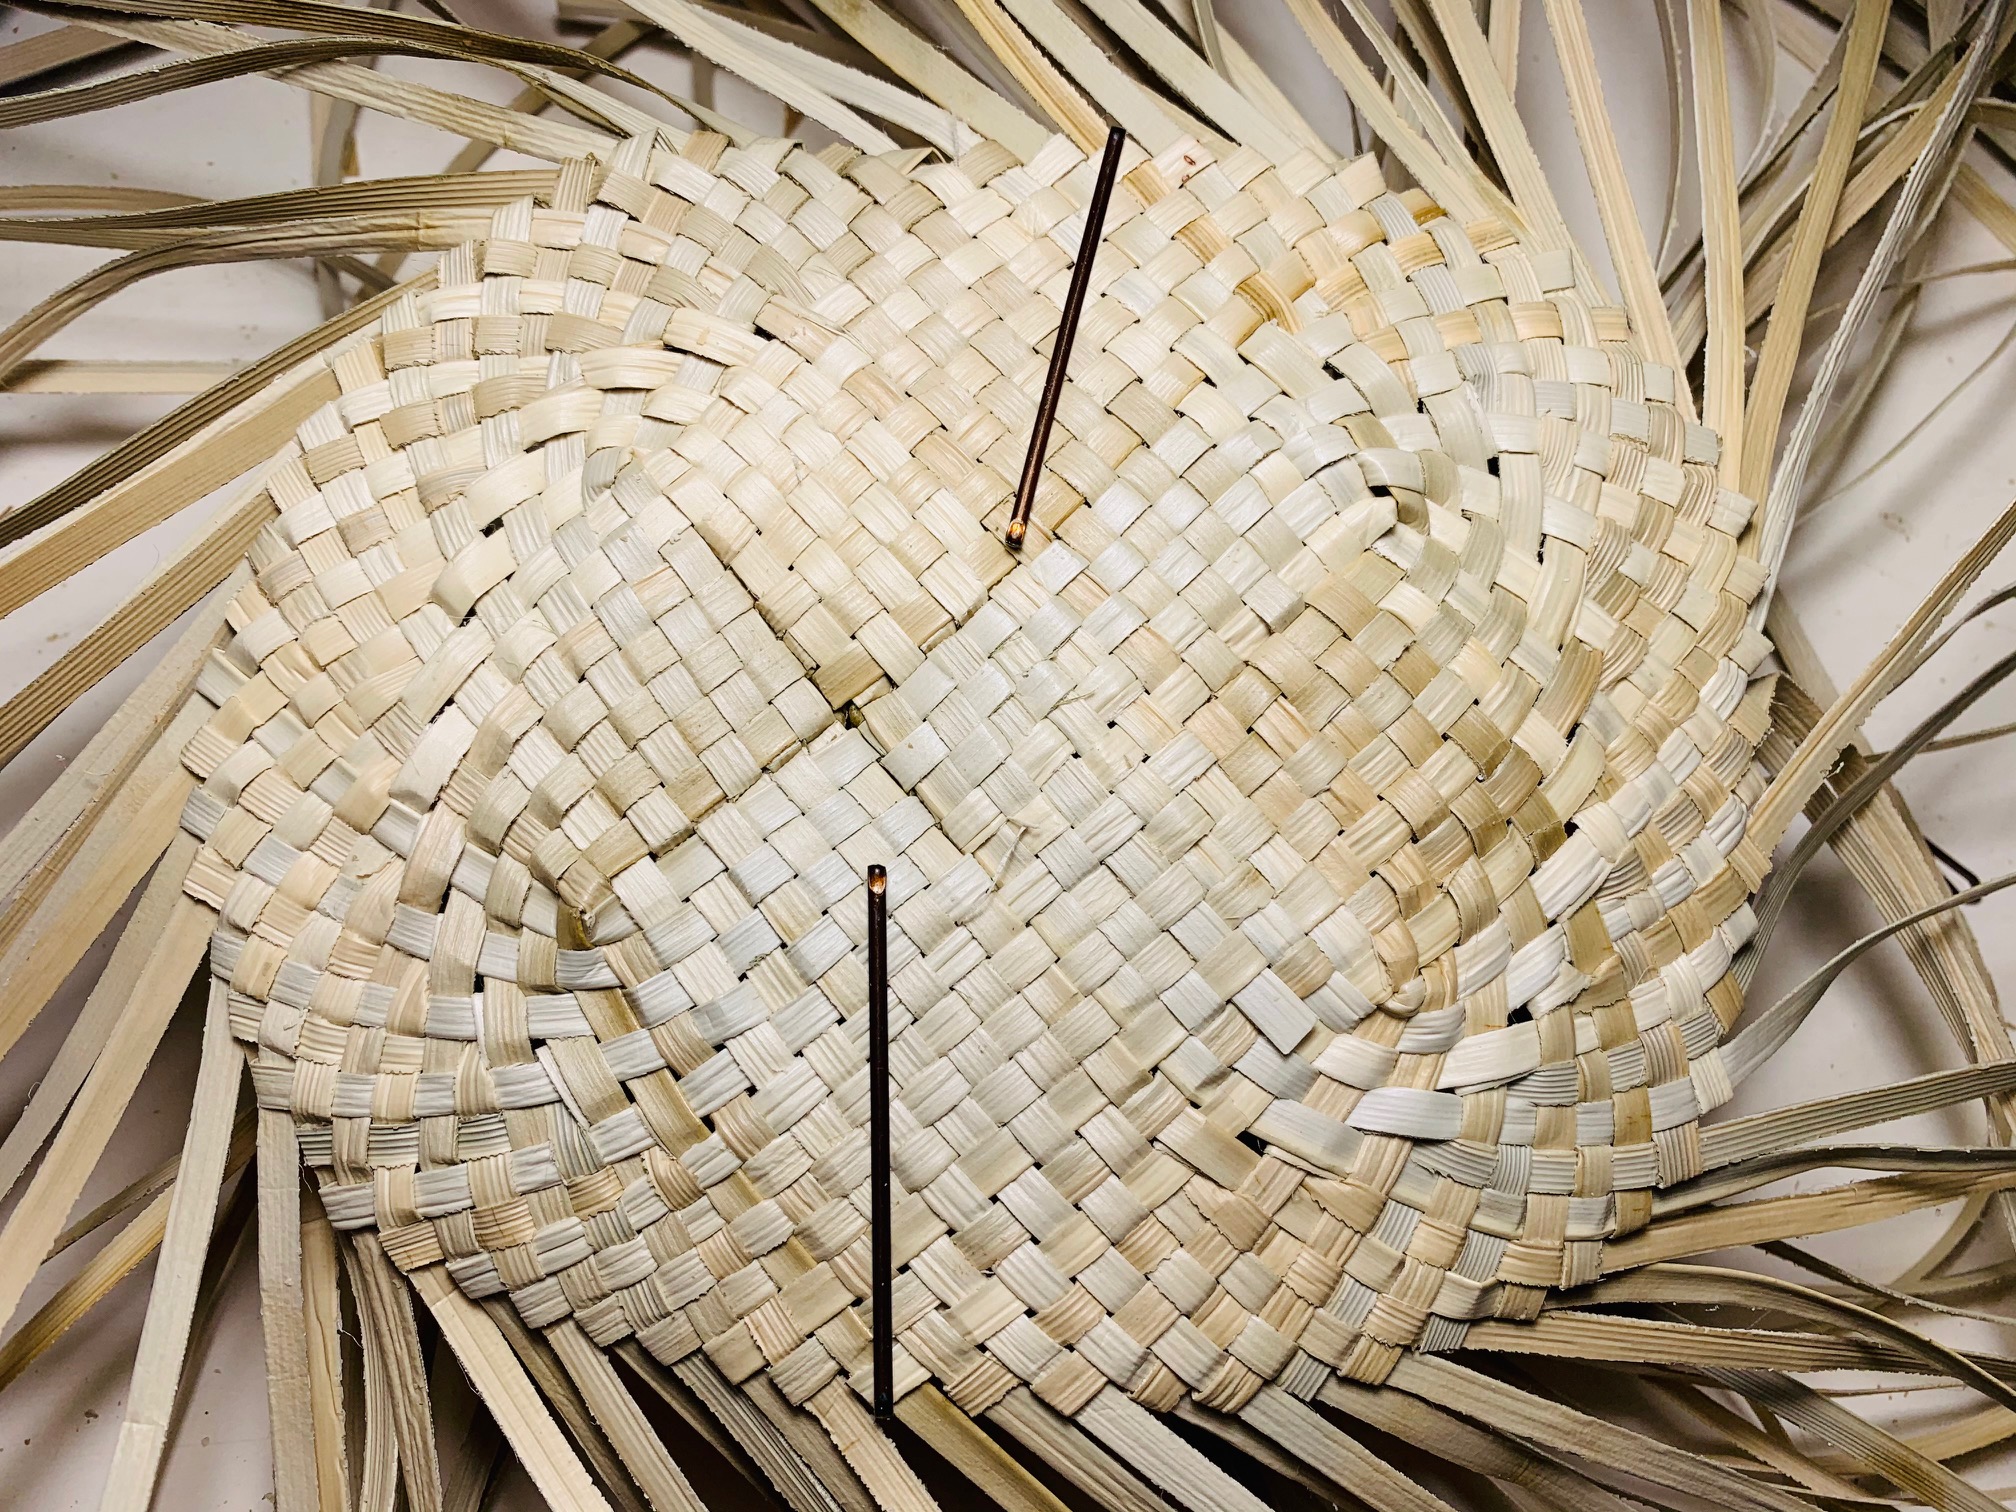 Figure 19. “Good” side of the finished pā
Now take the time to go and fold the koana which are folded toward the center of the pā all the way around. The finished result may look like Figure 20 below. It looks like a ratʻs nest but in fact all the koana are facing the right direction and there are no gaps.
 Figure 20. Underside of the finished pā with all the center pointing koana folded.
At this point your finished pā should look much like Figure 19. Congratulations! This has been a very difficult project. But mastering the piko-to-pā sequence will now open up a whole new world for weaving not only hats but many other articles as well.
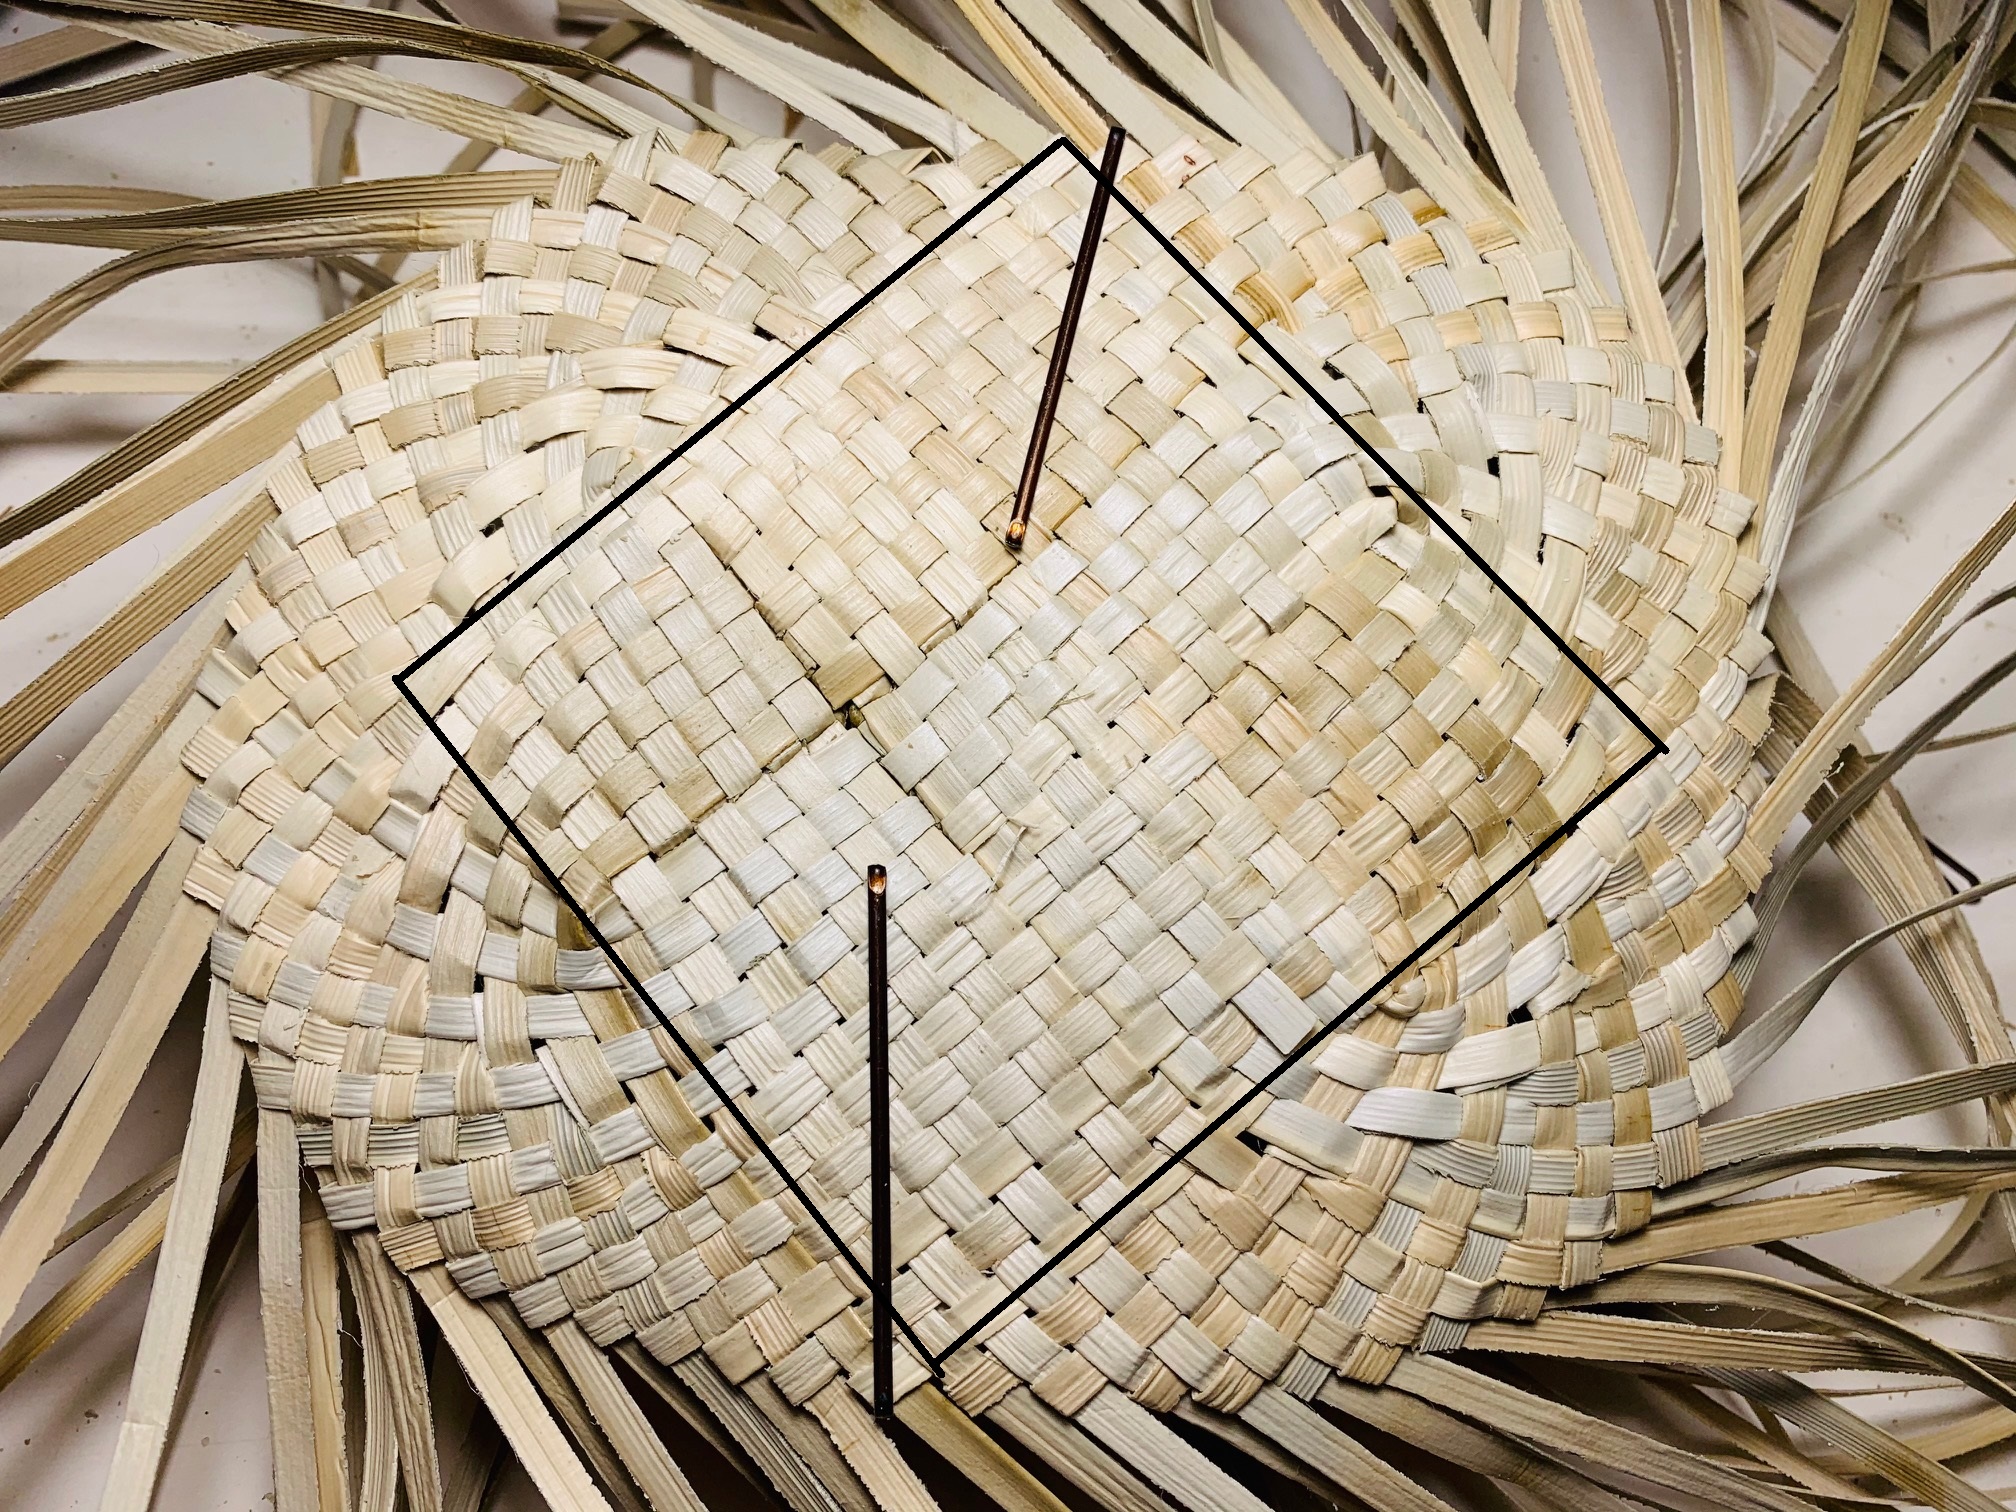 Figure 21. The finished pā compared with the outline of the finished piko.
Itʻs interesting to see where we ended up relative to where we began in this process. Although many early hats began with a circular form, in time hat form shapes became more representative of the shape of the human head. That is, in general the human head shape is generally 1/3 longer than it is wide. That being the case we needed to take a square ( the final piko outline ) and turn it into an oval.
I enjoy writing these pages and hope that they are interesting and useful to the reader. I’ve stopped weaving/building at this time and still need to generate some income in order to continue to expand this website with more useful articles. If this page was helpful to you and you would like to make a $10.00 donation in order to have more pages like it, please use the donation button below. Thank you.