Introduction
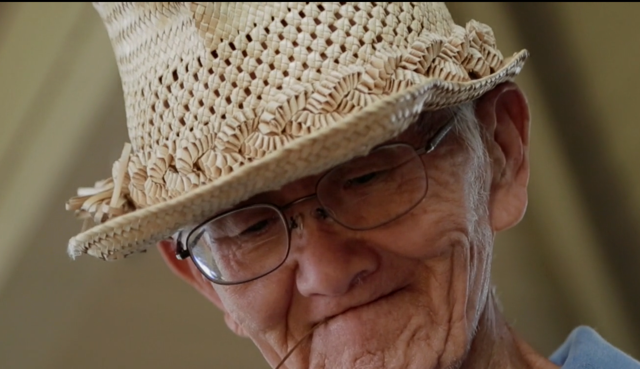 Figure 1. Uncle Ed Kaneko with one of his hats.
Like the late Uncle Peter Park, Uncle Ed Kaneko grew up in Kona. And as a child helped on his parents’ coffee farm. Below in his own words, he tells of growing up in Kona.
Uncle Ed Kaneko’s Autobiography on Vimeo
He was by all accounts a warm, generous and patient man who enjoyed sharing his lauhala ulana mana’o with others. His obituary in the Star/Advertiser gives that much additional richness to his life.
In 2016, while Uncle Ed was still alive, a close friend Nanette (Henani) Bell wrote a very detailed biography of him as shown below.
Master Lauhala Weaver Ed Kaneko also generously donated lauhala hats he crafted by hand to the Kona Coffee Living History Farm for the interpretive staff to wear at work.
Several of us were struck by the hatband on Uncle Ed’s hat above. What follows are three different ways to make a woven hatband like or similar to Uncle Ed Kaneko’s.
The First Three Koana Hatband
The following folding sequence was shared with us by experienced weaver Mei Lin Wong-Gary. It uses three koana and is relatively easy to fold. You can think of the orientation of the three koana as being like “rabbit ears” or the face of a clock with the times at 2 o’clock, 6 o’clock and 10 o’clock, whatever gives you the best way of remembering. I will be using the clock analogy.
We begin with three 1/4″ wide koana, rubber-banded at one end with the shiny side of the koana facing up ( Figure 2 ).
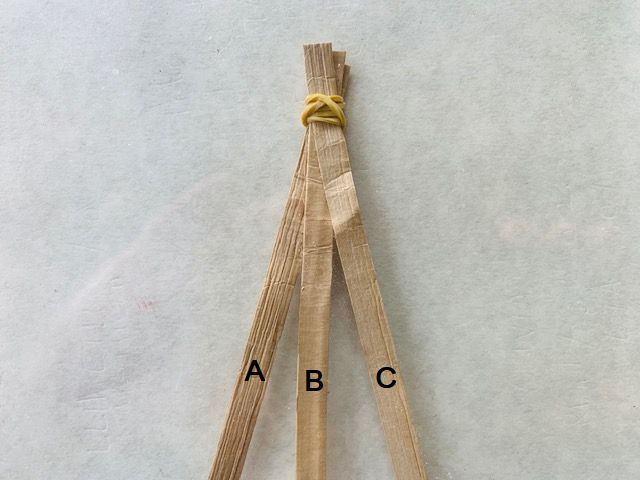 Figure 2. Three koana, labeled and shiny side up.
Now fold the “B” koana up and to the 2 o’clock position.
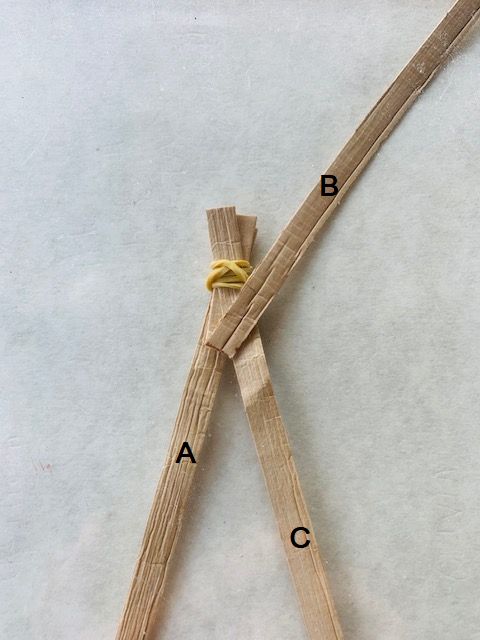 Figure 3. The “B” koana is folded up and the the 2 o’clock position
Now fold the “C” koana up and to the 10 o’clock position.
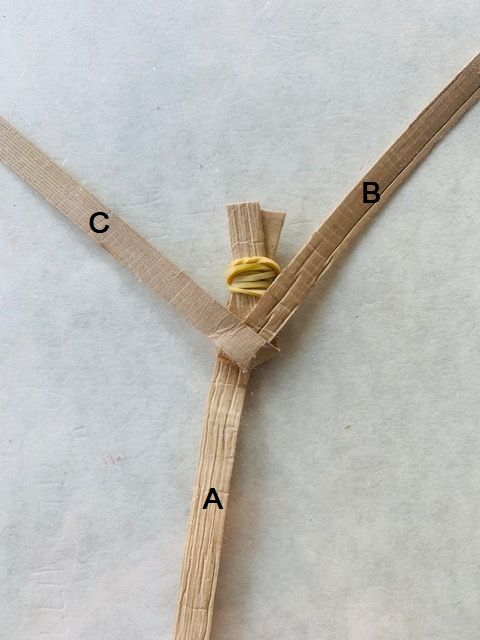 Figure 4. The “C” koana folds up and to the left
Next fold the “B” koana down to the 6 o’clock position
 Figure 6. The “B” koana folds straight down.
Next fold the “A” koana up to the 2 o’clock position.
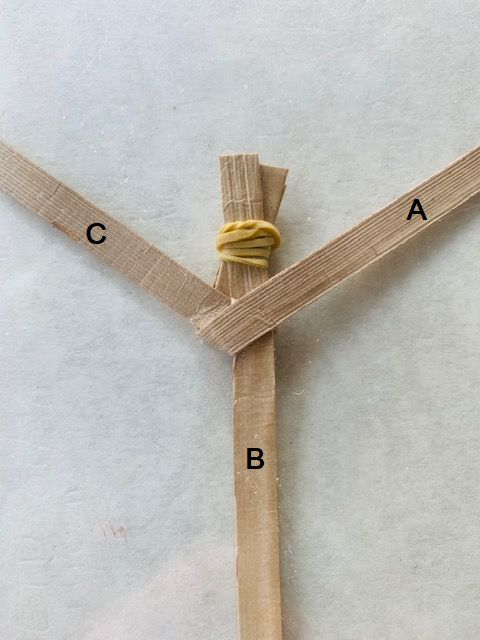 Figure 7. Fold the “A” koana up and to the right
Now fold the “C” koana down to the 6 o’clock position.
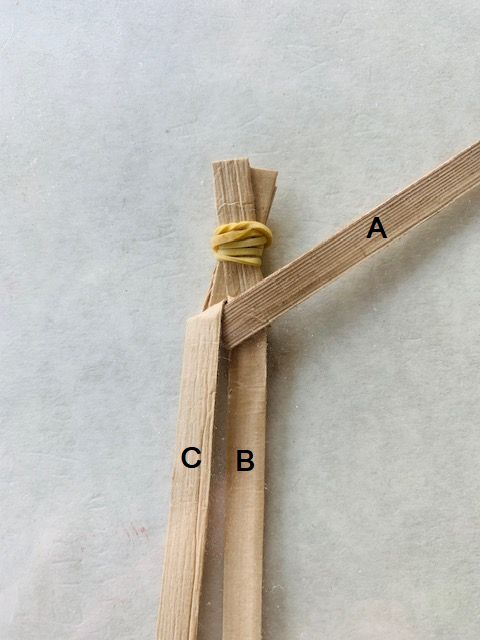 Figure 8. Fold the “C” koana down to the 6 o’clock position
Next fold the “B” koana up to the 10 o’clock position.
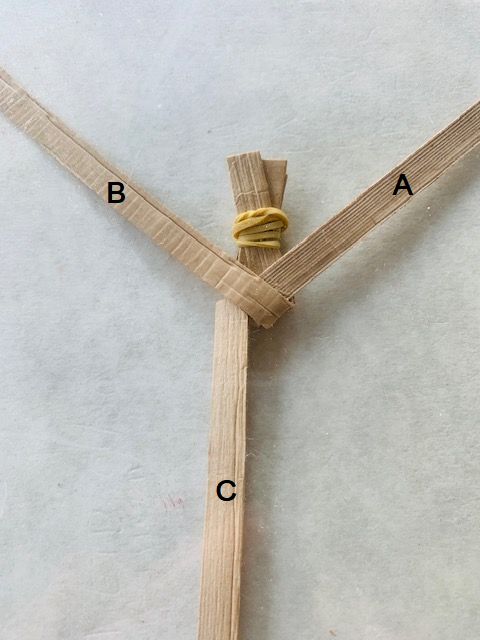 Figure 9. Fold the “B” koana to the 10 o’clock position
Finally fold the “A” koana down to the 6 o’clock position.
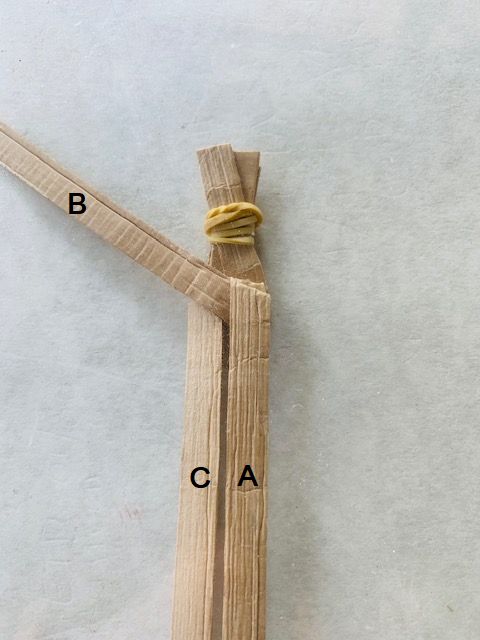 Figure 10. Fold the “A” koana down to the 6 o’clock position
And here’s a small segment of the finished product ( Figure 11 ). Clearly more practice is needed on my part. The finished weave is not square in cross section, but slightly flattened which may make it softer and easier to braid more closely. The koana need to be very soft and pliable to make this weave look even and attractive.
The look of the braid can be altered by how tightly you weave it. The braid in Figure 1 looks pretty tight, while the look in Figure 12 below looks much looser.
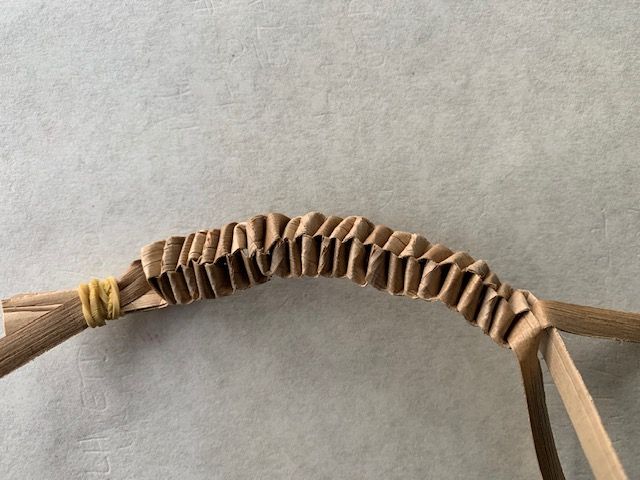 Figure 11. Partially finished segment of weave.
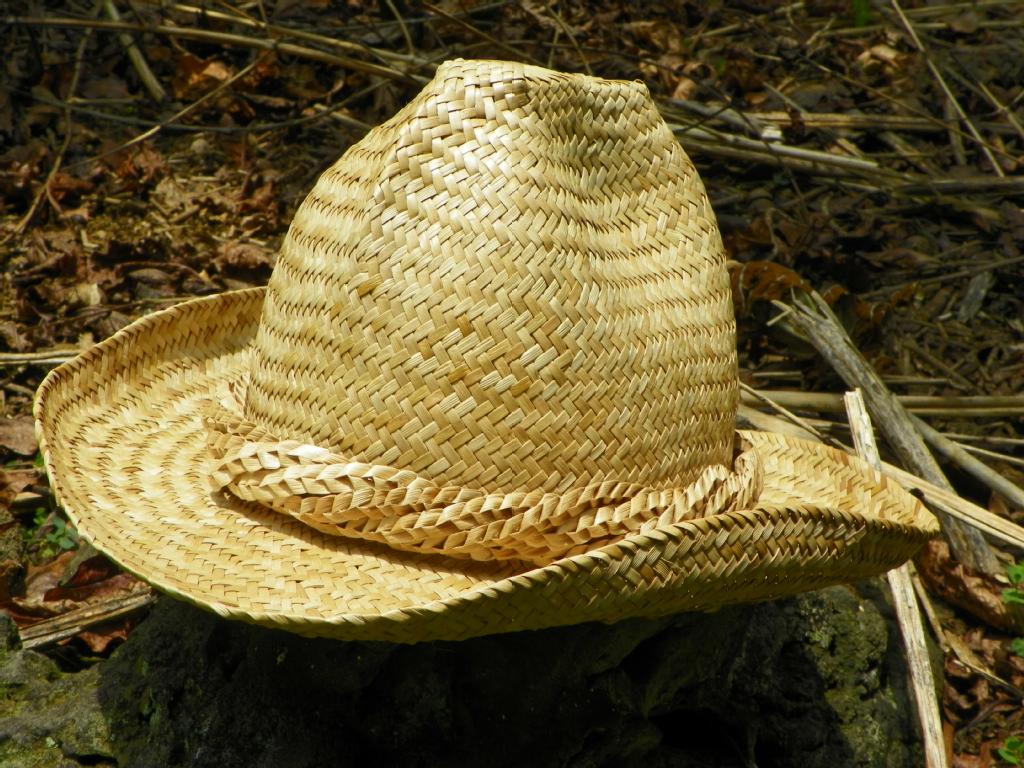 Figure 12. A Holo Lio (cowboy) hat by Ed Kaneko with hatband.
A Second Three Koana Weave
When I asked our lauhala weaving club how one might go about weaving Uncle Ed’s hatband, Ed Sousa came up with an attractive and ( I think ) original way of weaving the koana to achieve nearly the same look. Here are his photos and explanation.
“The weave can be done with three koana but I used two with one folded in the middle. This kept the beginning from coming apart while weaving. Also I started with the “good” sides down, but looking at the finished weave it would be better to start with the good sides up.”
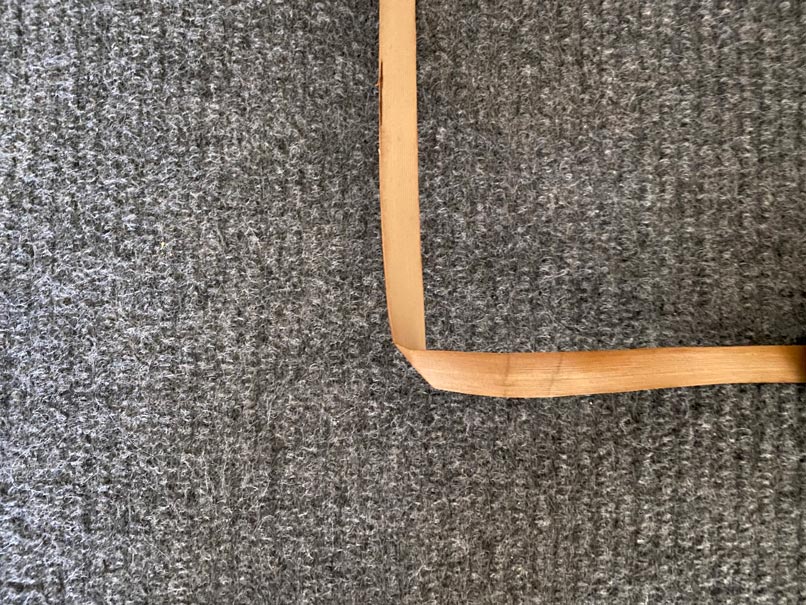 Figure 13. Begin with one koana folded over
“Step 1: (Figure 13) Start with one koana folded over the top to one side.”
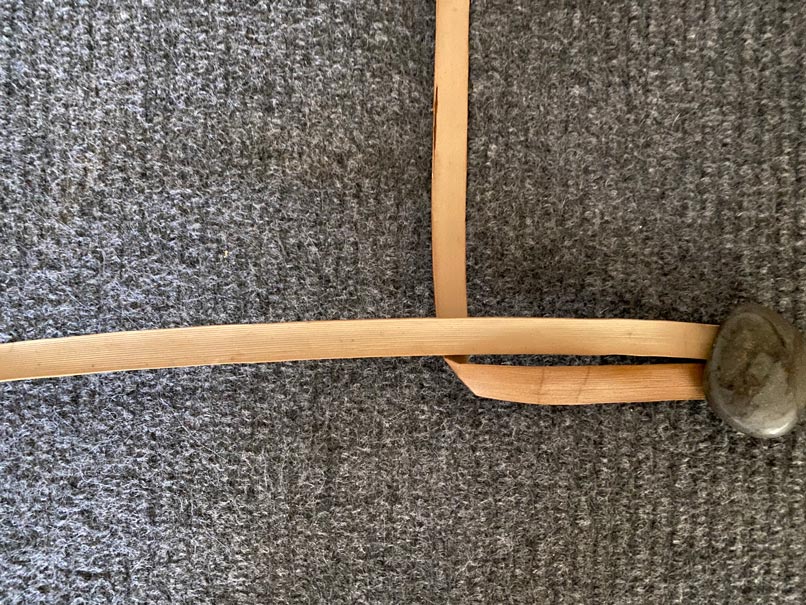 Figure 14. Place the second koana next to the first
“Step 2: (Figure 14) Add the second koana next to the turned down part of the first.”
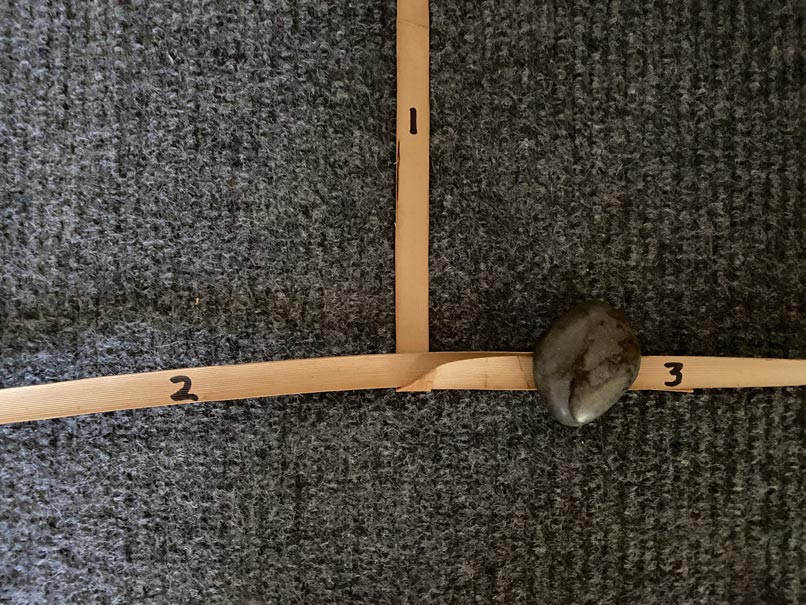 Figure 15. Fold the first koana over the second
“Step 3: (Figure 15) Fold the first koana over onto the second. The koana has also been numbered. Note: The koanas are woven in order from 1 to 3 and then back to 1 again. The “turning and folding” done to the first koana in steps 1 &3 will be repeated through out the weave. An easy way to weave this is to think of the three koana as a cross with one arm missing creating an open space.”
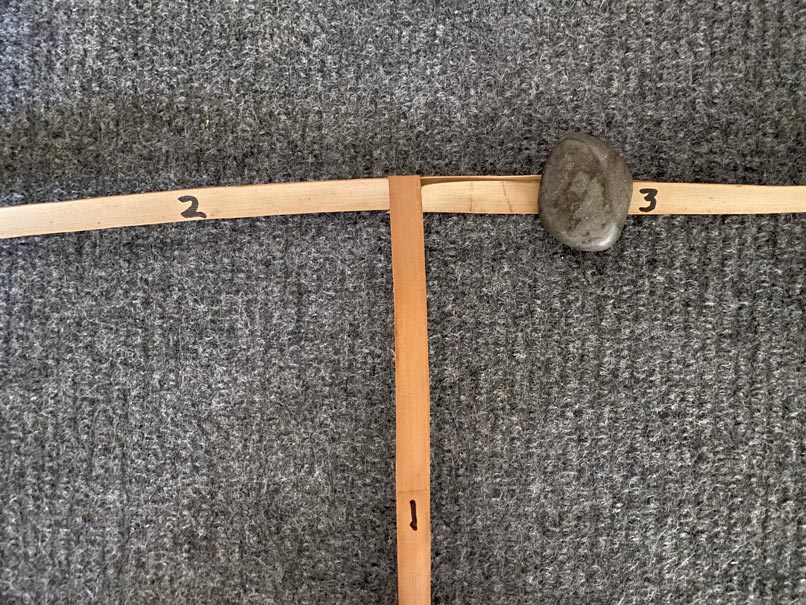 Figure 16. Fold the vertical koana down
“Step 4: (Figure 16) #1 is folded straight across the center of the cross into the open space.”
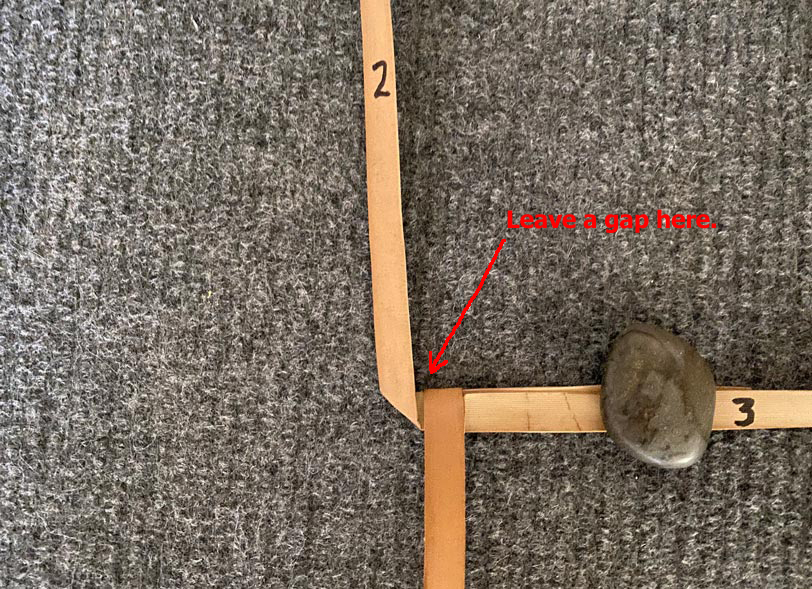 Figure 17. Fold the left side of the horizontal koana up
“Step 5: (Figure 17) #2 is turned toward the open space leaving a small gap and then (Figure 17) folded over onto the center of the cross.The weave consists of these two steps – across the center into the open space (step 4) and turn to the open space and then fold over the center (step 5).”
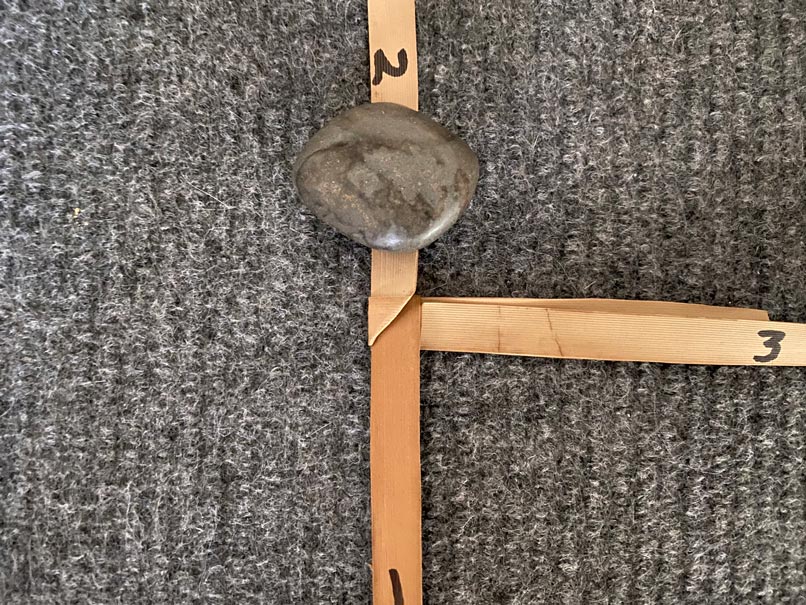 Figure 18. Fold the # 2 koana over
“Step 6: (Figure 18) #3 is folded straight across the center of the cross into the open space (repeat of step 4 but different koana).”
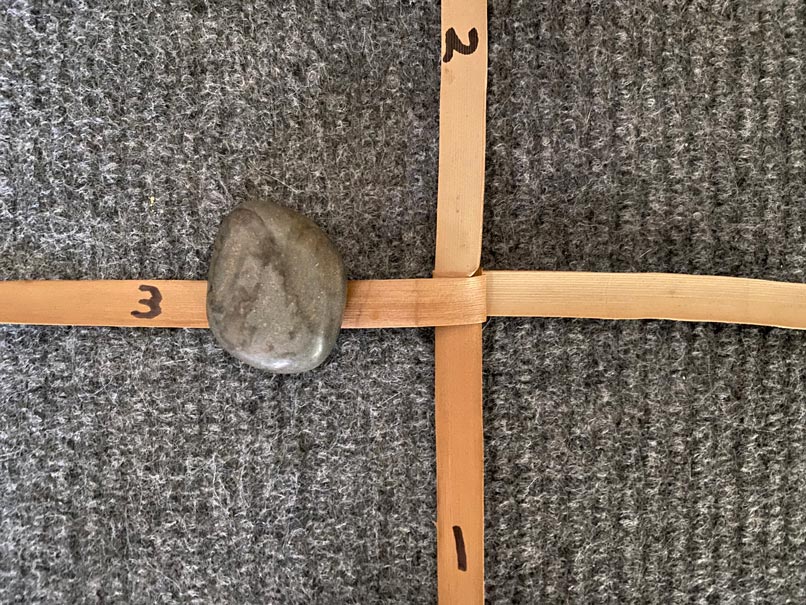 Figure 19. Fold the #3 koana over from right to left
“Step 7: (Figure 19) #1 is turned toward the open space leaving a small gap and then (Photo 9) folded over onto the center of the cross (repeat of step 5 but again different koana). The weave continues alternating the straight folds and the turn and folds of the koana going in the numerical order of the koana. It’s faster and easier to do it than explain it.”
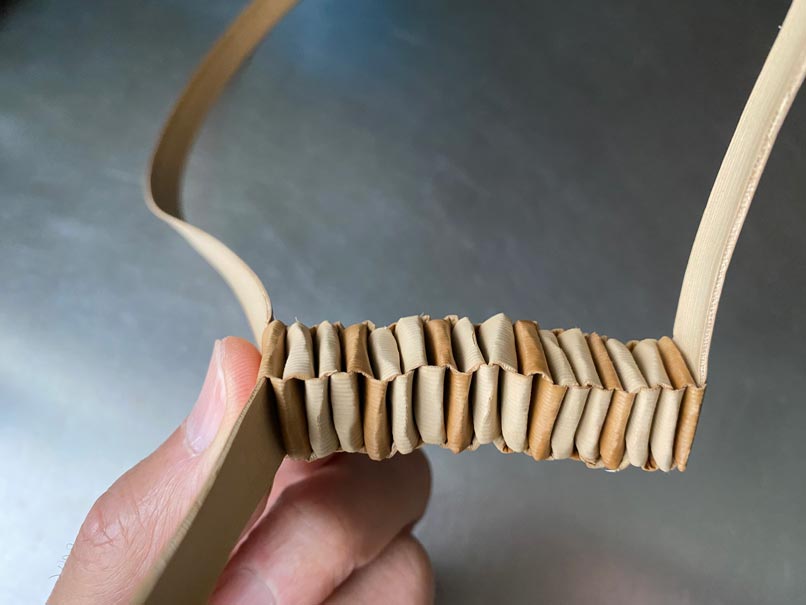 Figure 20. A partially finished weave using Ed Sousa’s approach
Figure 20 shows the partially finished hatband and Ed Sousa’s well manicured thumbnail. This weave is more square in cross section than what we believe to be Ed Kaneko’s version of this weave.
A Four Koana Spiral Weave
When I broached the subject of the hatband weave to my Mainland friend Irina (who had sent me the picture in Figure 1) we talked about it for a little while and she came up with the following variant of the box weave sometimes used by paracord bracelet weavers.
Figure 21 shows the beginning of the process. Although I’m beginning with only two koana folded over one another, Irina initially began with four separate pieces.
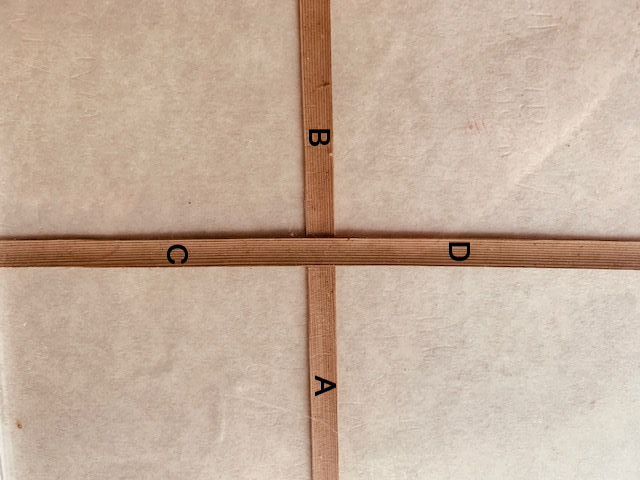 Figure 21. We begin with two koana.
Fold “A” up over “CD” and to the right of “B” in Figure 22.
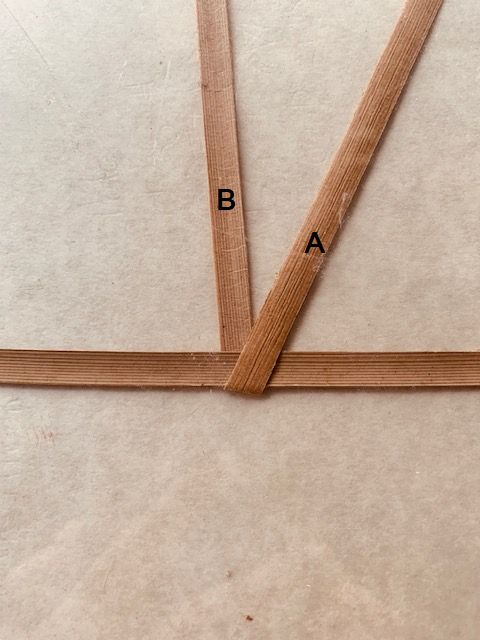 Figure 22. First fold
Fold “B” down over “CD” and to the right as in Figure 23. Then rotate the piece 90 degrees clockwise.
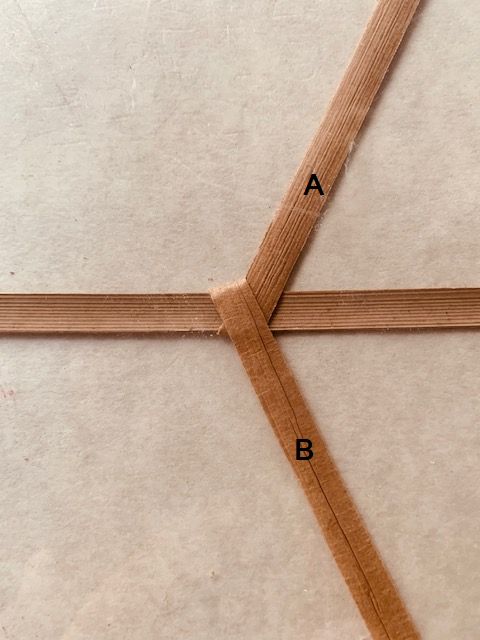 Figure 23. Second fold
Fold “C” up and to the right of “D” as in Figure 24.
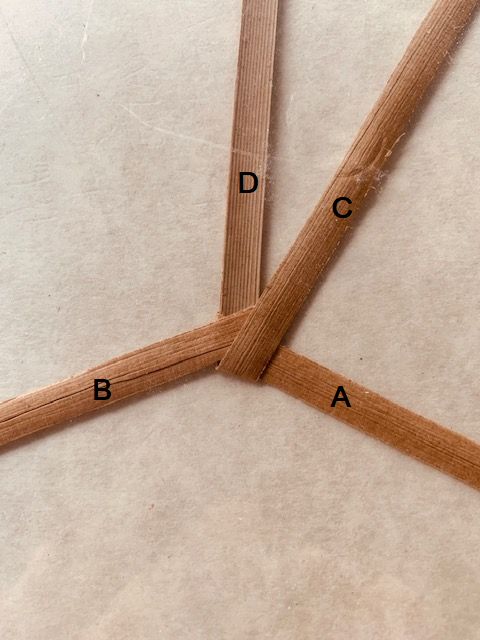 Figure 24. Third fold
Now fold “D” down as in Figure 25. Once again turn the piece 90 degrees clockwise.
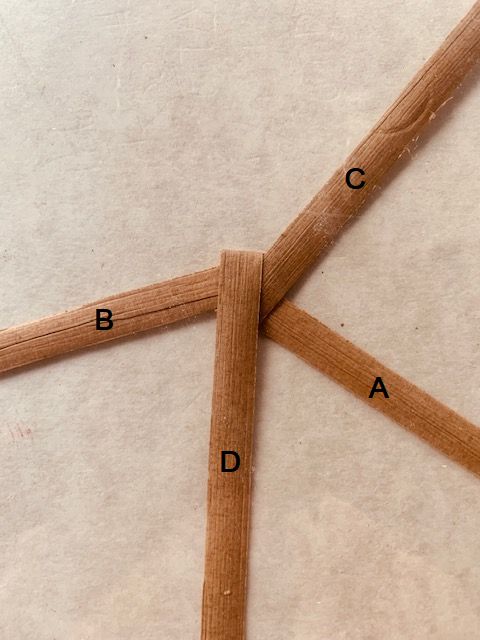 Figure 25. Fourth fold
In Figure 26, we’re beginning the folding cycle again in that the fold is the same as in Figure 22.
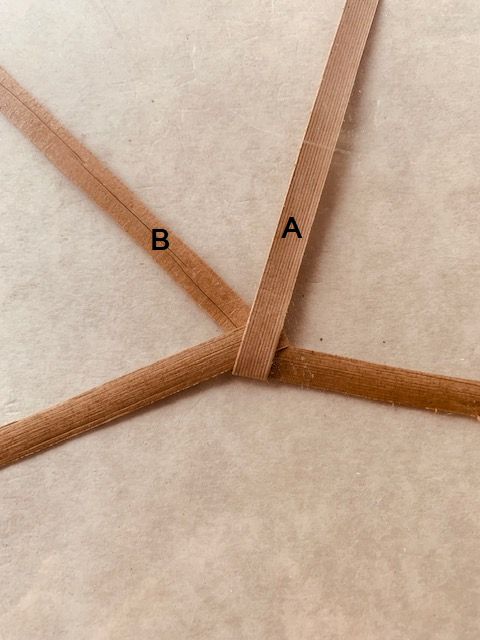 Figure 26. Starting the folding cycle again.
Continue weaving and rotating the piece until the desired length is reached. Figure 27 shows a small section of the weave and Figure 28 shows about 7 1/2 feet of weave twined onto one of my hats. This type of weave is also stiffer and more rectangular in cross section and in my hands at least gives a looser braid.
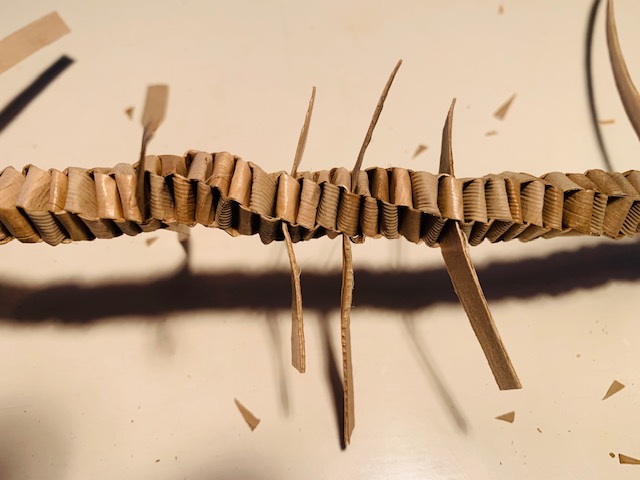 Figure 27. A small section of this type of weave showing addins before trimming
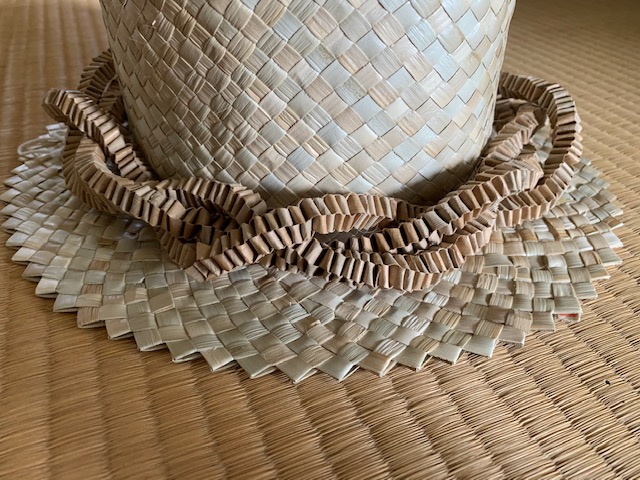 Figure 28. Spiral box weave