Introduction – Making a Lauhala Covered Door Stop
Let’s make a lauhala covered door stop using check weave (maka moena). These door stops seem to be in many local houses in Hawaii and are a quiet reminder of days gone by. The skills in this project are similar to some of the coaster projects we have done earlier. We’re also going to add some new skills that will be helpful in future projects. We’re going to start at one end of a brick, weave down the sides and then close the end up. This approach is very similar to covering a flask and even making a hat.
The project will also require some patience. If things don’t seem to be going just right, take a break.
Here’s what the finished product looks like:
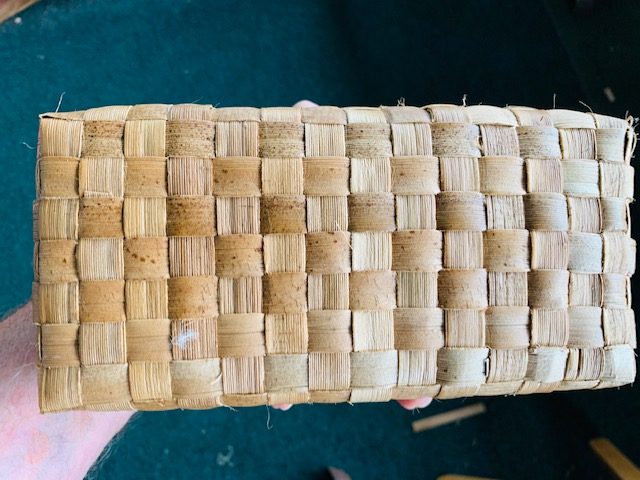 Figure 1. A finished lauhala covered doorstop
As usual there are a number of different ways to do this project. Weaving diagonally is another way but much more difficult, at least to me. The approach shown below is just one way. Your teacher will probably provide a different way and this approach can be an object for discussion.
As before, the basic structure of each project will involve a materials list, a tools list and a set of sequential instructions.
Materials List
A clean brick or some other heavy rectangular object and enough craft or other heavy weight paper to cover it. See Figure 2.
The number of koana you will need depend on the size of the brick you use. We’ll use 1/2″ wide koana. We describe how to measure the lengths of the vertical and horizontal koana in the Cleaning and Covering the Brick section below in Figures 3 and 4.
Tools List
A tool for softening the koana before weaving
Either a pin stripper or a box stripper to cut the koana from the lauhala
A spray bottle ( a small one from the travel section is good )
1/2″ wide painter’s tape
A dozen or so ~2 inch long bobby pins
Several 1/2 inch wide strips of old T-shirt material about 2 feet long
About 4 feet of cotton string – the type used to wrap baking goods boxes is the right size if you can get it.
A tool to help push one end of the koana underneath another
A tape measure or 12 inch ruler
We have described most of these tools in earlier projects ( First Project ) as well.
Covering the Brick; Estimating Koana Lengths and Numbers
Choose a brick or some other rectangular object of sufficient weight but which you can easily lift and later move around the floor with your foot.
Cover the brick with craft or some other heavy weight paper. Having this clean surface will protect the underside of the woven koana from wear and tear.
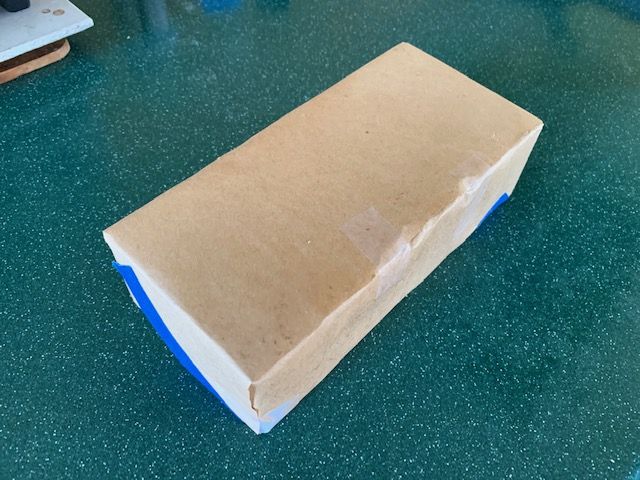 Figure 2. Covered brick ready for measuring and weaving
Figure 3 shows the labels (length, width and depth) for this brick for future reference.
First let’s estimate the koana lengths we’ll need to make the mat that will initially drape down the length of the brick and finish at the other end. We need to measure both the width and the length of the brick. In this case the width is 3 1/2 inches and the length is 7 1/2 inches. Again we need to add 3 inches on each end for weaving in. The koana will go completely around the brick in the length direction. So the total koana length (3 1/2 + 3 1/2 + 7 1/2 + 7 1/2 + 3 + 3) equals 28 inches for this brick.
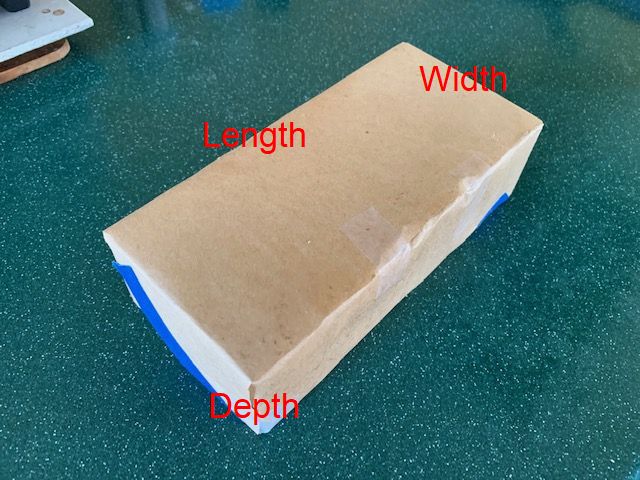 Figure 3. Labeling the brick for making measurements
Now let’s estimate the koana lengths for going around the brick. We need to measure both the width of the brick and the depth of the brick. In this case the width is 3 1/2 inches and the depth is ~2 1/2 inches. Again we need to add 3 inches on each end for weaving in. So the total length (3 1/2 + 3 1/2 +2 1/2 + 2 1/2 + 3 + 3) equals 18 inches for this brick.
But how many koana for the vertical koana and how many for the horizontal koana for this brick?
The number of koana to make our beginning mat is the sum of the width and the depth divided by the width of the koana. In this case, 3 1/2 + 2 1/2 divided by 1/2 equals 12 koana.
The number of koana wrapping around the brick is the length of the brick (7 1/2 inches) divided by the width of the koana (1/2) equals 15 koana.
In summary, for this brick we have 15 koana 18 inches long for wrapping around the brick and 22 koana 28 inches long for draping down the brick for this brick.
Weaving the Mat to Fit one End of the Brick
We are now going to weave a rectangle that will be 3 1/2 inches wide and 2 1/2 inches long. As we have done before, we’ll put down the painter’s tape sticky side up with the ends folded down. To save space, I ask the reader to refer to those instructions for mat weaving portion of this project. The length of the sticky side up should be about an inch longer than the depth of the mat – so 3 1/2 inches for this brick. The mat will be 5 koana wide and 7 koana long.
Fold all of the vertical koana in half and put the crease on the bottom edge of the tape with the underside of the koana facing upwards. When finished, tape with a longer piece of painter’s tape with sticky side down to cover the koana and the earlier painter’s tape. Weave in half of the horizontal koana and pin all four corners. Cut and remove the painter’s tape. Now turn the mat over. Your mat should look like Figure 4 with at least 13 inches of koana sticking out all around. Now we’re ready to begin wrapping the brick.
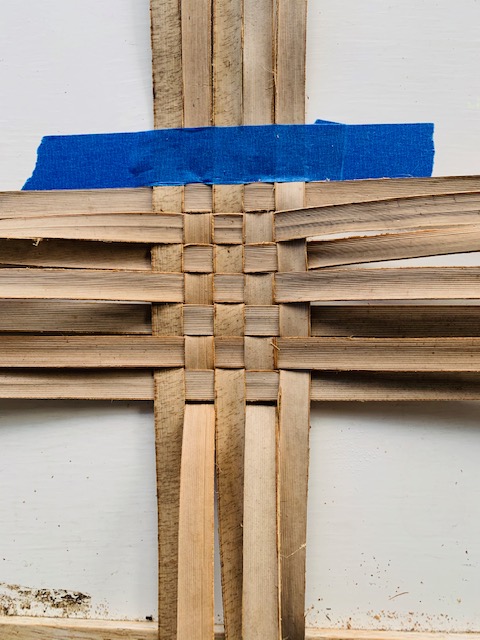 Figure 4. The woven mat which we’ll fix to the end of the brick.
Fixing the Mat to the Brick; Beginning to Weave Down the Brick
We’re going to tie the mat we just made to one end of the brick so that it doesn’t move around. We’ll need three pieces of cotton string about 30 inches long. Lay two of them down about 2 inches apart and one at right angles to them going down their middle. It will look like this: —–!—–!—– more or less. Now put the mat on top of the strings so that the strings are evenly spaced on the mat. The good side of the mat should be facing down so that it will be on the outside of the door stop.
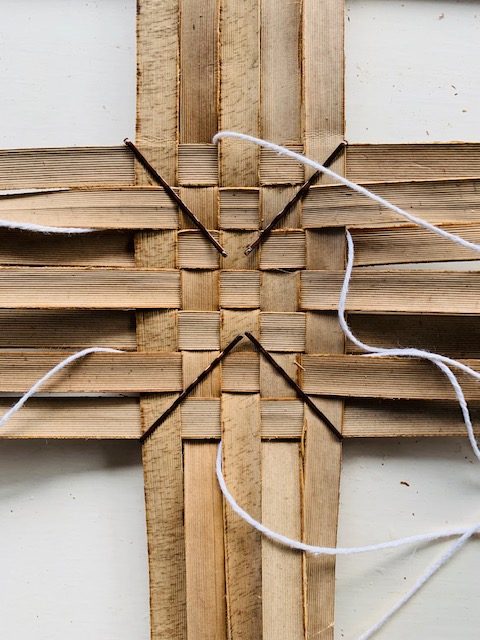 Figure 5. Mat placed on top of the cotton strings
Now remove the bobby pins and place the brick on top of the mat. Bring each string between the same two koana and tie it firmly to the other end of the brick with a bow knot. Weaving can begin.
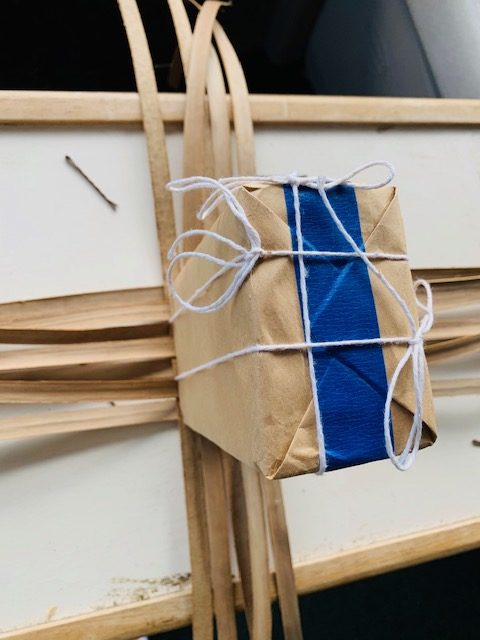 Figure 6. The mat is now tied firmly in place to one end of the brick.
At this point the end of the brick is going to look a little difficult with respect to how we’re going to begin weaving so we need to simplify the process a little.
First of all, moisten all of the undersides of the koana with the spray bottle and wait about five minutes for the water to work its way in. Then fold the koana on three adjacent sides of the brick against the brick and tie them in place about halfway down the brick with one of your T-shirt pieces. See Figure 7.
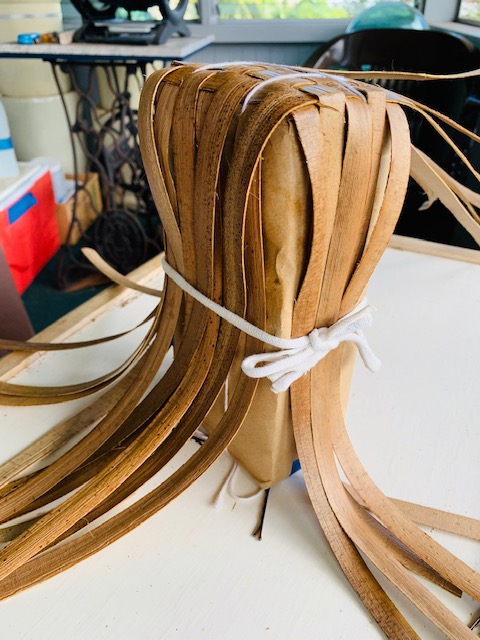 Figure 7. Koana on three of the four sides tied in place.
Now we’re going to weave five rows of koana around the brick beginning with one side. Ideally you should stagger the ends so that when you finish a row, there won’t be overlap in all the same section of the brick.
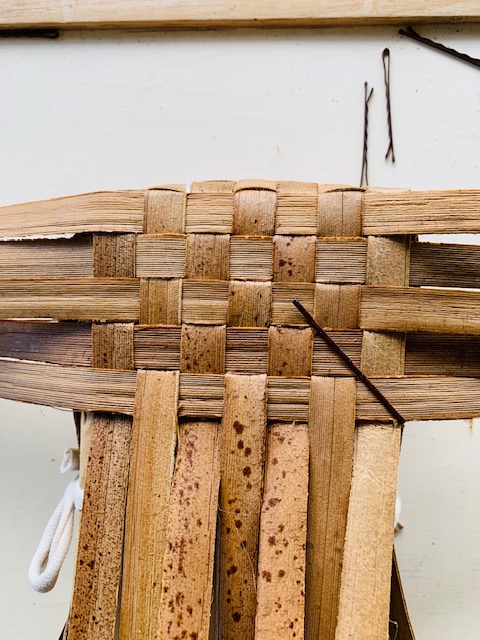 Figure 8. Five rows of koana woven in place on one side of the brick
Add a bobby pin to the lower right corner of the woven section and un-do the T-shirt strip. Roll the brick over while tucking the koana under so that the side you’ve just woven is to the right and the loose koana to the right are now underneath the brick. Now weave this new, un-woven side. Repeat this process until you have woven completely around the brick, adding bobby pins to the lower right corner of each face of the mat.
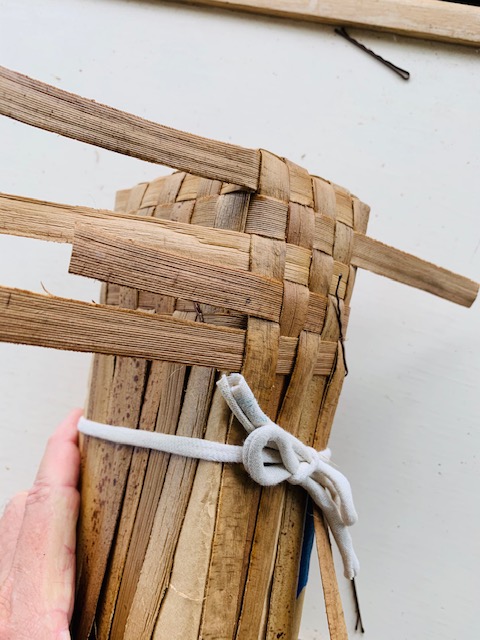 Figure 9. The first five rows woven in
Hold the un-woven long koana in place with the T-shirt strip. Shape and tuck the ends of the koana in.
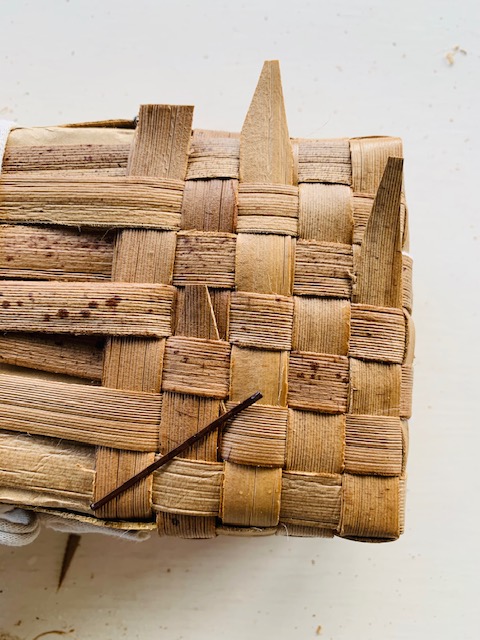 Figure 10. Shape the koana and tuck them in
Now move the T-shirt strip above to the woven area and tie it in place to hold the weave firmly against the brick. Rubber bands can substitute for this strip if you prefer. Tie another T-shirt strip around 3 of the four sides as you did before, this time with a new width facing you so that the woven koana will be in a different place again. See Figure 11.
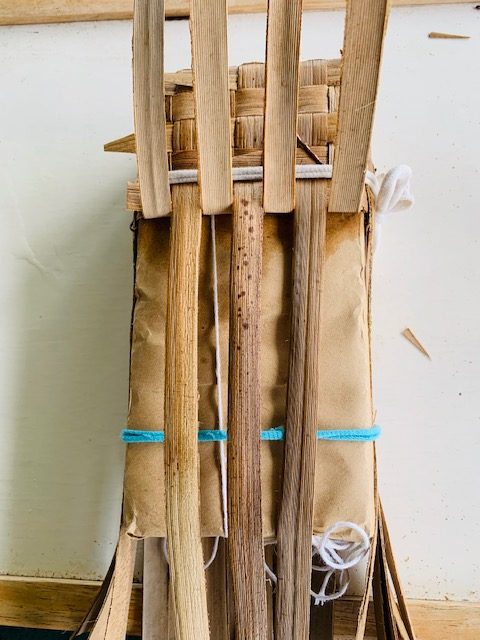 Figure 11. The woven section is held in place with a T-shirt strip and three new sections tied down with the blue strip
Now take another five of the koana that go around the brick and moisten them. Continue weaving as before and tuck in the ends when you have finished. Then hold the second set of weaves in place with another strip of T-shirt. At this point you can untie the strings, pull them out and save them for another door stop.
 Figure 12. Two sets of weaves finished and ready for the last set.
We now want to measure the distance between the bottom edge of the last woven in koana and the edge of the brick. The reason for this is that we never really know how tight the weave will be by the time we get to the end of the brick. I measured 2 inches for this distance. That means that I’ll need four more koana to finish up. At this point the koana running the length of the brick are reasonably well behaved. So let’s just weave the remainder of the koana going around the brick, one face at a time. As usual, please place a bobby pin in the lower right corner when you’ve finished each face. The trim to points the loose ends and weave them in as before. When that’s done we’re ready to close the end of the weaving.
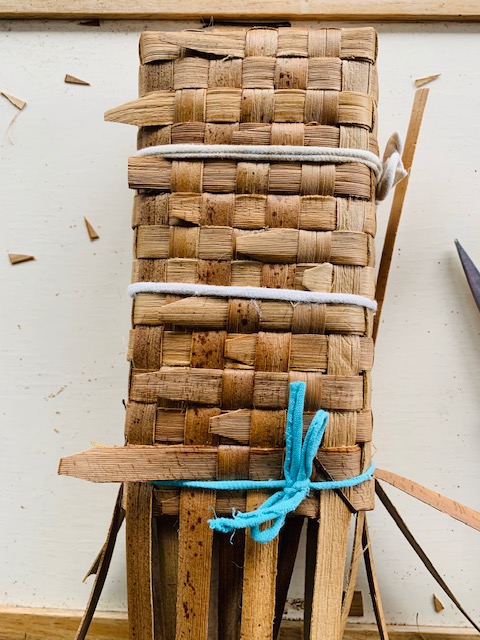 Figure 13. The last set of koana has been woven in and we’re ready to close the end.
Closing the End of the Brick
I’m sure that there are many ways of closing the end of the brick. Here is just one way that seemed fairly simple to me. Let’s look at the koana on the “depth” side of the brick in Figure 14.
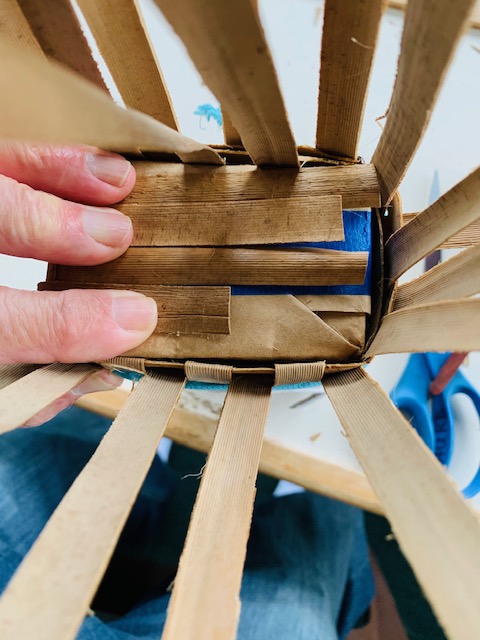 Figure 14. The koana with short ends are being folded flat over the end of the brick.
I’ve taken the short ones and just folded them flat on the end of the brick. Now take their opposites, cut pointed tips and weave them into the opposite side that they originate from. At this point you should have four (or more depending on your brick) parallel strips of koana and you’re ready to weave in the koana on the “width” sides of the brick.
Look at the opposing pair of koana at the edge of the brick that haven’t been woven in yet. One will be shorter than the other. Make a pointed tip on both and weave the shorter one into the mat, then trim the end flush with the edge. Now weave the other koana on top of the first one going over the edge and into the other side. Figure 15 shows this having been done for two rows.
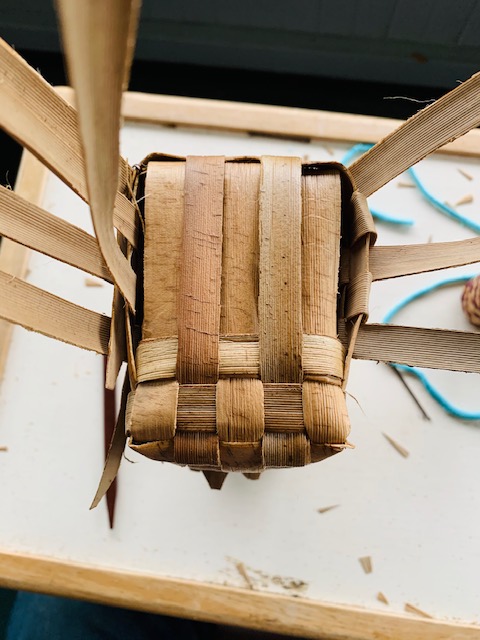 Figure 15. Two rows of koana have been woven into the mat.
As you weave along the “width” side, it’s very important to continue to push the koana back toward the beginning edge. This is because we aren’t doing the folding and pulling of the koana that we normally do to obtain a tight weave. Be sure to keep the koana damp to maintain their flexibility as well.
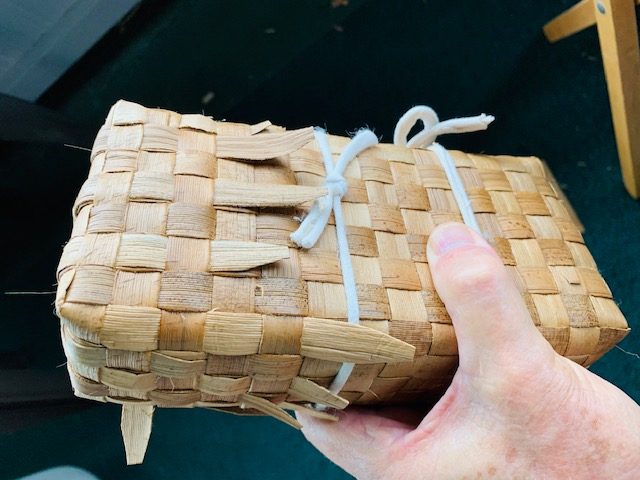 Figure 16. The door stop nearly finished and ready for trimming
Figure 16 shows all of the koana from the “depth” and “width” sides woven in and ready for trimming. The last couple of koana may have been a bit of a struggle but by going slowly and persevering things will work out. The koana are surprisingly plastic in their behavior. Gentle but firm kneading and tugging will move the koana closer to where you want them to be.
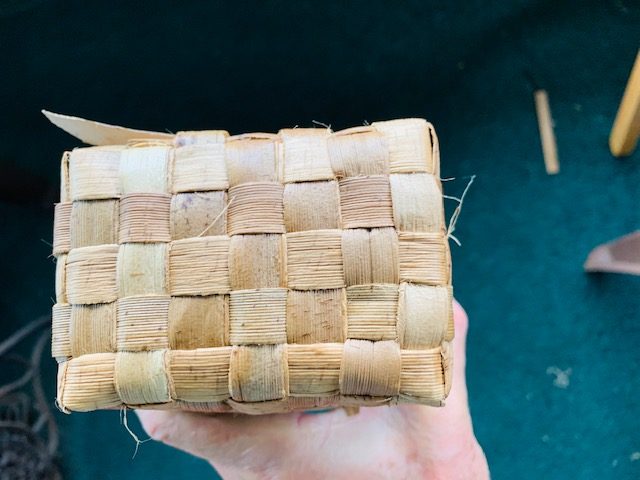 Figure 17. A view of the finished end of the door stop
Figure 17 shows a view of the finished end of the door stop. The “grass” needs a little trimming but we’re almost there.
Figure 18. The finished door stop ready to go
At last, we’re all trimmed and finished. Ready for the next one?