Introduction
This is our most complex project thus far but it builds on the experience we got earlier on. In two earlier projects, we learned how to make a small basket and then how to make a sleeve for a drinking glass. We also learned an inexpensive way on how to make an ipu or form for a hat.
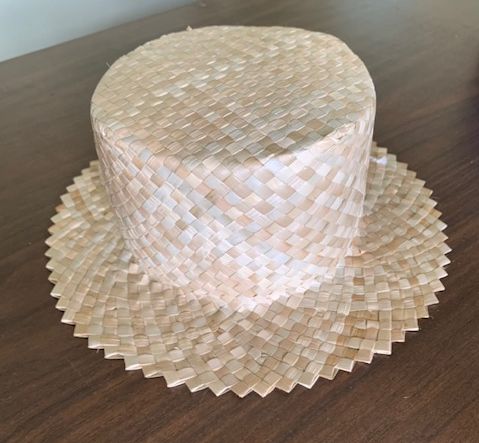 Figure 1. Shows approximately what the finished hat will look like.
In this tutorial weʻre going to make a flat-topped hat with a small, flat brim, hopefully looking a little like a “boater or skimmer” . The approach also similar to the four-cornered Maori potae. But you could also call it our “drinking glass” hat. Here is the sequence of steps in the process:
- Measure the size needed for the ipu and construct
- Using the size of the ipu, estimate the number and length of koana needed; using a stripper, cut the koana.
- Make a square piko/pa the width of the top of the ipu and tie to the ipu with string.
- Begin the basket corner weaving process for all four sides of the piko/pa then continue weaving down the sides of the ipu.
- Insert the string into the weave where the sides and brim meet.
- Weave the brim to the width desired, adding in koana using one of several approaches.
- Finish the edge of the brim by weaving the koana back into the brim.
- Iron the brim and sew in the sweatband.
Making the Ipu
At this point the reader should refer back to the section on how to make an ipu or simple hat form from PVC. Figures 1, 2 and 3 show the ipu that we’ll use for this tutorial. The ipu is about 7 inches wide and 3 1/4 inches high. The circumference is about 22 inches.
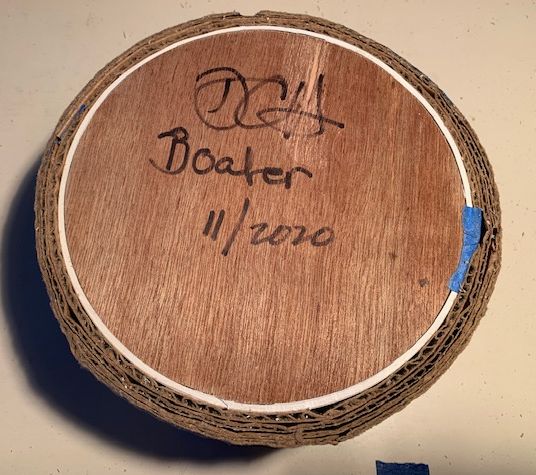 Figure 2. Shows the top of the ipu. Boater refers to the hat shape when finished.
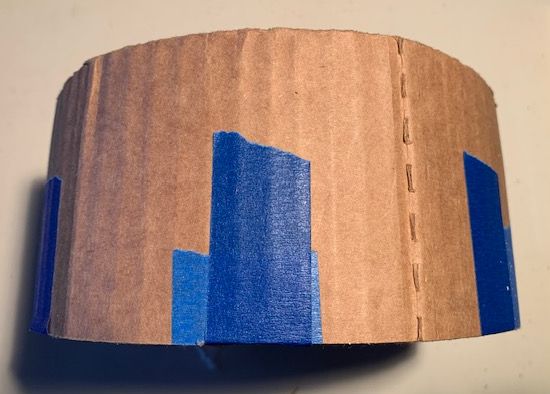 Figure 3. Shows the side of the ipu. Nothing fancy here…
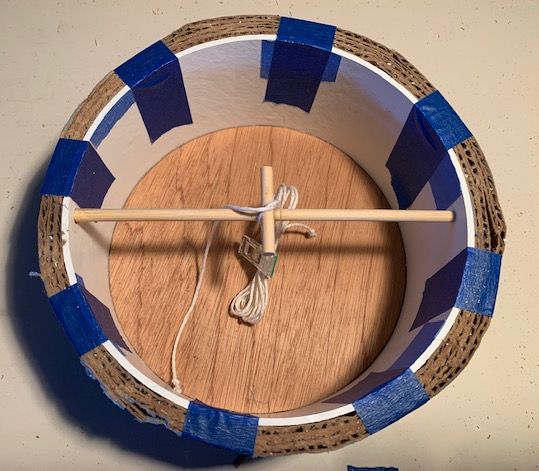 Figure 4. Shows the underside of the ipu.
The cross members act as a base for the string which will tie the piko/pa portion of the hat to the ipu to reduce slipping. There are just enough pieces of blue tape to stop the cardboard from moving around. We don’t want to completely cover the edges because later on we’ll need to fasten the inside of the hat brim to the ipu.
Number and Length of Koana Needed (for this hat)
The distance across the top of the ipu is about 7 inches. The height of the ipu is about 3 1/4 inches. But since the koana are woven diagonally across the side of the hat, we’ll need about 1.5 times the 3 1/4 inch measurement for each side ( 2 x 3 1/4 x 1.5 = 9 3/4 inches. Let’s round up to 10 inches ). The width of the brim will be 2 inches. Again by the same reasoning ( 2 x 2 x 1.5 = 6 inches ). I usually add 3 inches to each end of the koana so that there will be lots of length to finish the edges of the brim. So brim edge length is ( 3 + 3 = 6 inches ). The total for hat top plus sides plus brim plus edges is ( 7 + 10 + 6 + 6 = 29 inches ). I call this type of hat an “iwilei” hat. Iwilei is a Hawaiian measurement unit which is the distance from your chin to the tips of your outstretched arm fingers ~ a yard or less.
We are going to strip the koana into 1/4″ wide koana with lengths of 29 inches or a little more. The width of the top of the ipu is 7 inches. So we’ll need 7 / 1/4 = 28 koana to go across one way and another 28 to go across in the other direction, making 56 koana altogether for the top and sides.
When we get to the brim we’ll need to add more koana because the brim diameter continues to increase as we go further out. To get a flat brim, I’ve found that we need to add a pair of koana every fifth maka. There will be about 55 maka at the base of the sides, so 55 / 5 = 11 pairs of koana will be needed for the first row of additions. We’ll probably make two sets of additions total so 22 pairs of koana total. If we use the bent koana approach for adding in, 22 total koana will be needed.
Using the same logic that it’s easier to cut something shorter than longer, although the total needed will be ( 56 + 22 = 78 ) 78, for this hat I’ll strip 100 koana.
Making the Piko/Pa and Tying it to the Ipu
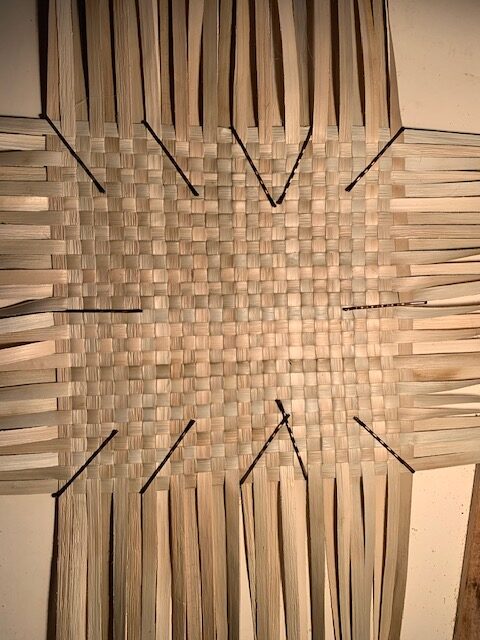 Figure 5. The finished piko/pa
Figure 5 shows the finished piko/pa. It ended being 26 x 26 koana rather than 28 x 28, which is usually how these things go. The edges of the piko/pa hang a little over the edge of the ipu but that’s better than being too small. A little overhang will make it easier to round off the four corners.
 Figure 6. Closeup of the weave
Figure 6 gives you a sense of how tight the weave should be for the piko/pa. If you’re having problems making the weave tight, please consider looking at Project 1, Figures 6 and 7.
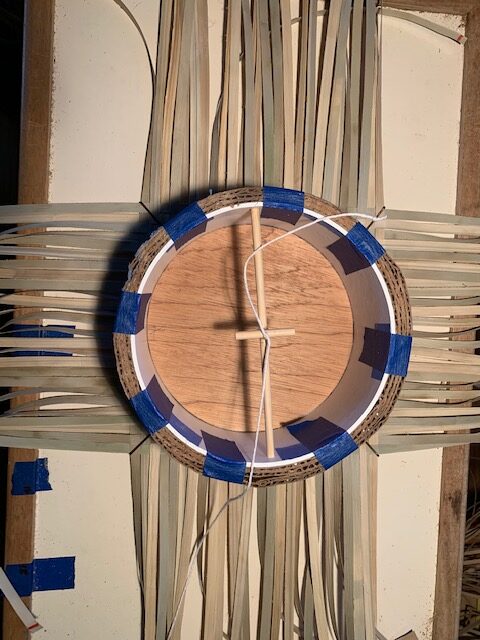 Figure 7. The ipu is centered on the underside of the piko/pa
We begin by centering the ipu on the underside of the piko/pa. Then we put the string between two koana in the center of one of the sides.
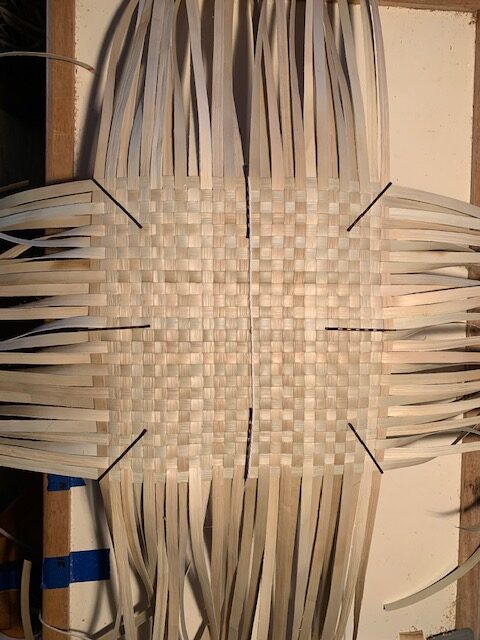 Figure 8. The string has crossed over the piko/pa from the center of one edge to the next
Now cross over the top of the piko/pa, put the string between the same pair of koana and continue to the ipu.
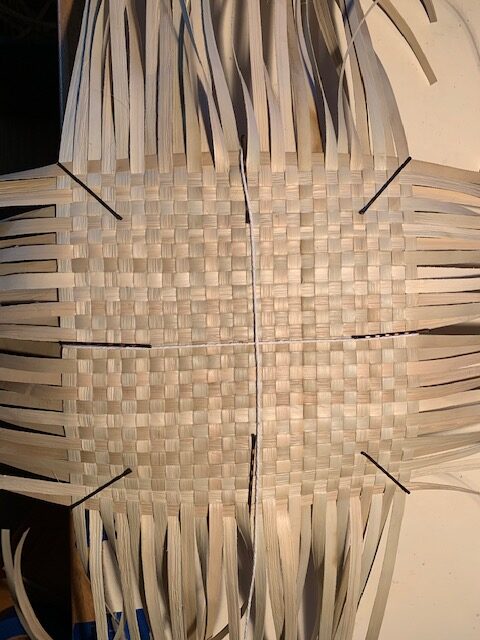 Figure 9. The string has crossed over the piko/pa in both directions.
Loop the string under the cross piece of the ipu, turn 90 degrees and repeat the process.
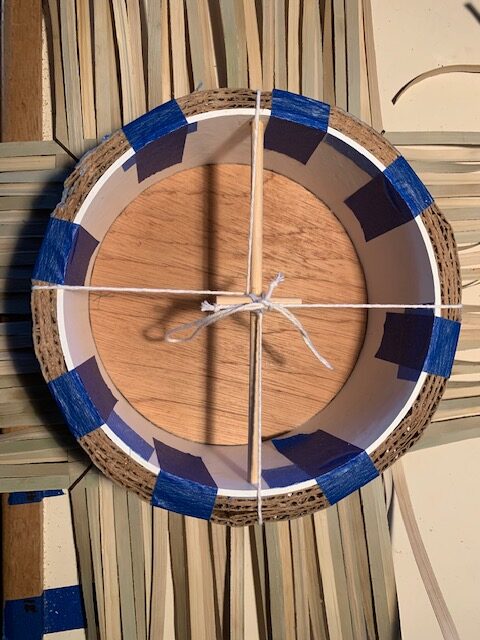 Figure 10. The string has now crossed the piko/pa in both directions.
Finish the tying process by first tying an overhand knot in the middle of the cross piece and then finishing up with a double bow knot.
Weaving Down the Sides of the Ipu
 Figure 11. Beginning the first side weave.
As you did in the basket, weave up for five or six koana on each side of the string. Hold in place with two bobby pins.
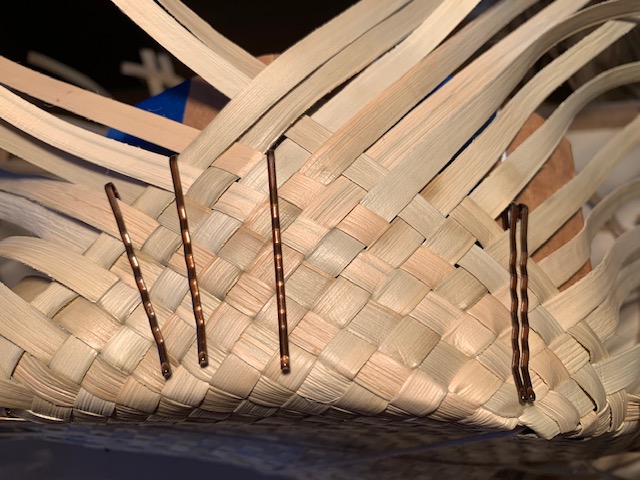 Figure 12. Now weave to the left all the way to the “corner”.
From the double bobby pins weave all the way to the right “corner”, then continue weaving toward the next string.
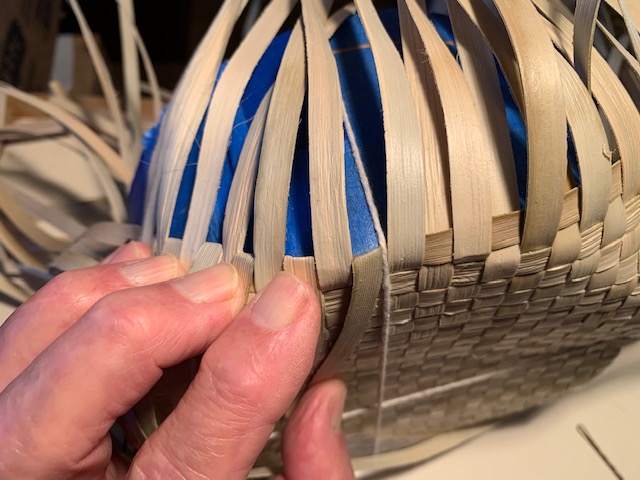 Figure 13. Showing the point at which koana on either side of the string change directions
As you are weaving from left to right, it’s very important to secure the outermost koana. It’s the horizontal one that’s under my fingertips on the left in Figure 13.
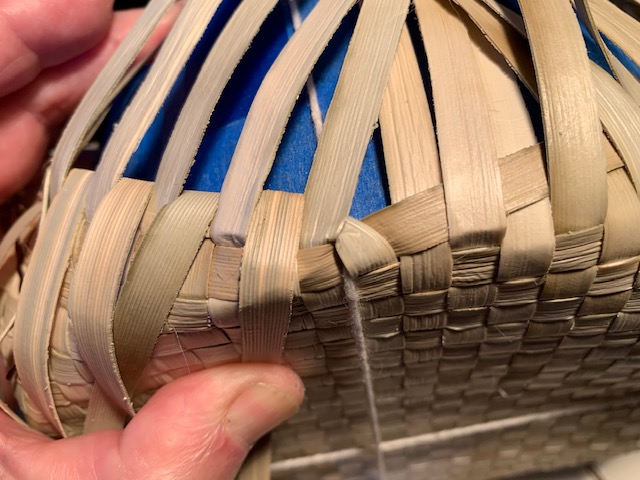 Figure 14. Koana weaving orientations at the string
Figure 14 shows that koana to the right of the string must turn left and those on the left of the string must turn right. Continue weaving until you have woven all the way around.
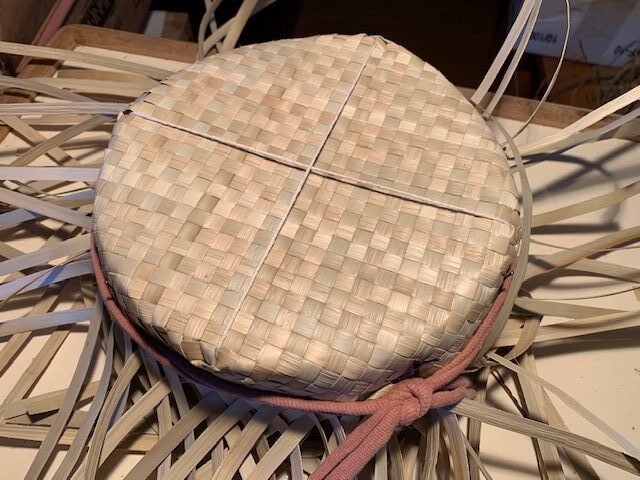 Figure 15. A T-shirt strip holding the sides against the ipu.
It’s necessary to have a way of holding the woven lauhala against the sides of the ipu as you weave down. I use strips of T-shirt material. They’re stretchy so you can apply just as much pressure as you wish. Now is the time to firm up all of the koana as they pass over the upper edge of the ipu. Begin with koana which are facing in one direction and gently but firmly pull them to remove the excess slack. This especially important in the area that the string passes over the edge of the ipu. When you have finished with that repeat the procedure with all the koana that are facing in the opposite direction. You should be able to see a clear difference in how neatly the koana are arranged as they pass over the ipu edge at this point.
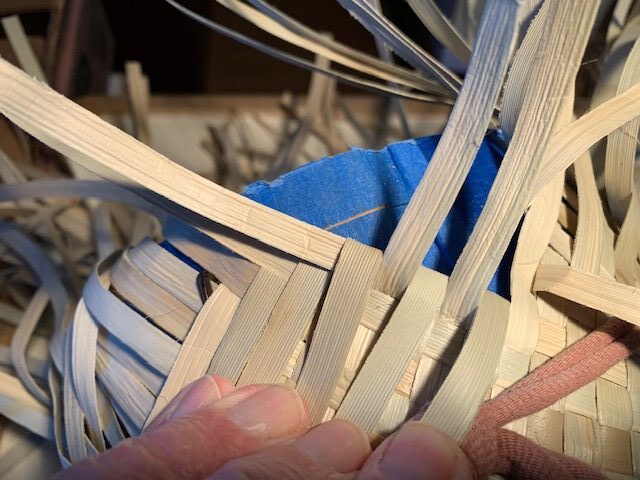 Figure 16. The beginning of the first set of additions.
I usually weave 3-4 rows at a time as I’m going down the sides of the ipu. In this case you shouldn’t be surprised if the number of koana that you need to work with changes as you go around the ipu. That would be because there were different numbers of koana that were woven as you made your first circle. The main thing at this point is that the top edge is consistent and that you end up with a consistent edge.
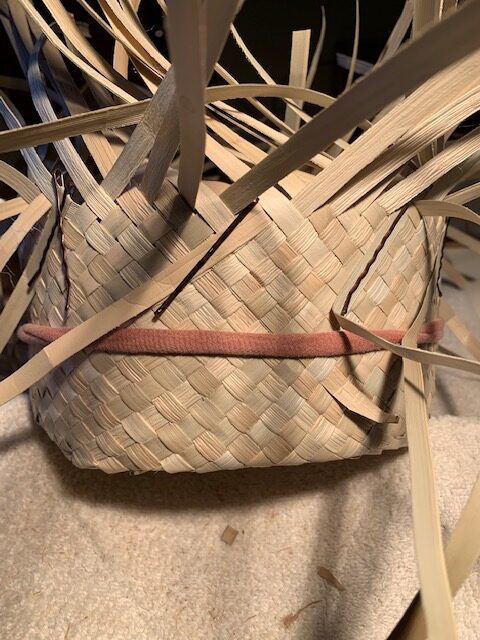 Figure 17. Continue weaving down the sides until just past the edge of the ipu.
It’s better to have the edge of the weaving to be a little long ( and stick out over the edges ) than too short. I also mark every fifth koana with a bobby pin. Because that’s the frequency that we’re going to add koana in so that we can have a flat brim, it’s an easy way to keep track of how many koana to put aside for that purpose.
Weaving in the String at the Bottom of the Sides
At this point we’re going to do a couple of things. First, we undo the double bow knot of the string and cut the small knot off. The little knot was there to keep the string from fraying, but it will be easier to pull the string through if it’s not there. So please pull the string completely out, bundle it up and hold it to the cross piece with a little clip or something to keep it out of the way.
Then slide the hat halfway up the form, keeping the T-shirt material in place for the moment. At this point you’ll need two pieces of T-shirt material.
Fold all of the koana which go from lower left to upper right down and hold them in place with one of the pieces of T-shirt material. Fold all of the koana which go from lower right to upper left up and hold them in place with T-shirt material. See Figure 18.
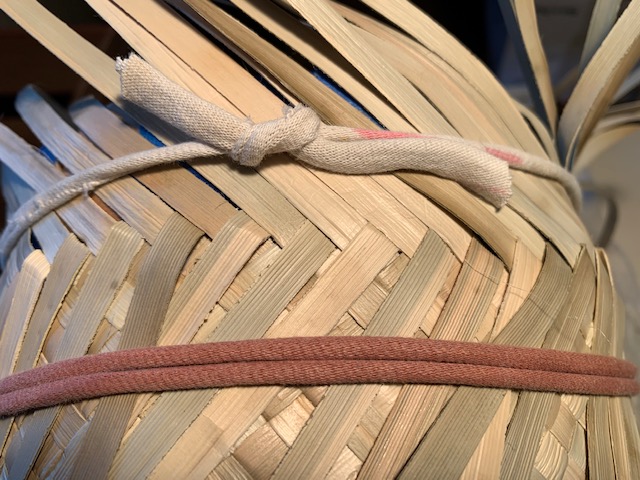 Figure 18. Two T-shirt ties holding the koana apart for string placement.
Figure 19 shows the string in place with a double bow. At this point it’s useful to hold the string in place with bobby pins every 10 maka or so.
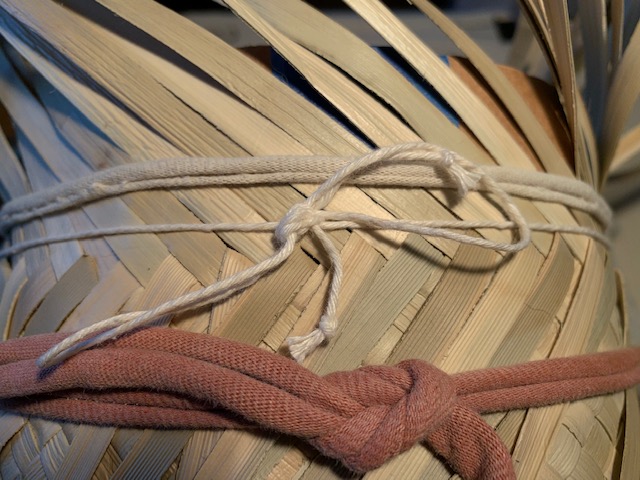 Figure 19. The string in place.
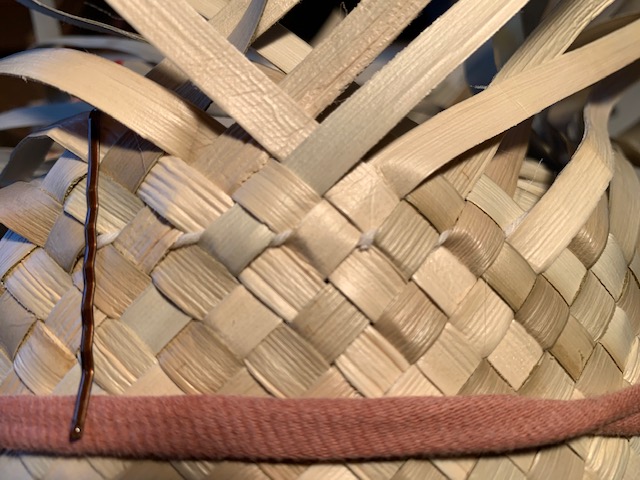 Figure 20. A double row of weaves holding the string in place.
Weaving the Brim of the Hat
Before I begin, I usually bobby pin the string to the edge of the ipu. That’s one reason why we didn’t tape over all of the corrugated cardboard – it’s easier to put in the bobby pins.
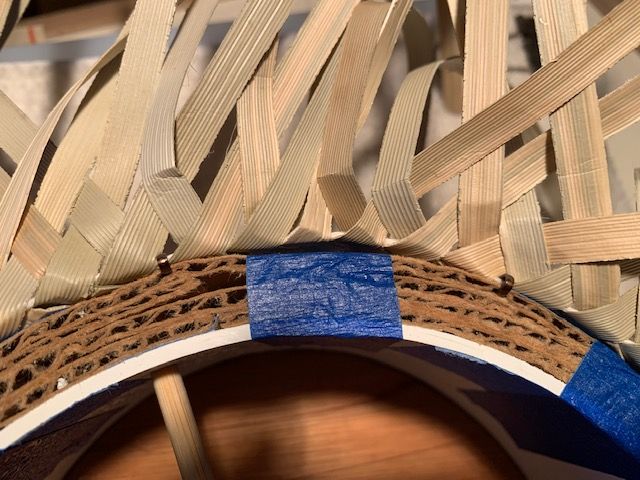 Figure 21. Shows two of the many bobby pins holding the string to the ipu.
I begin the first row of the brim with three open koana going from lower left to upper right as shown in Figure 22 below.
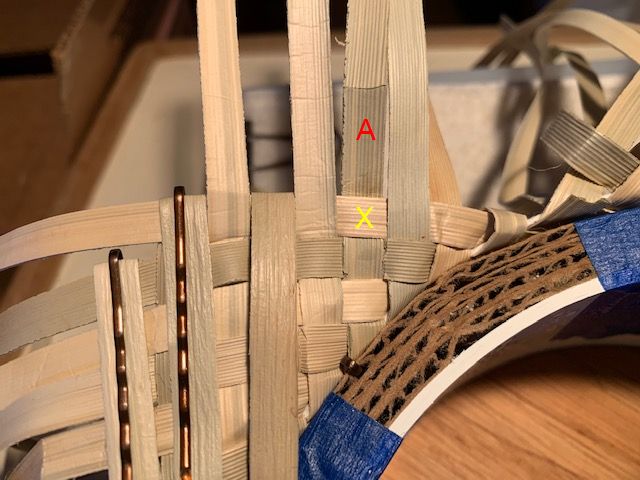 Figure 22. Getting ready to put in the first add-in.
Weavers may use any koana add-in they choose at this point. I use the one below because it’s easier for me to do add-ins in the succeeding rows. Also I don’t mind the add-in being so visible because I like the pattern it makes on the underside of the brim. In Figure 22 above, two koana are marked. The maka with the yellow X shows where the future bent koana will be inserted. The koana with the red A will be folded down after the bent koana has been folded in.
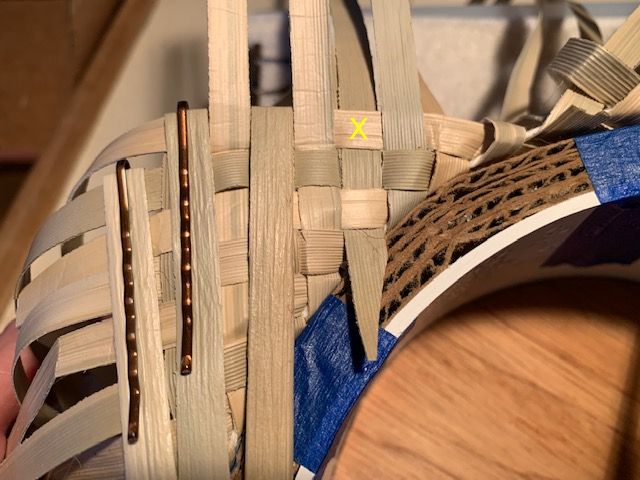 Figure 23. The future bent koana is inserted under two maka.
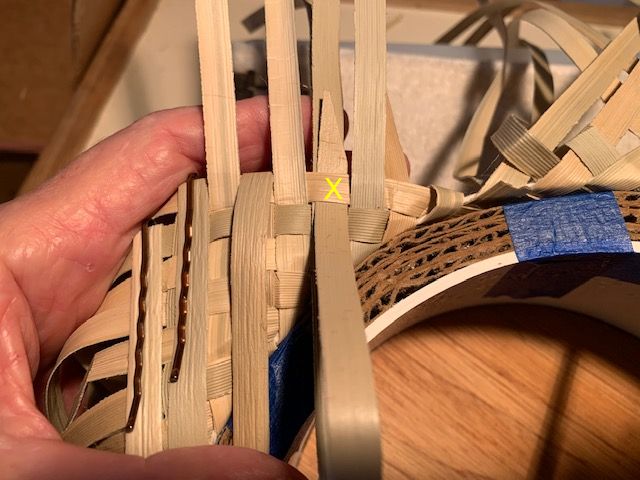 Figure 24. The bent koana is folded back and inserted under the upper maka marked with the yellow X.
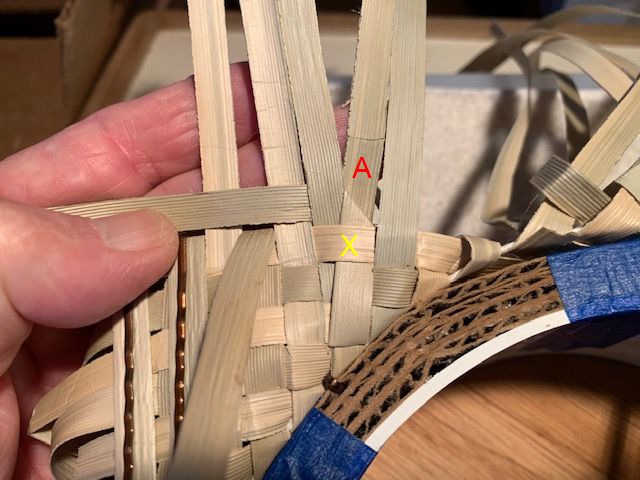 Figure 25. The bent koana is now folded under itself
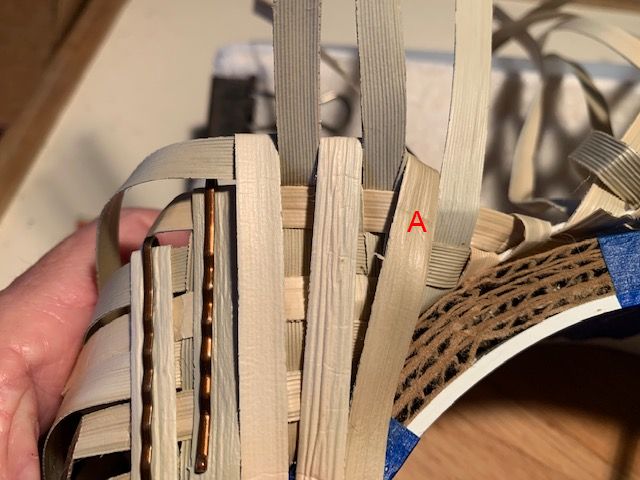 Figure 26. The bent koana is now woven in and the koana marked with the red A folded down.
Continue weaving until you are five maka from the first add-in. Now repeat the process of adding in as shown above. I usually mark every fifth add-in with a bobby pin as shown below. It helps me keep track of things.
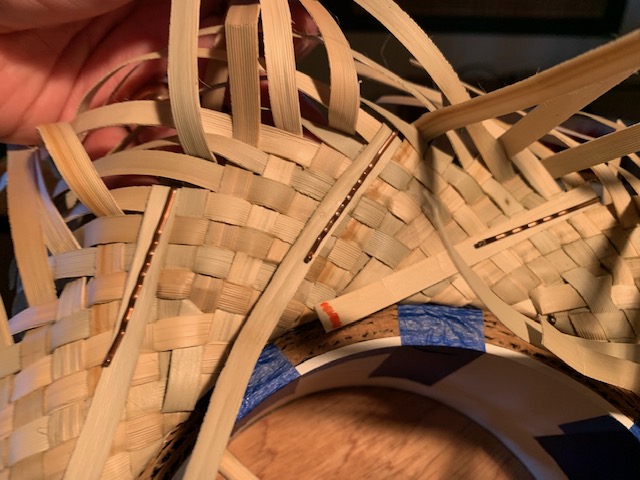 Figure 26. Showing add-ins marked every fifth one.
For this hat I finished this row and then added two more rows to get the ~2 inch brim width I wanted.
Finishing the Edge of the Brim
At this point you have several choices for finishing the brim based on our previous tutorials:
I went with a simple nihoniho edge with both directions of koana woven under two maka. See Figure 27 below.
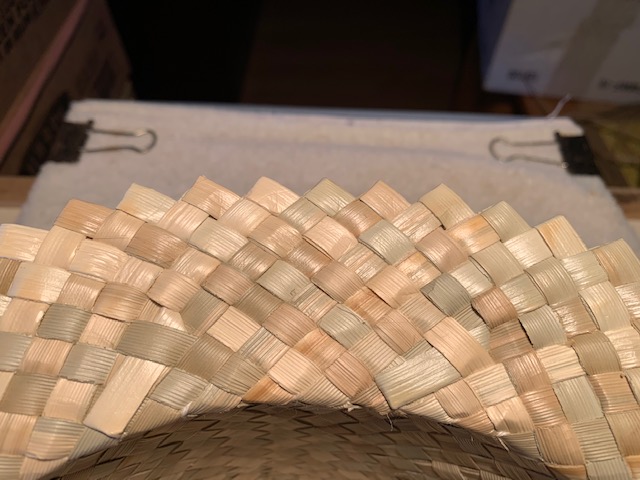 Figure 27. Shows the underside of the nihoniho edge after weaving, trimming and ironing.
I hope that this has been a fun project for you. If there are sections which aren’t clear enough, please contact me and I’ll try to help.