Introduction
Earlier we discussed using brown lauhala from the ground or freshly harvested from the tree. Freshly fallen brown leaves can be and are frequently used but if the weather is too dry/wet or if one’s timing for finding proper leaves isn’t right then only a few leaves can be found on the ground or picked from the tree – if any.
According to Carol Zakahi in a 2011 Jan-Feb issue of Keola Magazine, when she was growing up, a number of local weavers of Japanese descent boiled green leaves to bleach them before drying and weaving. Each person had their own recipe for doing the boiling.
So as an alternative to using brown lauhala let’s learn how to prepare green leaves for weaving. Green leaves will generally be more available throughout the year, at least from pū hala which aren’t too tall to harvest from. This project will take time (weeks) and patience. Sunny summer months make for faster drying, but the lau will eventually dry at all times of the year.
Bird et al. (1982) suggest that green leaves can be de-thorned, flattened and dried in the sun. They also note that although some workers boil their lau, others do not. No mention is made of the fact that earlier Hawaiians used to wilt the leaves over a low, smokeless fire in order to soften them nor that a number of Pacific cultures soak their lau in seawater for a week or so to condition them. Many are the paths to a workable product…
Our First Approach – Boiling the Lauhala
From looking at many YouTube videos from Polynesia, Micronesia and Southeast Asia (including India), it generally appears that after harvesting, de-thorning and some sun drying, all green lauhala were treated early on either 1) with heat from a low fire until the leaves softened or 2) boiling until the leaves changed color.
Let’s try the boiling approach first because it’s easy to notice color change. Some of the YouTube examples added materials such as lemons and/or soap to the boiling solution. But we’re not going to follow that approach because we understand that in the long run, chemical additives weaken the lauhala.
Several years ago I planted several different varieties of pandanus. Two were of sprouted seeds from Kona which had thorns and one was from a young branch with roots which was thornless and color variegated. I chose the thornless one for this first trial.
Because I hadn’t deliberately pruned the thornless one regularly, there were many separate branches with leaves both large and small. I chose two of the larger branches, removed them from the group and used all but the center-most leaves. Altogether there were a little less than a hundred lau to process.
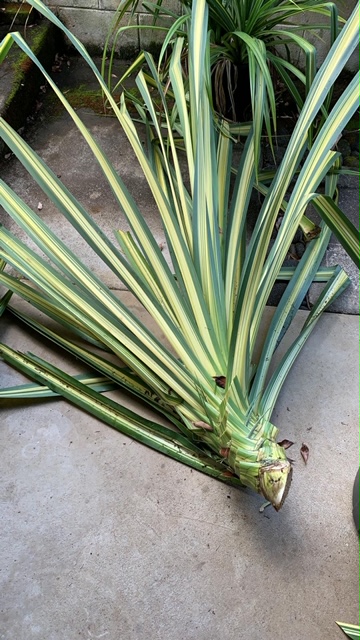 Cut off limb from variegated hala Cut off limb from variegated hala |
 Lau cut at attachment point to limb Lau cut at attachment point to limb |
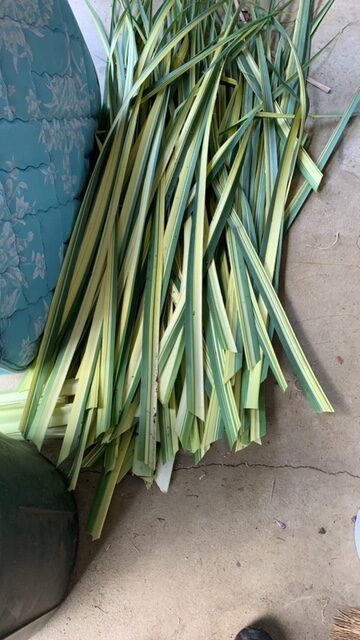
After splitting the lau in half lengthwise, I rolled the leaves into bundles of six lau each and held the bundle together with narrow strips of T-shirt material. All the lau are facing in the same direction relative to one another. In retrospect, I should have removed the center portion even though it was thornless because when the lau dried out, the stiff center portion was hard enough to cut skin.
 Top view of six lau packets Top view of six lau packets |
 Side view of several packets waiting for boiling Side view of several packets waiting for boiling |
It turns out that Walmart has lightweight two gallon stainless pots with lids for less than $8 at the time of this writing. These pots are about 8 inches across and 9 inches high and suitable for small scale boiling operations.
Using an old plastic cutting board, I cut a circular piece about 1/2″ smaller diameter than the inside of the pot and put in a large eye bolt for steadying and removing this cover. I’m using an outdoor propane cooking setup to heat the water but since there aren’t any noxious fumes from this operation, cooking could just as well be done indoors on a stove.
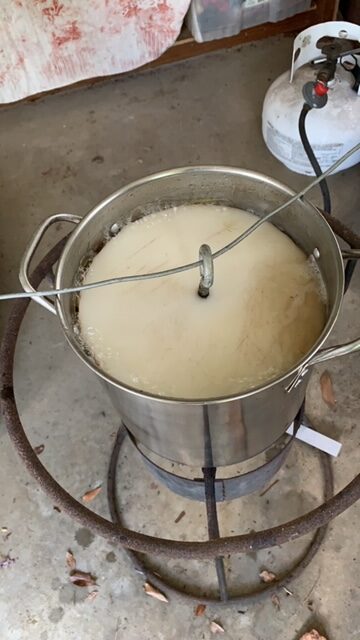 Stainless steel 2 gallon pot with plastic lid in place, water boiling
The wire running across the pot supports the lid, letting it float on the water surface just above the lau. Although I cooked the rolls of leaves one at a time the first time through, the next time I was able to fit three rolls in with no problems.
After putting the lau into the boiling water and putting the plastic lid on, I waited until boiling started again and let it go for 8-10 minutes. For these lau, that was enough to change their color. The next time through I boiled the leaves for ~ 20 minutes just to make sure that the inner portions of the roll were heated all the way through.
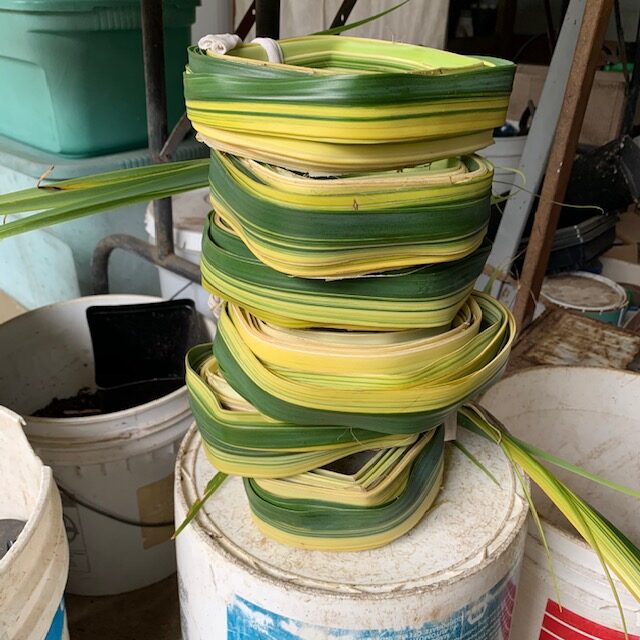
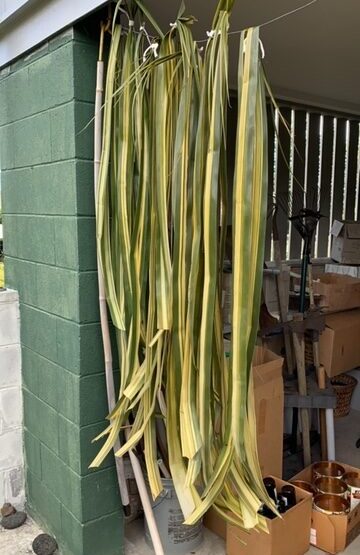 The lau just after boiling The lau just after boiling |
 The lau after one day, now partially dried The lau after one day, now partially dried |
I hung the lau to dry out from the boiling process for a day and then rolled them into batons as done in Niue (Cole, Shari and Kulatea, Vitolia, Cultural Aspects of Niue – Pandanus Weaving, Institute of Pacific Studies, University of the South Pacific, Suva, Fiji, 1996) and several other cultures. They note that from this point on, the lau should not become wet again – that is, rained on.
The lau tend to curl and fold inwards toward the under surface. Because the outer surface has some sort of waxy layer water from the inner part of the lau is released more quickly. So rolling the lauhala into batons reduces the curling of the lau as they are drying. The Cole and Kulatea book shows the outer surface on the outside of the batons, but when I tried both ways, having the inner surface facing out seemed to dry the lau faster.
Since many cultures donʻt use the baton method to reduce leaf curling, the reader should feel free to experiment and try full drying without doing this step.
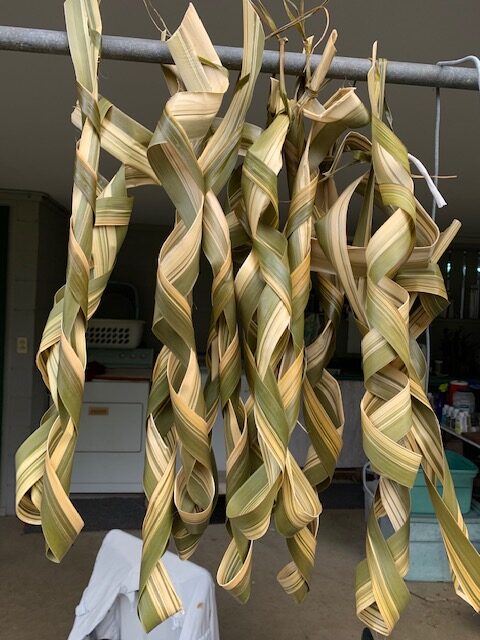 Generally following the instructions in Cole and Kulatea, I rolled the lau into batons
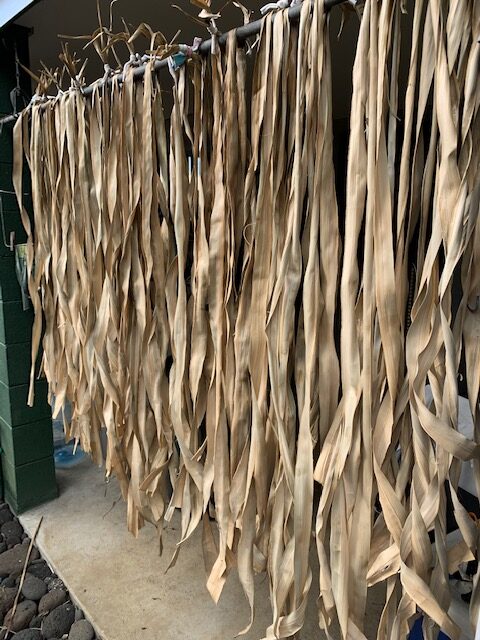
After another three days, I unrolled the batons, smoothed them out and rehung them in groups of four lau to dry further. Following earlier methods, I mostly did this unrolling and smoothing process early in the day when the leaves were more pliable because of overnight lower temperatures and higher humidity. If you wait until the lau have been sitting in the sun all day to do the unrolling, the lau can be brittle and less easily worked.
In the figure below, the lauhala below are shaded in the morning and have full sun in the afternoon, making for slow drying.
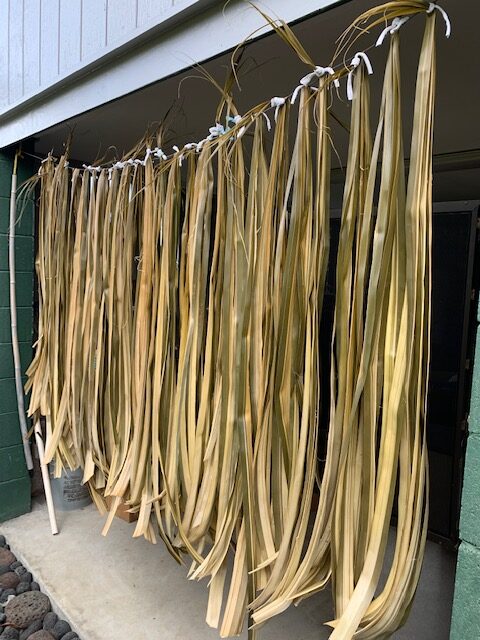
 After one week, the lau are noticeably lighter in color and generally remaining flat
Remarkably in Hilo, there are days when it’s sunny nearly all day long. At such times it would be convenient to take all the lauhala out and hang them somewhere to dry out more. In my yard I have a cyclone fence which is nearly always at right angles to whatever wind is blowing and is in full sun much of the time.
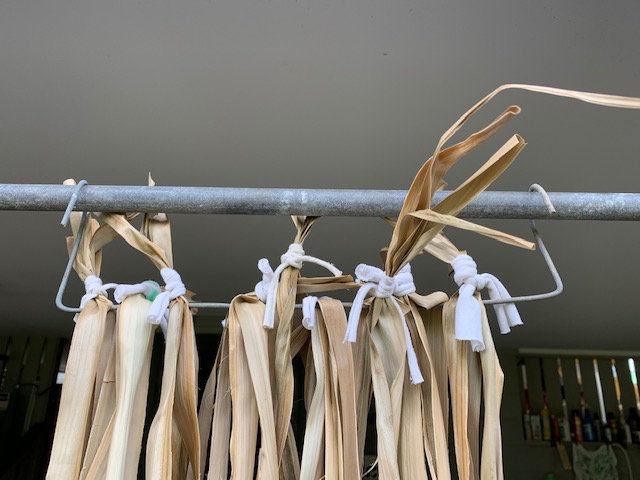
I tried two different ways of hanging the lauhala in groups for easy transport. The first way was on plastic coat hangers.
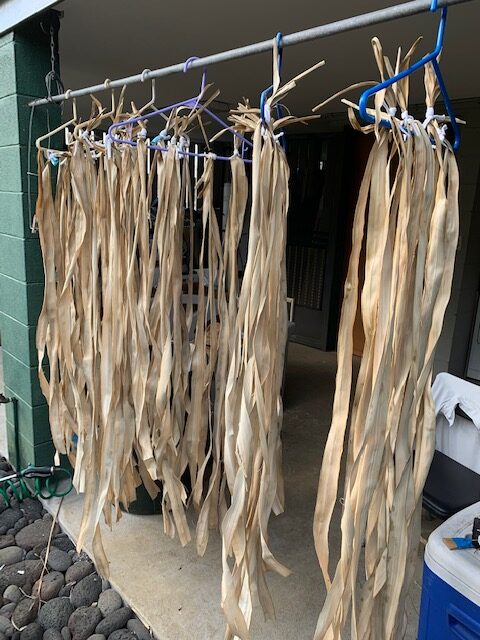 Strips of lau hanging from plastic coat hangers
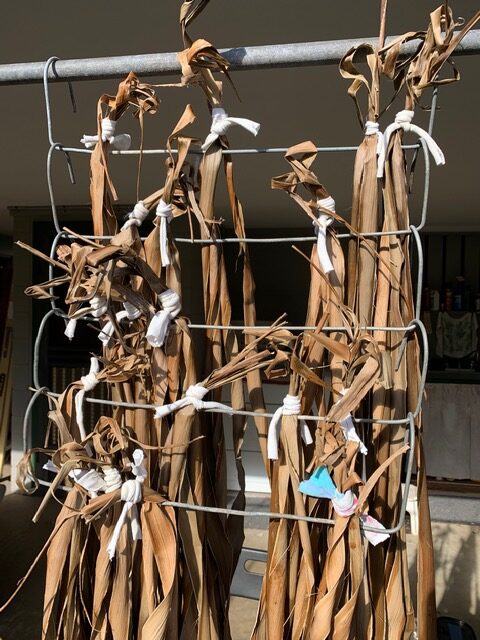
This worked well on the metal pipe where the lauhala were drying but the hangers didn’t attach well to the fence. So I made metal hangers out of heavy wire that loop over both the metal pipe in our laundry area and the top bar of the cyclone fence. Now it only takes about 5 minutes to bring the lauhala out for sunning and another 5 to bring them back in later on – much easier than tossing a whole loose bunch on the grass.
 Strips of lau hanging from metal frame
 When all the metal hangers are about the same size, they
can be easily hooked together for transport to and from the fence.
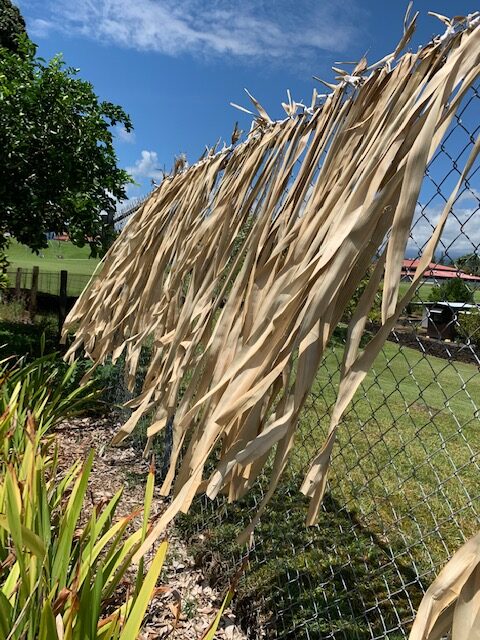 Lauhala blowing in the wind. A lovely sight…
When the lau feel quite dry, in the morning we’ll roll them loosely into small kuka’a as shown in the videos by Mei Lin Wong-Gary. Then we’ll store them for at least a week or more in a place with good air circulation until we want to use them.
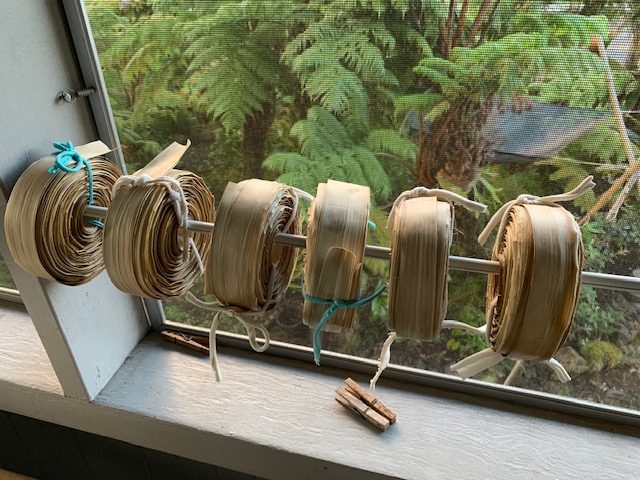 Lauhala kuka’a airing out in open shade
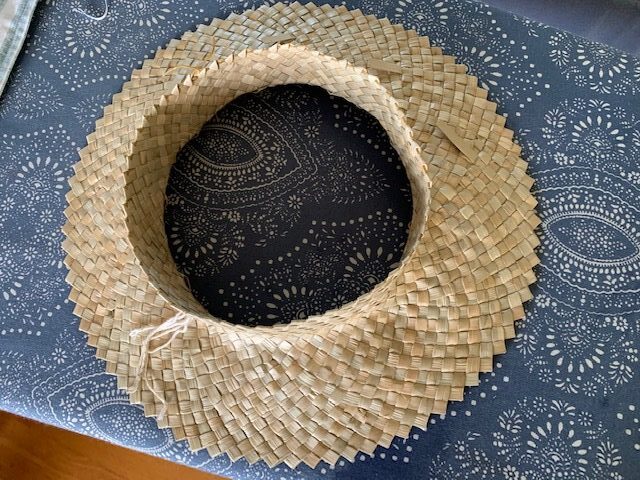 Unfinished hat made from the lauhala kuka’a shown above
What’s coming up next on another page will be experiments with all green lauhala which also have thorns on the edges and midribs.