Introduction – Making Small Lauhala Baskets
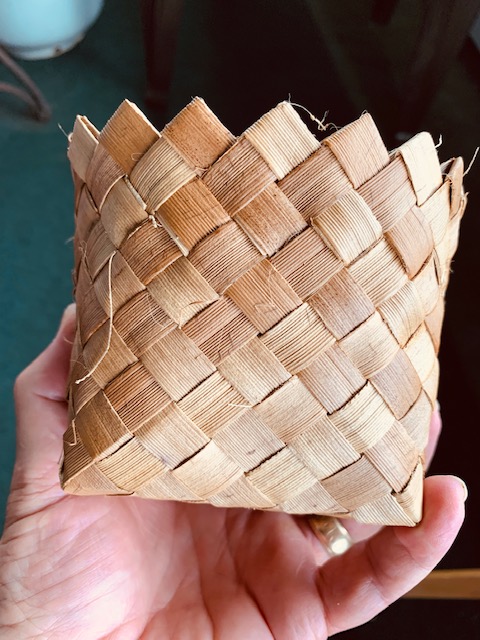
Let’s make a small basket using check weave. These baskets are also one half of a pair that will make a nice box. The skills learned in this project will enable the maker to make other articles in the future such as a flask cover and a simple hat. The project will also require some patience. If things don’t seem to be going just right, take a break. Here’s what the finished product looks like:
As usual there are a number of different ways to do this project. The one shown below is just one way. Your teacher will probably provide a different way and this approach can be an object for discussion.
As before, the basic structure of each project will involve a materials list, a tools list and a set of sequential instructions.
Materials List
You will need 20 koana 1/2″ wide and 24″ long. This amount will let you make a container 5 inches on a side and 4-5 inches high. The koana may seem a little long but it’s better to trim at the end than have to add in along the way.
Tools List
A tool for softening the koana before weaving
Either a pin stripper or a box stripper to cut the koana from the lauhala
A spray bottle ( a small one from the travel section is good )
1/2″ wide painter’s tape Small hair pins ( those about 2″ long work well for me )
A tool to help push one end of the koana underneath another
A 12″ or longer ruler
We have described these tools in earlier projects ( First Project ) as well.
Making the Bottom of the Basket
We begin as we have in the previous projects by laying down a section of the blue painter’s tape, sticky side up. The length of the tape should be about an inch longer than the total width of all the vertical koana. In this case the total strip width is about 5 inches. Fold each koana in half and put the crease at the bottom edge of the tape with the underside of the koana facing up. When all ten strips are on the tape, cover them with another piece of tape sticky side down.
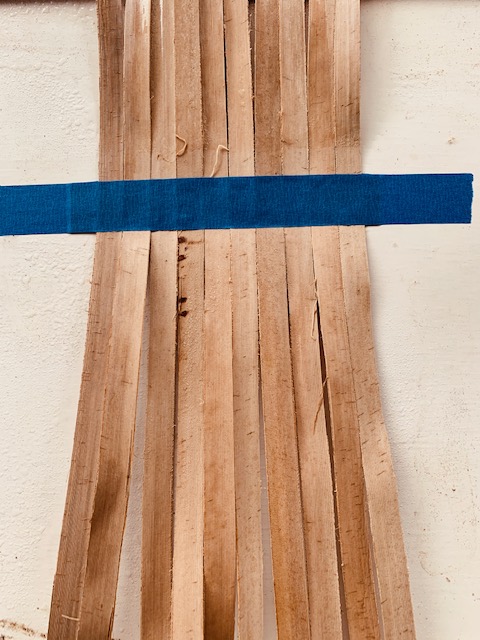 Figure 1. The ten vertical koana in place with underside facing up and both tapes put down.
Moisten the koana with the spray bottle and then weave in the first five horizontal koana. Hold the four corners in place with bobby pins.
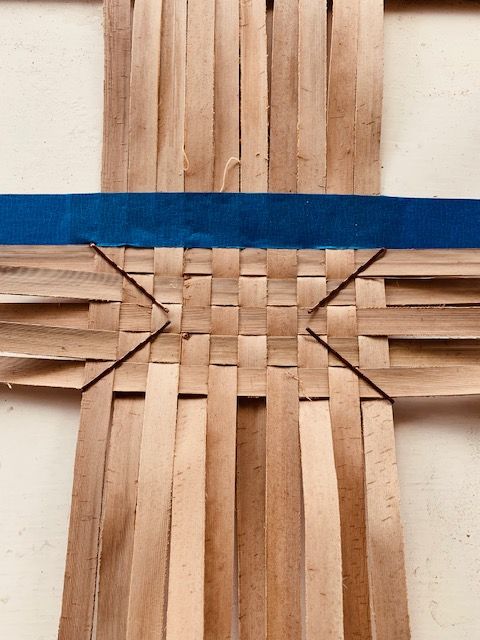 Figure 2. Five koana woven in and pinned.
Carefully cut through the blue tape between the fifth and sixth vertical koana and remove the tape from both sides.
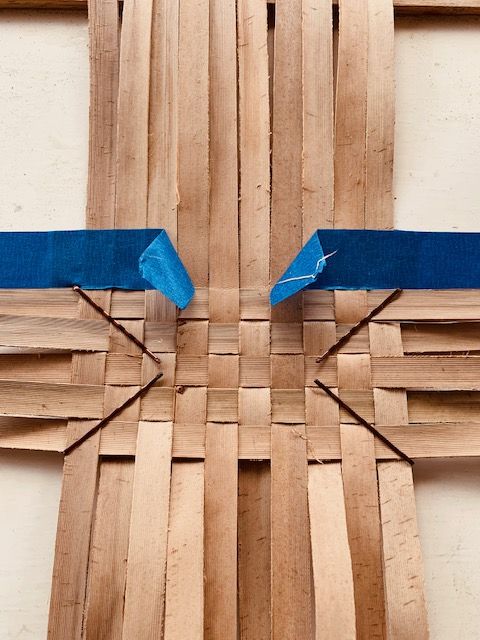 Figure 3. Painter’s tape cut through both layers and being peeled away.
Now we reverse the woven mat and begin weaving from the koana center crease again. Doing this means that we will end up with equal lengths of koana on each side of the mat when we have finished the first stage. Figure 4 shows the sixth horizontal koana woven in.
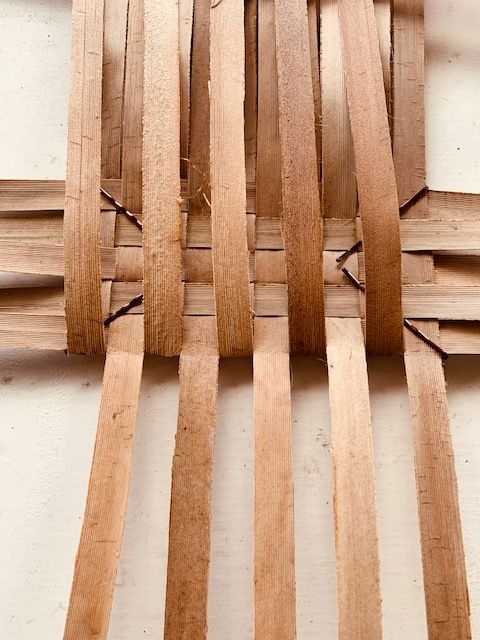 Figure 4. The sixth koana has been woven in.
All twenty koana have been woven in Figure 5. Now pin all the corners and the halfway point along each of the sides. These halfway points are where we will begin weaving next.
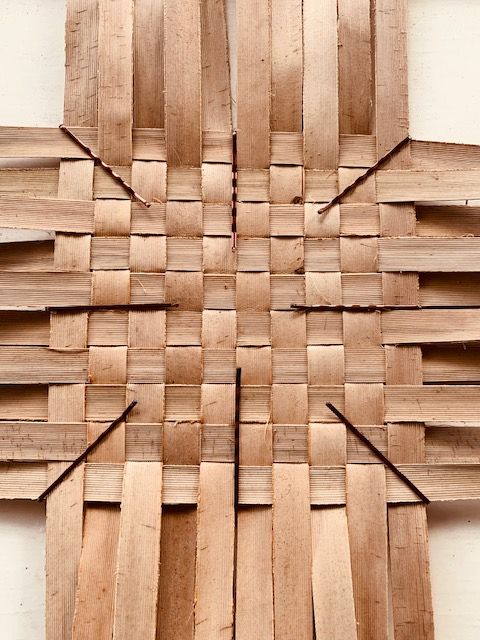 Figure 5. All twenty koana woven together, corners and sides pinned.
Now turn the mat over so that the “good” side up. We are ready to make the corners of the basket.
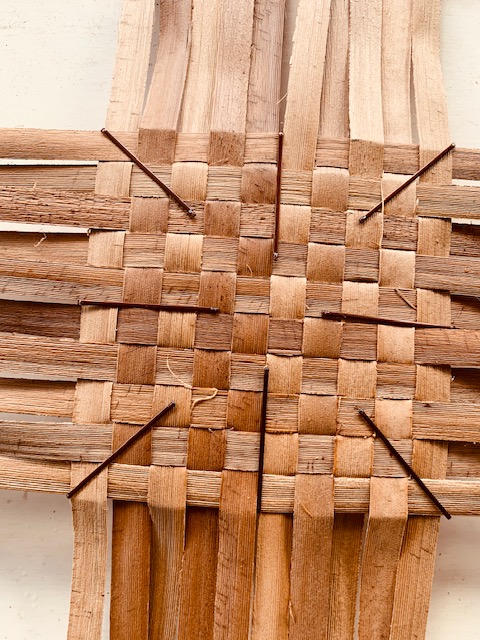 Figure 6. The “good” side of the mat is facing up now.
Weaving the Four Corners
Hold the mat vertical with the “good” side facing you and one of the edges upwards. Begin weaving like Figure 7 below. It doesn’t have to be exactly the same because of the weaving pattern of the mat. That is, below, the koana to the left of the pin goes first, then the one to the right of the pin goes next. But it might be the other way around for the mat you have. The main thing is to begin to weave this corner normally, making an effort to have each maka (crossing) a square shape and not a diamond shape.
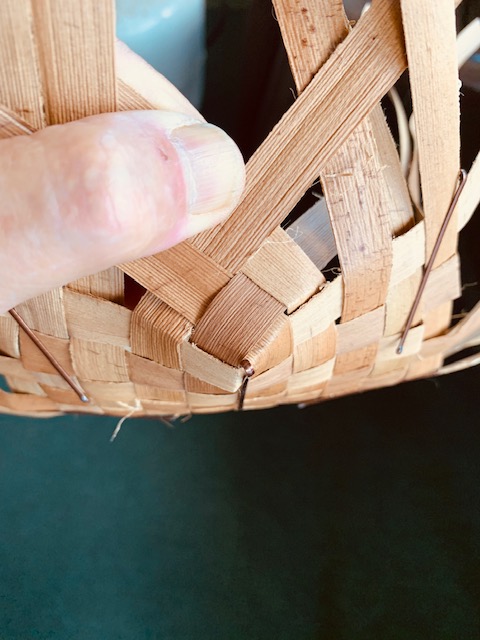 Figure 7. Begin weaving at a midpoint of one of the sides.
Continue weaving until you have woven three koana to the right of the pin and three koana to the left of the pin. Then double pin the koanas in place.
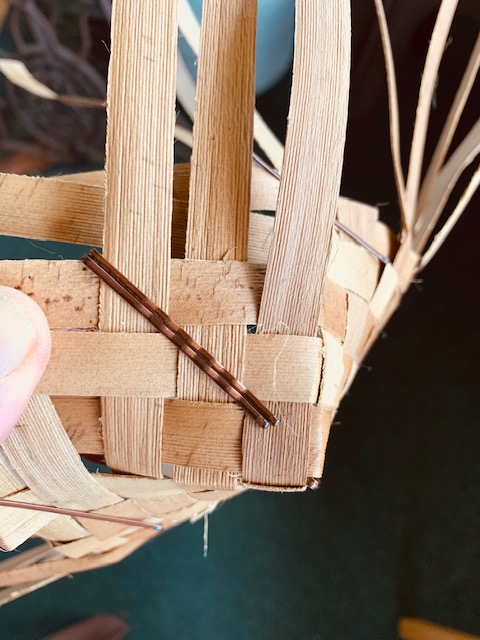 Figure 8. Six koana woven for the corner and pinned in place.
Figure 9 shows a different view of the woven corner.
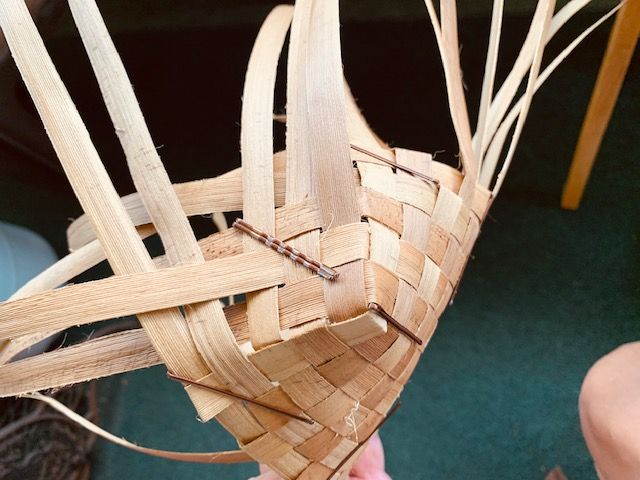 Figure 9. A different view of the corner
Now continue on and weave the next corner as shown in Figure 10.
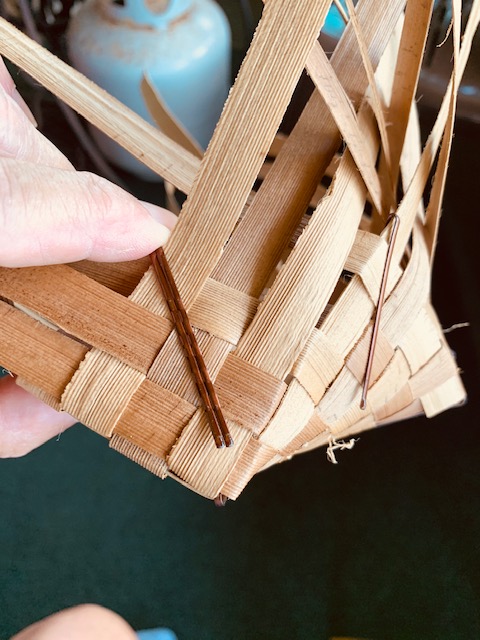 Figure 10. We weave a second corner
Continue weaving until you have woven all four corners and pinned them. Now make a crease from corner to corner as shown in Figure 11.
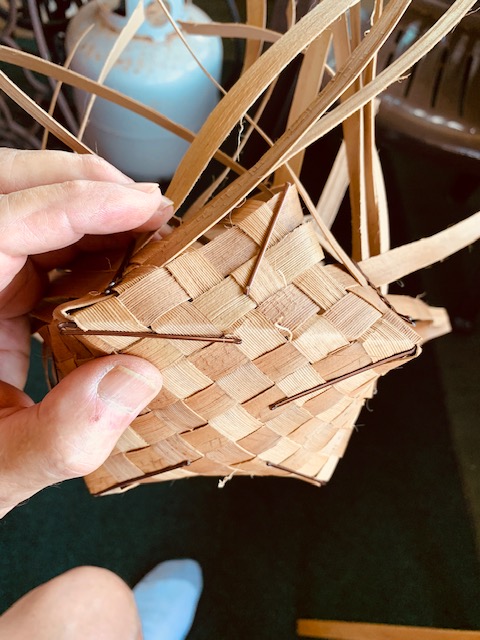 Figure 11. Making a crease from corner to corner
Figure 12 shows the bottom of our basket. It’s not quite square because the weave isn’t tightened and the camera angle isn’t exactly at right angles.
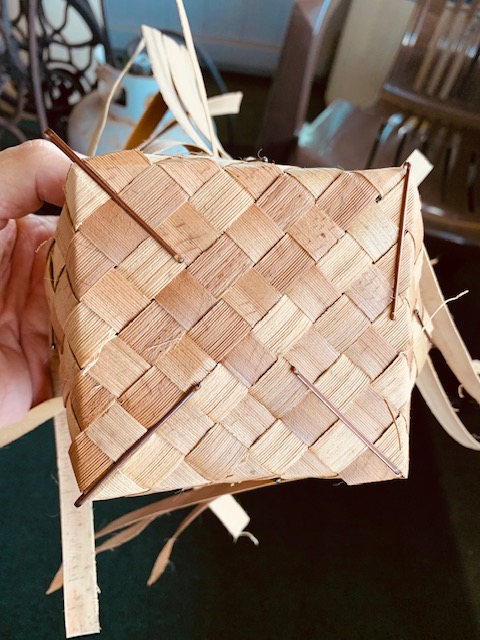 Figure 12. The bottom of the basket.
Weaving from Corner to Corner
We now want to close in the weaving from corner to corner. When we do this it’s important not to get lost and weave too much in one area and not enough in another. For me, the simplest thing is to count the number of maka from the bottom edge, weave until you reach that number and then put a pin every so often. Looking at Figure 13 we see that there are three maka from the corner to the double pins. You can also see that the weave is pretty loose at this point. That must be corrected during the weaving process.
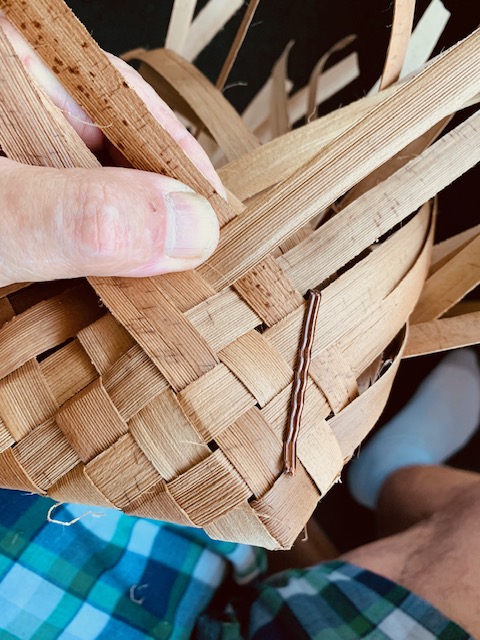 Figure 13. There are three maka from the corner to the double pins
Figure 14 shows the progress of weaving from the corner on the right to the corner on the left. I put two additional pins in to show the three maka height of the weave. We need to keep gently but firmly tugging all the koana to make the weave as tight as possible.
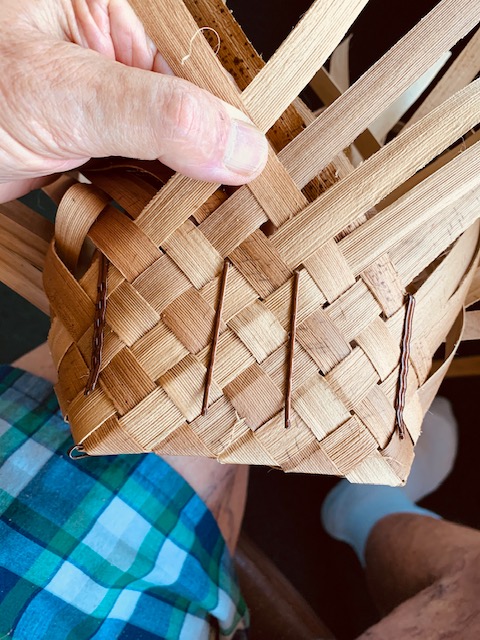 Figure 14. Additional pins showing the three maka height of the weave
Figure 15 shows the weave as both too loose and the koana not at right angles to each other. If the koana are not at right angles, the weave becomes longer and the upper edge will stick up higher in that area. So we must continually monitor the weave.
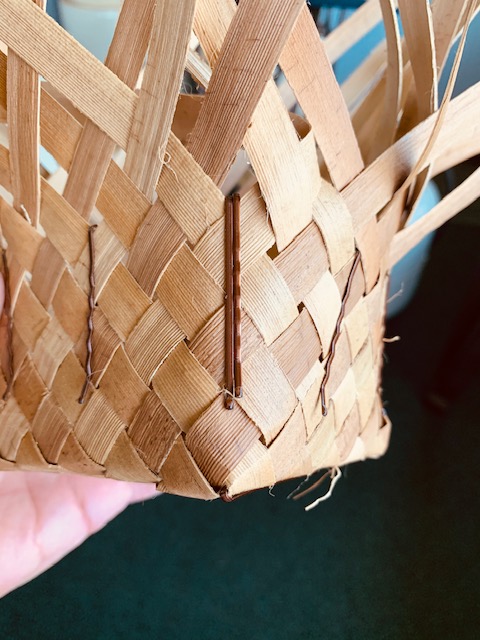 Figure 15. The maka are diamond shaped not square shaped
Figure 16 shows some loose corners. I need to identify those koana and pull them more firmly to tighten them up.
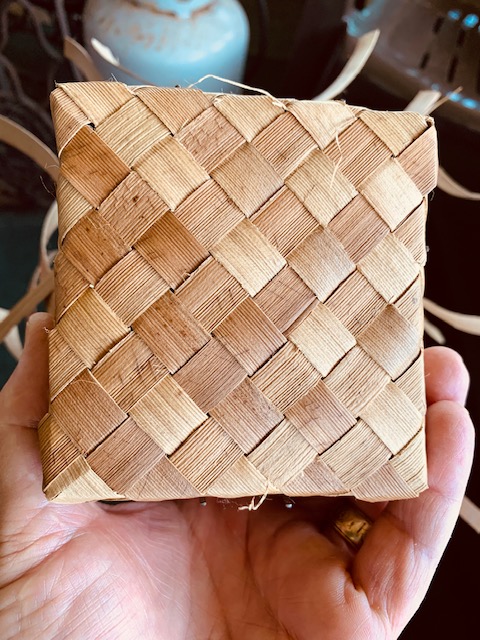 Figure 16. The weave looks pretty tight but there are loose corners
Figure 17 shows the interior of the basket with all sides woven in to the same height.
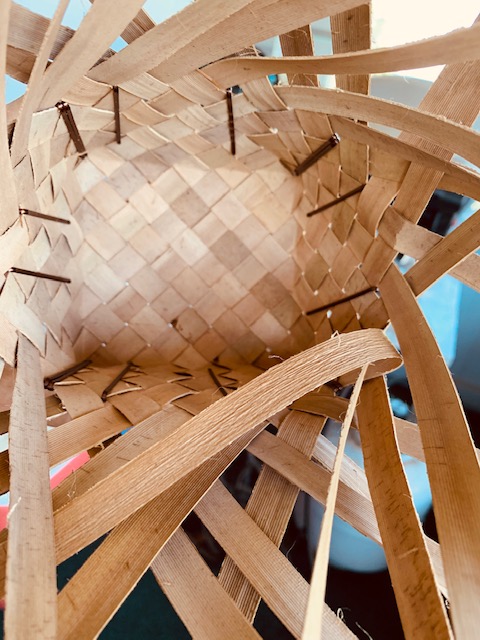 Figure 17. We look at the interior of the basket
Figure 18 shows koana woven in but the weave is loose and the koana are not crossing at right angles. Time to tighten.
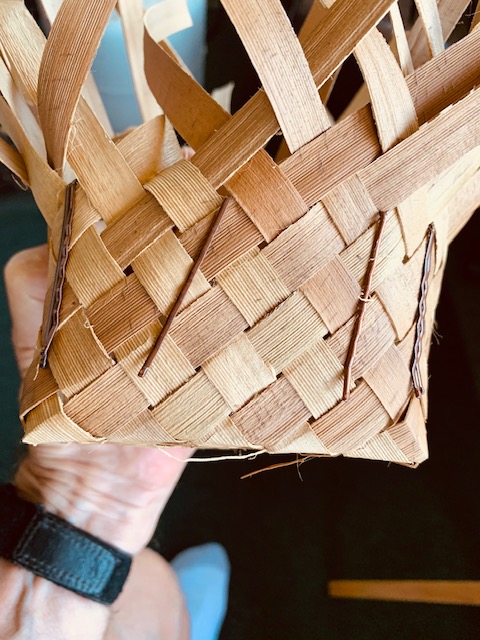 Figure 18. A side look at the basket showing tightening needed.
Figure 19 shows the weave more tightened and koana at right angles.
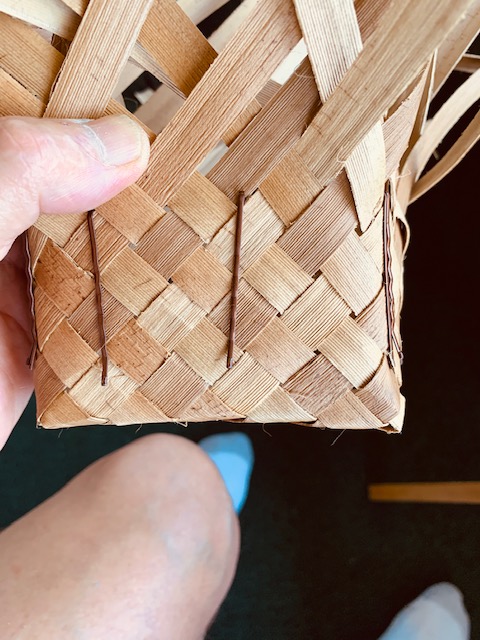 Figure 19. Shows the weave more tightened up.
Figure 20 shows the basket with two more rows added. In order to both tighten and keep tight the weave, I have temporarily made a nihoniho (toothed) border and pinned each double fold.
 Figure 20. We have added more rows and temporarily made a nihoniho edge
Figure 21 shows the interior of the basket showing the temporarily folded in koana. Next I will take out a side at a time, trim the ends of the koana and actually weave them into the structure.
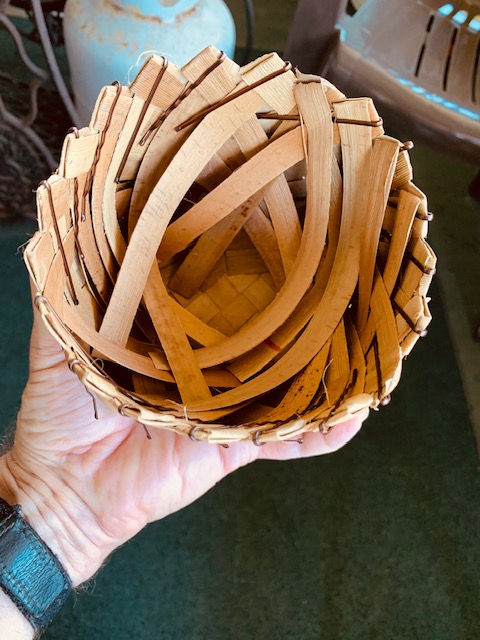 Figure 21. A look at the inside of the basket with the temporary pinned nihoniho edge
Chapter 8 in Bird, et al. (1982), pp. 141-145 shows the sequence of folding the koana to make the nihoniho edge. You can download it from this source for reference.
Finishing the Nihoniho Edge – Weaving the Inner Koana
Before weaving, moisten all the koana and the inside of the basket with your spray bottle. Then shape the ends of the inner koana for easier weaving.
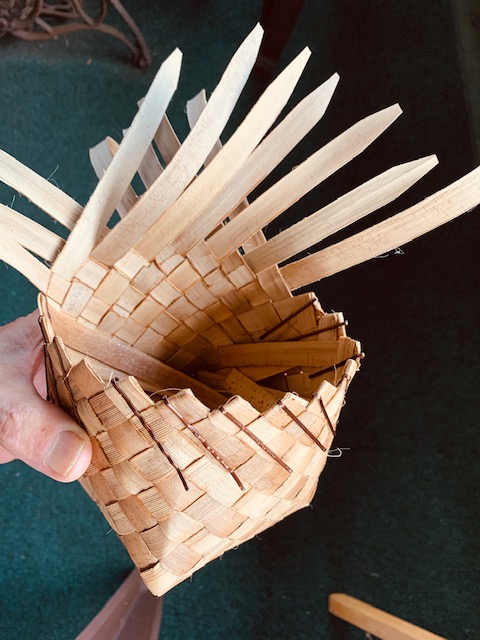 Figure 22. Showing the trimmed inner koana ready for weaving
Figure 23 shows the first part of the weaving process.
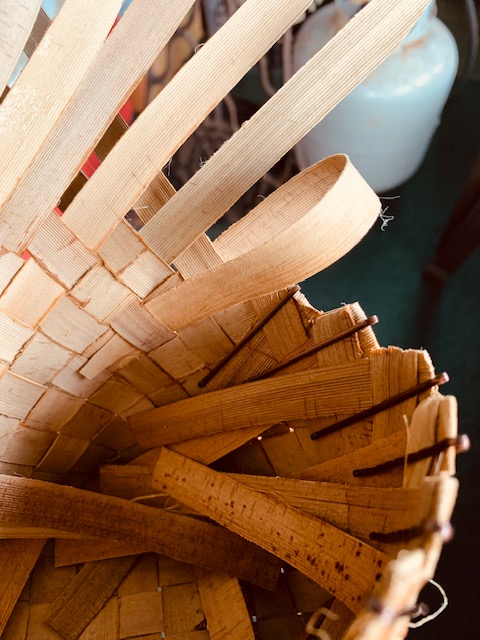 Figure 23. The first part of the weaving process begins
Figure 24 shows the first koana pulled all the way down. We only need to weave under one crossing koana because the opposing koana which we’ll weave in later will lock this one in place.
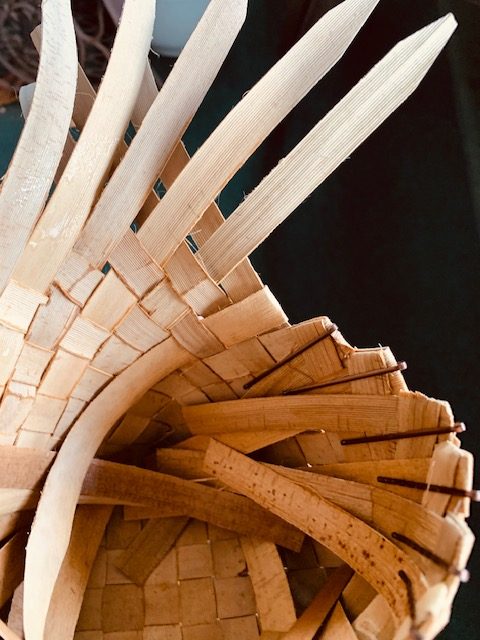 Figure 24. The first koana pulled all the way down
In Figure 25 the weaving progresses. Time now to unpin more of the nihoniho pairs, shape the tips and weave them in.
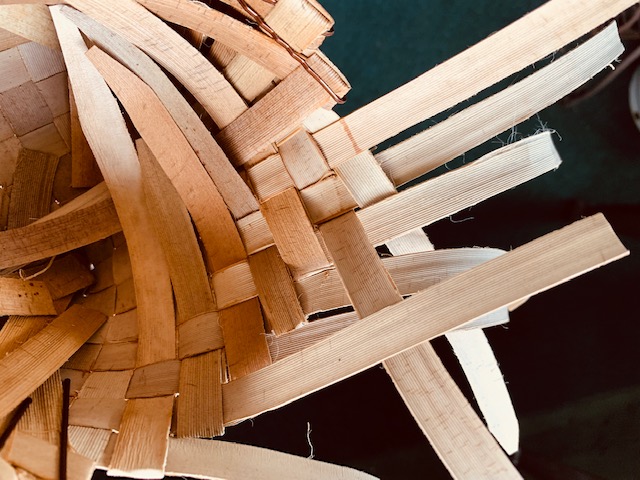 Figure 25. The weaving progresses
Figure 26 shows all of the innermost koana woven in.
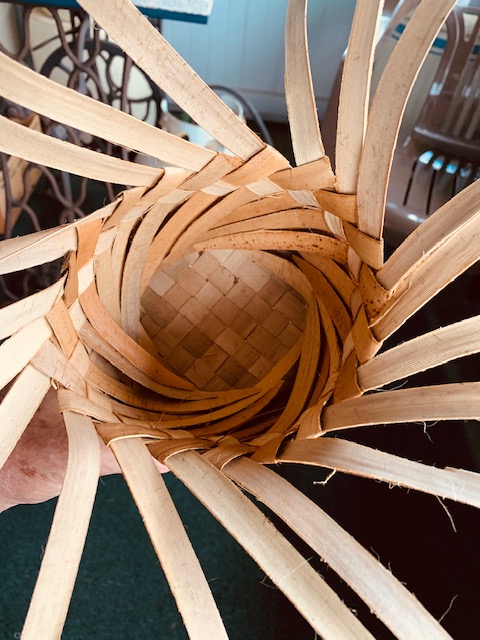 Figure 26. All of the inner koana woven in.
Finishing the Nihoniho Edge – Weaving the Outer Koana
In the next and finishing step we’ll weave in the remaining koana. Figure 27 shows two things: 1) the innermost koana is folded back so that it will be easier for the outer koana to weave under two crossing koana; 2) An outer koana being woven into the matrix, passing under two crossing koana. When you are doing this it is very important to gently push the maka of the nihoniho against its neighbor so that there is no space between them and the weave is tight. It is also important at the beginning of the weave to weave between koana layers not on the outside of the nihoniho. Weaving between the layers will lock each nihoniho to its neighbor.
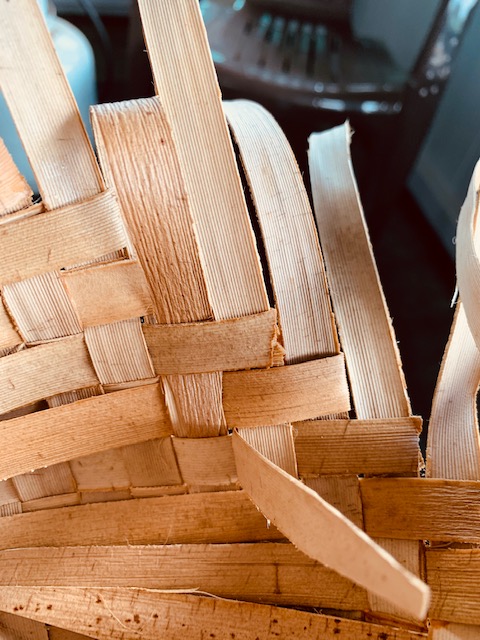 Figure 27. An outer koana being woven in.
Figure 28 shows the pulling process nearly complete but there is a small space that still needs to be closed. See it? Also after folding back, the inner koana was cut away, making it easier to weave the outer koana in. You should now begin the fold back all the inner koana and trim them at the fold point where they have gone underneath just one crossing koana.
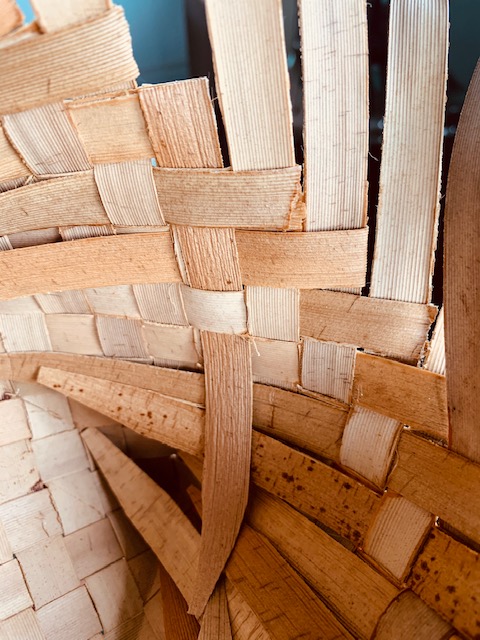 Figure 28. Pulling in the outer koana. The inner koana has been cut away for easier weaving.
More outer koana have been woven in. See how closely they are to their neighbors.
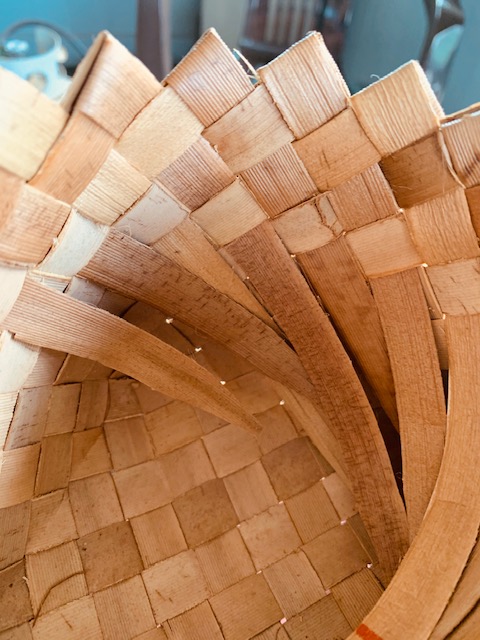 Figure 29. The weaving continues
We have woven in all the outer koana at this point as shown in Figure 30. Now fold each outer koana back over the second koana that it was woven under and trim it off.
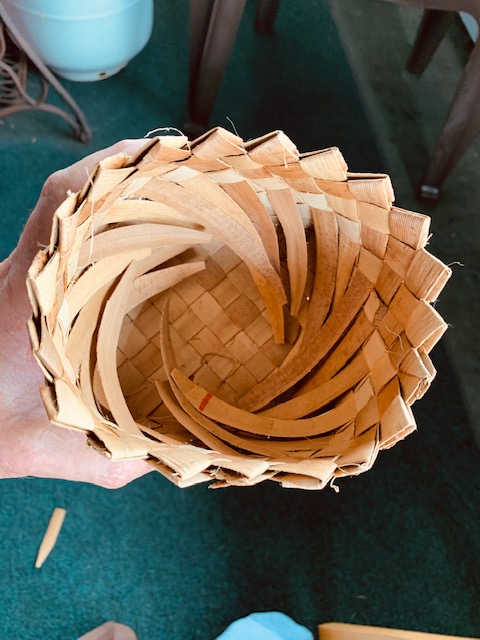 Figure 30. The weaving in of the outer koana is finished.
Figure 31 shows the finished project.
Figure 31. Finished!