Introduction
When you change from a horizontal two ply twill to a vertical one, or vise versa, you are making a pattern called herringbone or ʻekeʻeke in Hawaiian.
I couldnʻt find any written description on how to do this, so the following is my approach using trial and error. Another item for discussion with your kumu ulana…
In the first weave change (going from maka moena (check) to maka ʻoʻeno (horizontal two ply twill), we followed Jim Skibbyʻs approach for making a practice board (Chapter 3). This approach uses lauhala koana/mauʻu instead of plastic strips as I had done elsewhere. I do recommend using Jimʻs approach and find that the lauhala is surprisingly durable with respect to repeated folding and unfolding. I taped my lauhala strips to an old plastic cutting board to keep them from moving around.
First Stage – Fixing the Height of the Change
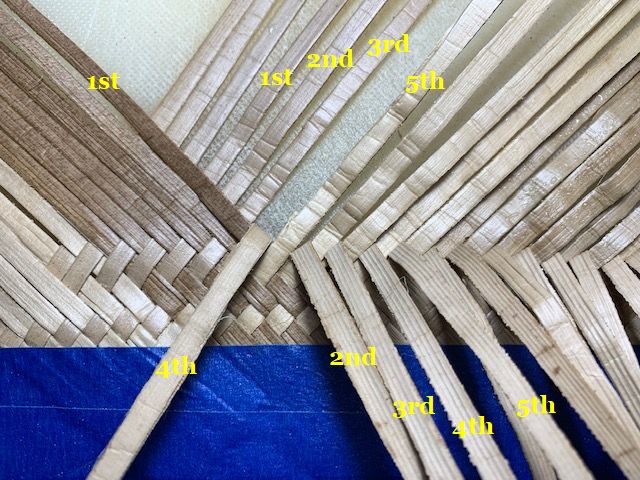 Figure 1.
Weʻll continue using the moe, ku and ulana terminology in Jim Skibbyʻs book. These are common terms used by weavers and are defined HERE. In the photos shown here, the moe go from lower right to upper left and the ku go from lower left to upper right. Another Hawaiian term weʻll begin to use is pelu meaning to fold.
There are a lot of labels in Figure 1. I hope you will eventually agree with me that because no one is here to physically show you how to do this, this compromise will suffice. So Figure 1 shows the 4th ku pelu over the 1st moe. Because we are now fixing the height of the weaving change, we will be using the 3rd, 2nd and 1st ku in that sequence as we progress.
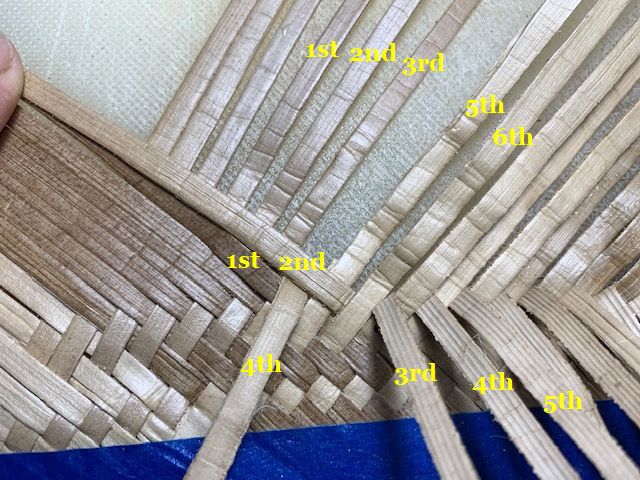 Figure 2.
In Figure 2 the 2nd moe now overlays the 5th, 3rd, 2nd and 1st ku. Weʻre ready to pelu the 4th ku forward and then pelu both the 4th and third ku back.
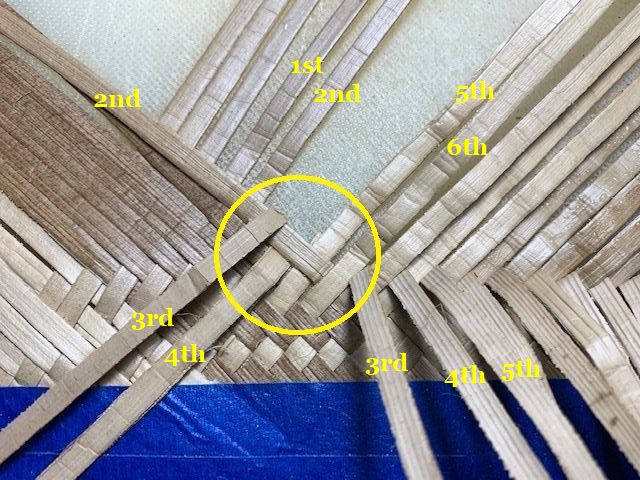 Figure 3.
When I weave, I find that looking for patterns that repeat helps me a great deal. In Figure 3 I have circled the weaving pattern for the vertical twill. Two koana pelu back (the 3rd and 4th ku) and two koana remain forward (the 5th and 6th ku). Jim Skibby terms this pattern or unit a maka. I suggest that this is part of the meaning when weavers talk about “two up, two down” when weaving the twill pattern. The other part involves the actual weaving mechanics which weʻll talk about shortly.
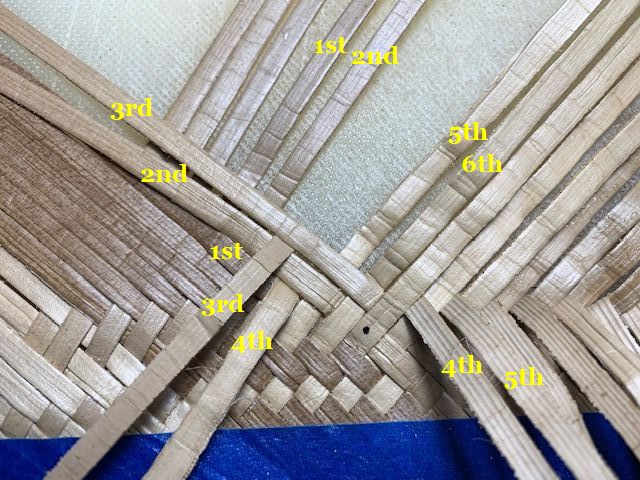 Figure 4.
We now fold the 3rd moe over the 6th, 5th, 2nd and 1st ku and are ready to ulana. Pelu the 6th ku back. Then pelu both the 3rd and 4th ku forward ( “two up” ), and then pelu the 2nd and 3rd ku back ( “two down” ). This then is the actual weaving motion of the “two up, two down” phrase.
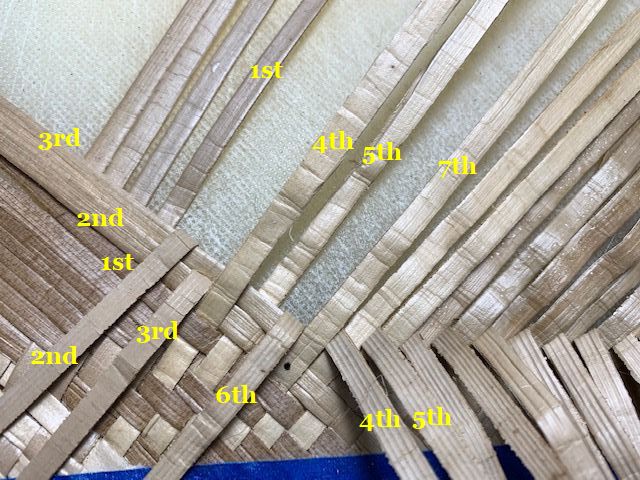 Figure 5.
Figure 5 shows that the maka in Figure 3 has moved up and to the left. Weʻre now ready to fold the 4th moe down over the 7th, 5th, 4th and 1st ku.
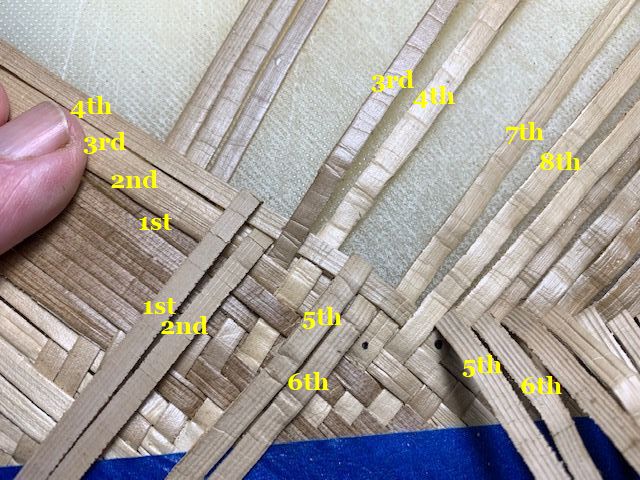 Figure 6.
Figure 6 shows the results of our ulana following the laying down of the 4th moe.We pelu the 6th ku up and then the 6th and 5th ku down. We pelu the 3rd and 2nd ku up and pelu the 2nd and 1st ku down – “two up, two down”.
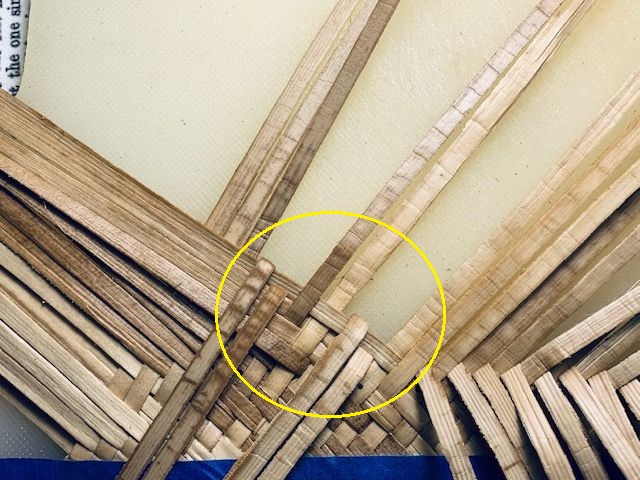 Figure 7.
We now have two maka. Letʻs stop increasing the height of the weave and begin moving across to the right.
Stage 2 – Weaving to the Right
I have repeated showing Figure 7 because it is this pattern which we want to repeat as we change from the horizontal to vertical twill: two pairs of “two up, two down”. Once again, the moe go from lower right to upper left and the ku go from lower left to upper right.
Figure 7.
Iʻve also re-numbered the koana/mauʻu. Again, the figures will look a little busy but it was the only way I could figure out how to keep track of things.
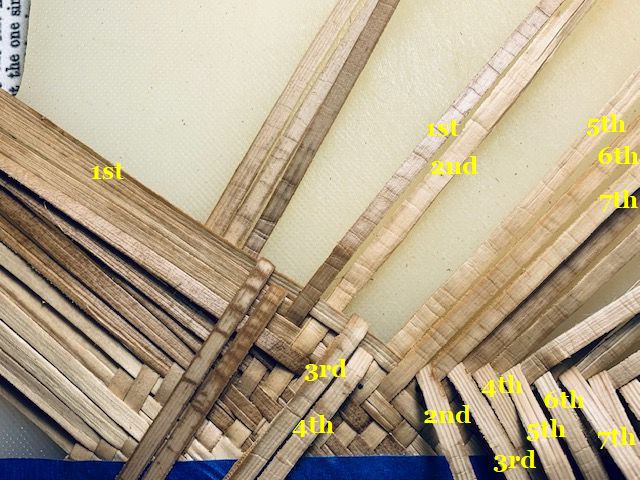 Figure 8
Figure 8 shows where we left off at the end of stage one with the new labeling in place.
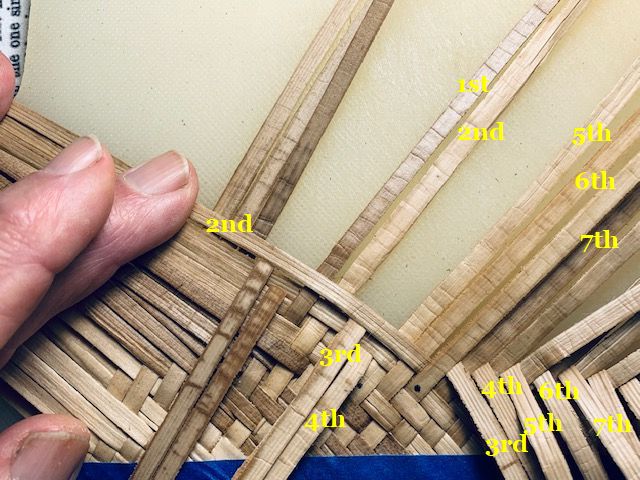 Figure 9.
In Figure 9 the second moe is being laid down and itʻs time to ulana.
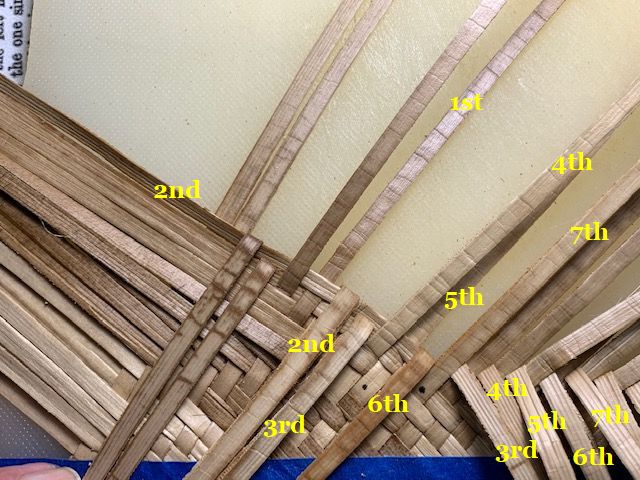 Figure 10.
In Figure 10 the 3rd and 4th ku pelu up and the 2nd and 3rd ku pelu down. The 6th ku also pelu down.
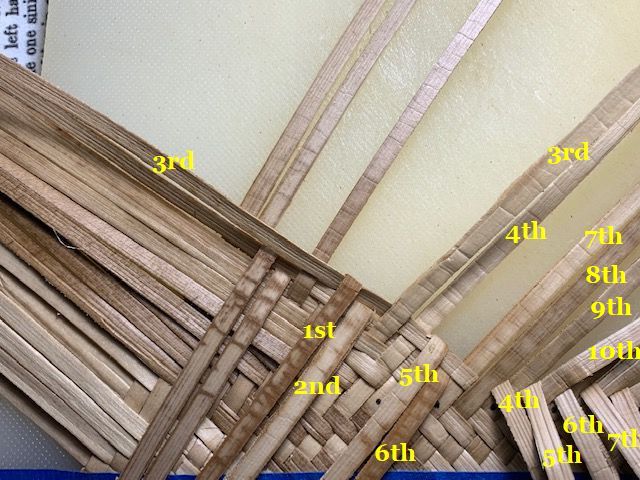 Figure 11.
Figure 11 shows the 3rd moe lain down then ulana: the 6th ku pelu up then the 5th and 6th pelu down; the 2nd and 3rd ku pelu up and then the 1st and 2nd ku pelu down. Now we have the same “two up, two down” arrangement that we started with. Note that the 9th ku in the corner is underneath the 4th moe.
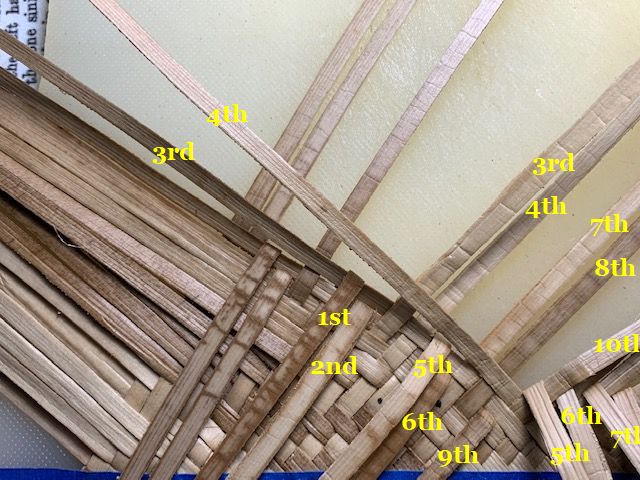 Figure 12.
In Figure 12 we have folded the 4th moe down and then the 9th ku. Next we will first pelu the 4th moe back and then pelu the 9th ku down.
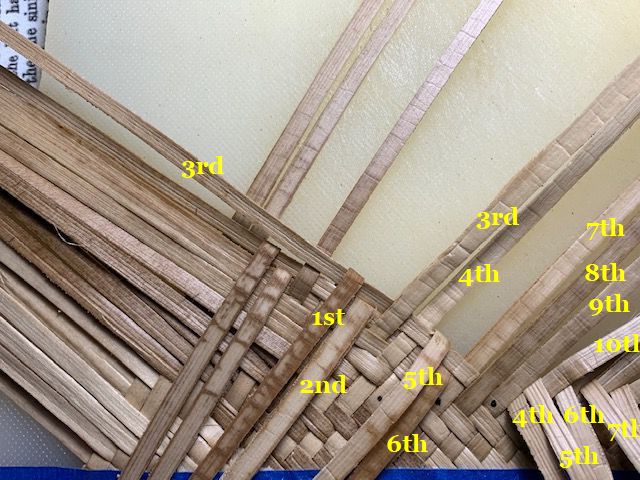 Figure 13
In Figure 13 we pelu the 4th moe back to its original place and pelu the 9th ku down. Now when we pelu the 4th moe down again the 9th ku will be underneath it.
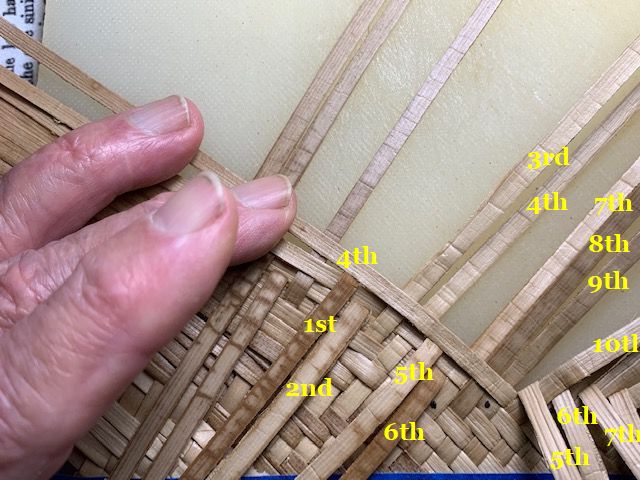 Figure 14
In Figure 14 we pelu the 4th moe down. Now time for ulana. We pelu the 5th and 6th ku up, then pelu the 4th and 5th ku down. We pelu the 1st and 2nd ku up and the 0th and 1st ku down. Finally we pelu the 9th ku down.
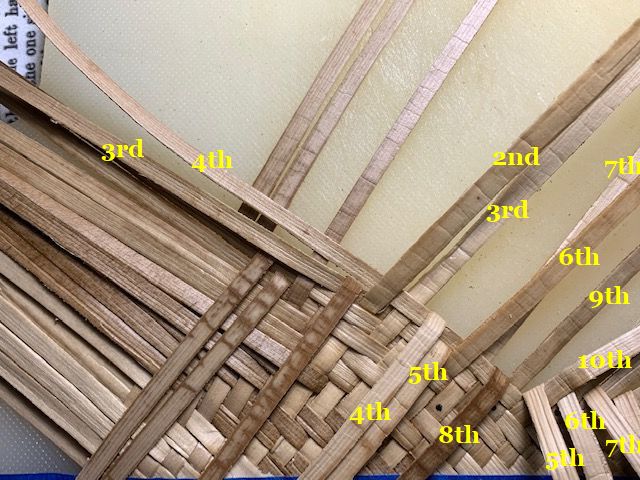 Figure 15
Figure 15 shows the results of the ulana described for Figure 14. Now time to pelu the 5th moe and ulana.
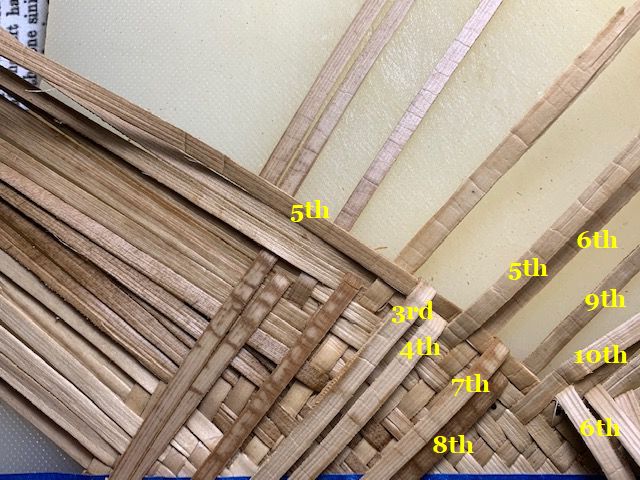 Figure 16
In Figure 16 the last ulana of the cycle is finished and we have our starting “two up, two down” configuration as shown in Figure 17.
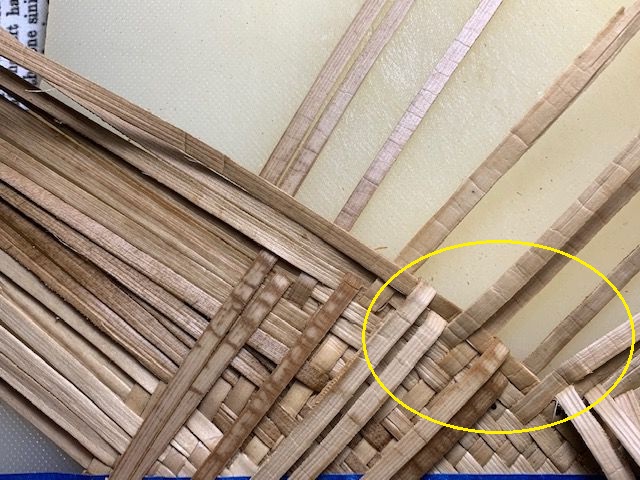 Figure 17
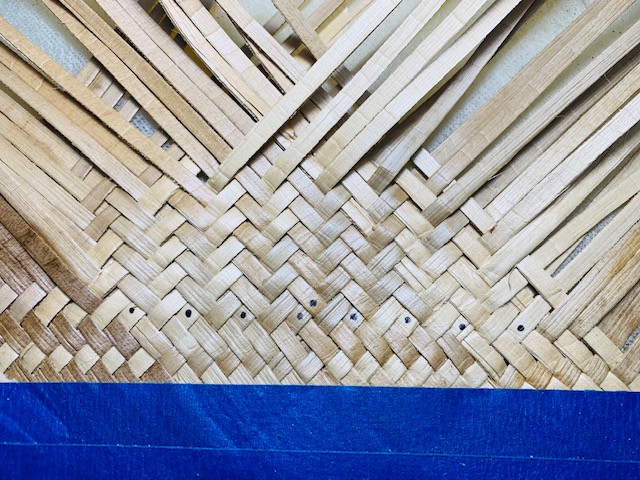 Figure 18