Introduction
In this project we’re going to make a trivet or a purse using diagonal weave (ka’akepa). This approach was referenced earlier under flax weaving in Sources of Information. In this YouTube video the weaver begins with a square of woven koana, weaves a couple of smaller squares in opposite corners and then opens up the structure to make a pocket. At this point we can either stop or go one to extend the sides and make a larger trivet. The finished trivet is below.
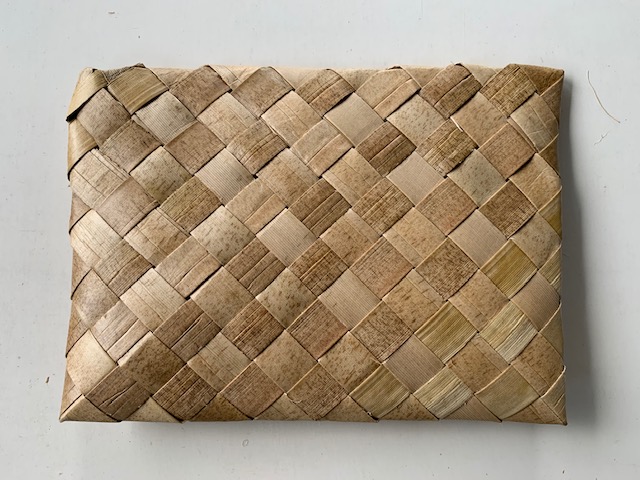 The finished trivet.
Beginning the Project
Using the same beginning approach as in the second project, we weave an eight by eight square of koana or lauhala strips. The koana are 1/2″ wide and about 22″ long. This is now the starting point for this new project.
 A beginning square of koana, measuring 8 x 8 pieces.
Weaving Two Small Squares in Opposite Corners
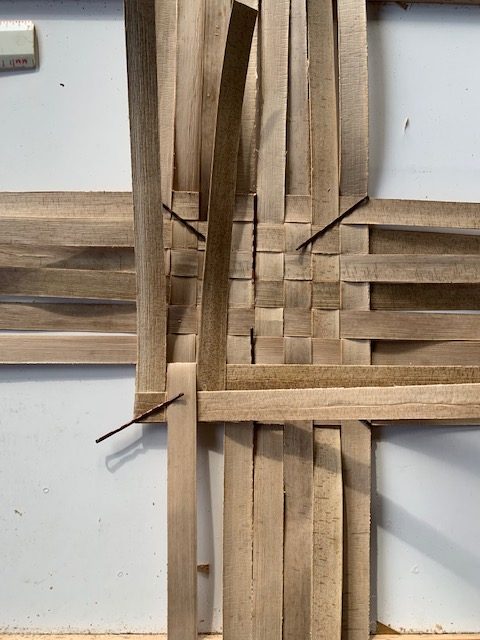
Now, as shown in the video, we begin weaving in the lower left corner.
 Beginning to weave the second layer in the lower left corner.
Now continue weaving until you have woven four koana in both directions.
 Continuing to weave
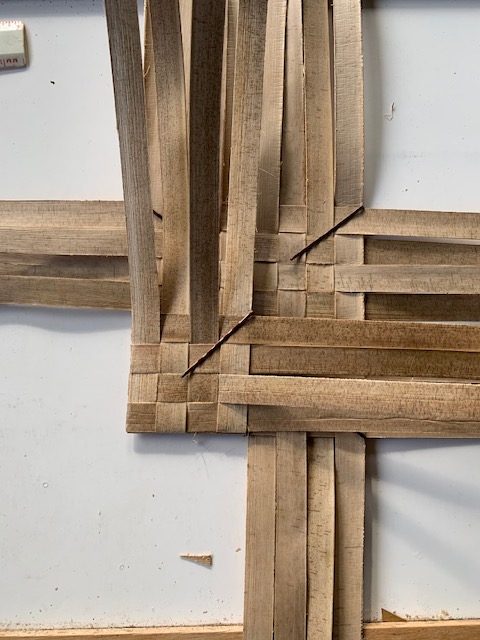 The first corner is now finished.
When you have finished, go the the opposite corner and repeat the process.
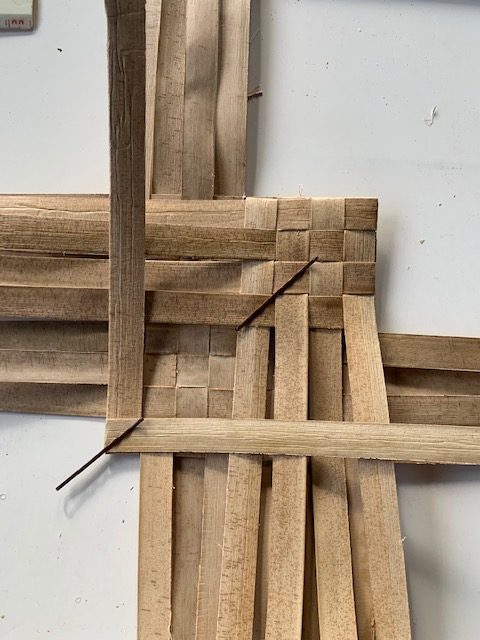 Beginning the second corner
The second corner is now finished.
Folding up the Opposite Corners to Make the Pocket
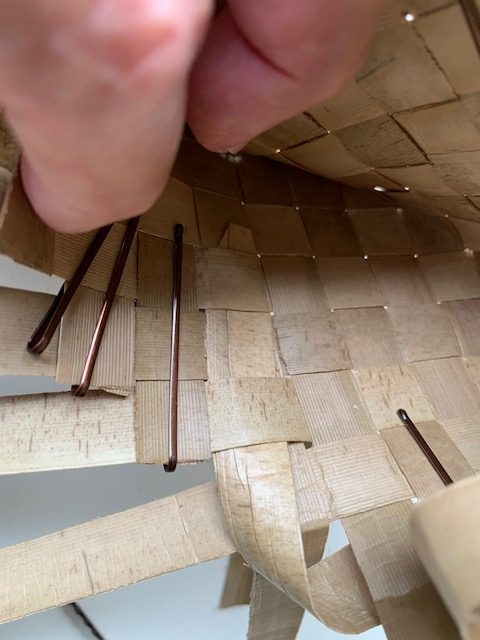
At this point, as shown in the video, we need to open up the pocket. First we make a crease along the direction of both bobby pins.
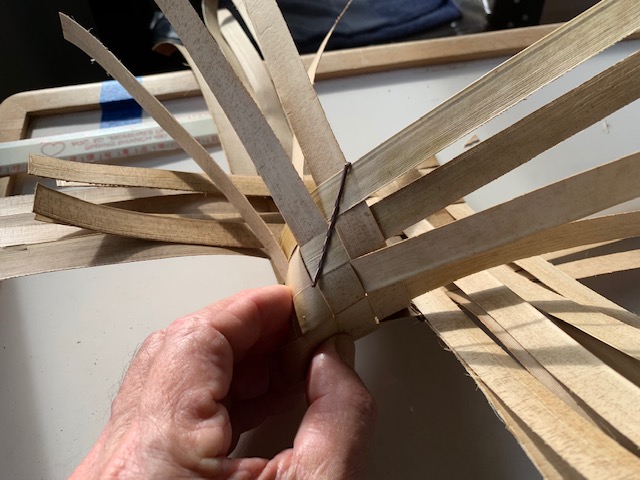 Pinching a corner along the direction of the bobby pin.
Pinching the corner in the figure above will make a crease from the bottom corner to the pin. This crease will become one of the edges of the bag/pocket.
 Opening the pocket.
We’re now looking from the top of the project. I should be pinching both sides at once but not being three-handed I settled for this shot.
 Flattening the pocket and now showing the diagonal weave
Weaving up the Sides to Make the Height the Same all Around
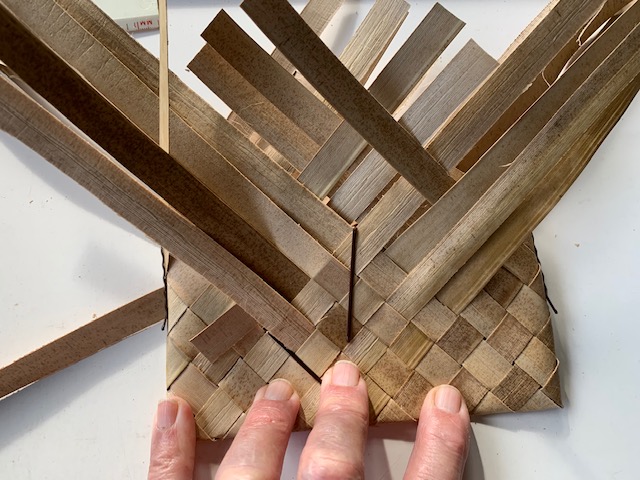
By flattening the creases and smoothing down the project, the diagonal nature of the weave becomes apparent. At this point we now want to weave all the koana up to the same level as the top of the two left and right edges .
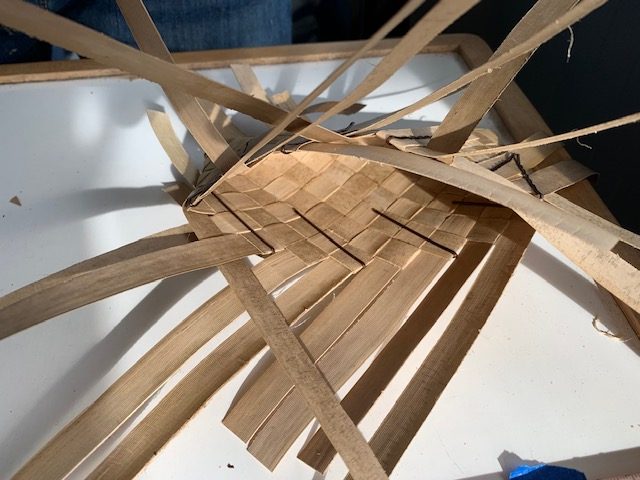
 Beginning the weave.
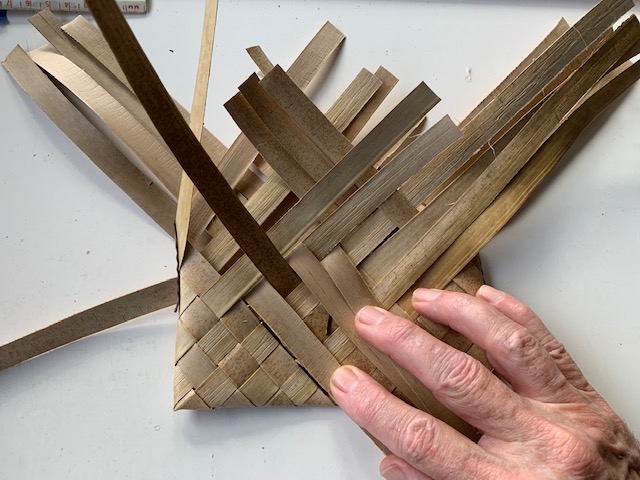
What follows now is a series of pictures showing the progress of the weave upwards on the first side.
 Continuing to weave.
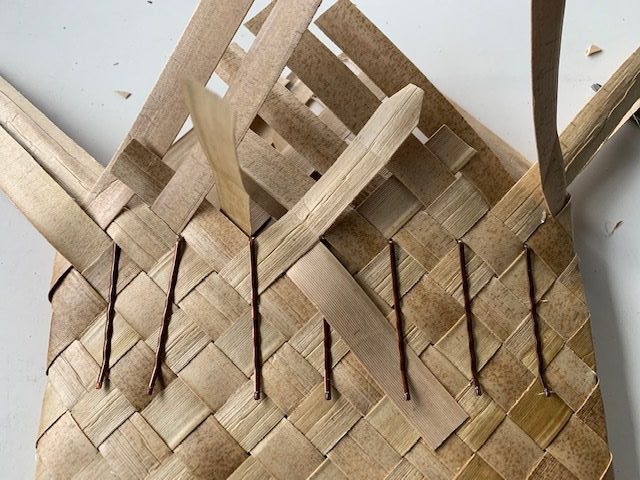
 Marking every other koana at the same level.
At this point we’ve reached the top of the pinched left and right sides with the weaving process and are now marking every other folded koana with a bobby pin. Traditionalists prefer to use a locking fold (which I will illustrate at a later time) rather than bobby pins.
 Beginning on the other side.
We’ve turned the project over and are now weaving up to the same level as the first side.
 Continuing with weaving and marking at the same level.
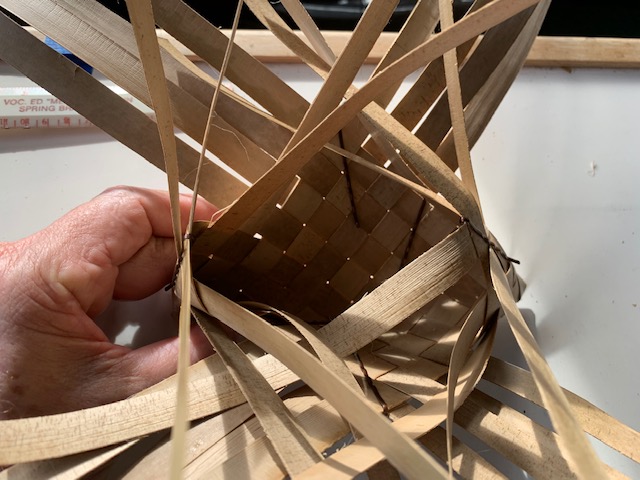
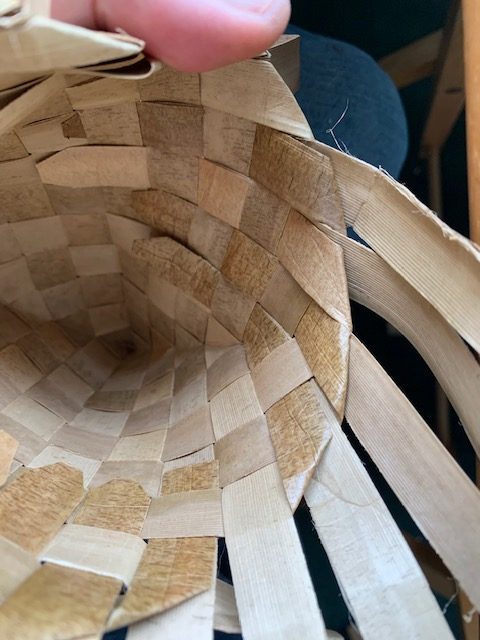
 Showing the inside of the open pocket from above.
We’ve now reached the point where we are at the same level of weaving all around the upper edge of the trivet or purse.
We now have a choice of going several directions. 1) We can finish the edges and have it as a shallow purse. 2) We can keep weaving to extend both sides of the pocket to make a square shape. 3) We can extend one side in order to make a folding flap that will go over the other side so that we can open and close the bag. 4) We can close up the pocket as a rectangle or continue weaving as in 2) and then close it up after putting in insulation.
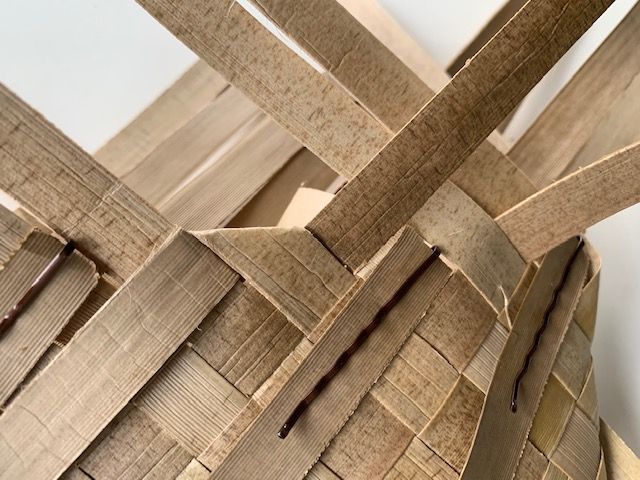
Let’s first look at option 1) finishing the edges.
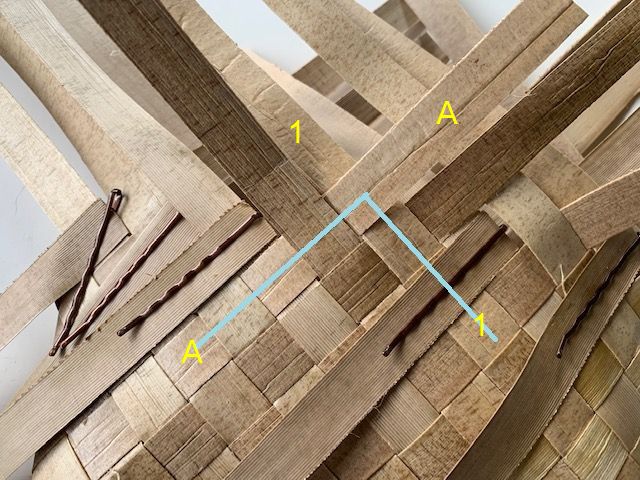
In the figure above, we’re looking at two crossing koana, A and 1. It’s important to understand that these are at right angles to each other as shown by the blue line. The concept of working with pairs of koana at right angles to each other is fundamental to the weaving process, especially during the process of finishing an edge. At first it’s easy to choose the wrong koana to weave under. If things seem wrong, look closely at each pairing of koana and see if you have skipped one. That’s what usually has happened to me.
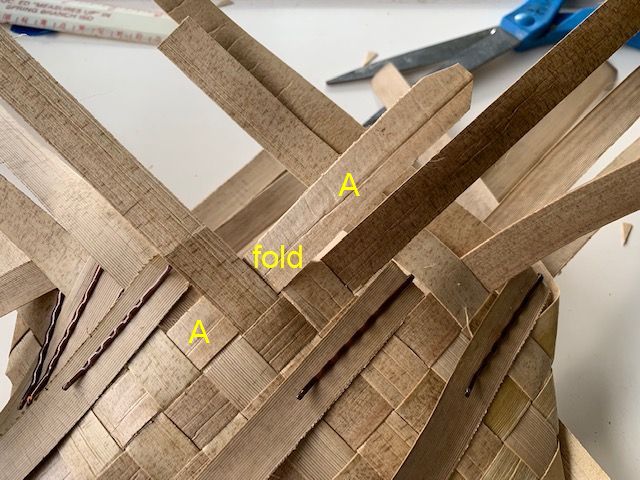
 The two koana are labeled, the fold marked and the end of koana 1 trimmed.
We’re now going to begin making a smooth edge for the bag/pocket. For the purposes of clarity, koana A has been folded back on itself and the end of koana 1 has been trimmed to make it easier to weave under koana A on the inside of the bag. Where the word “fold” is will be where we fold koana 1 down and into the bag. The edge of the fold will be parallel to the bottom edge of the bag/pocket.
 Inside the pocket showing koana 1.
We’re now looking at the inside of the bag and koana 1 is in the process of being folded back and woven under koana A.
 The progress of koana 1 weaving.
Here above we are a little bit further along with koana 1 having been woven further along under koana A.
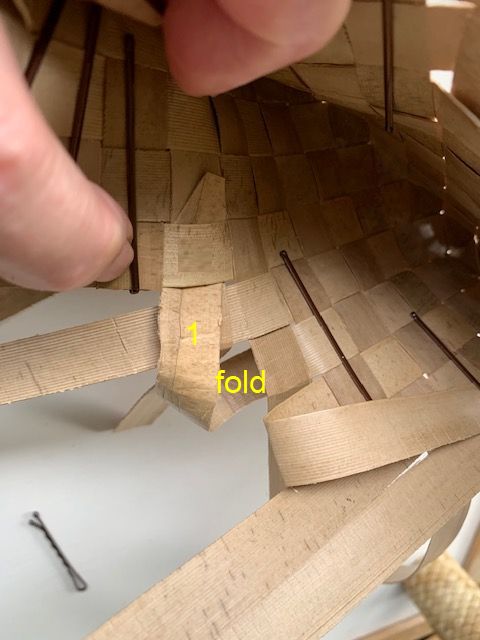
 koana 1 now cleanly folded into the pocket.
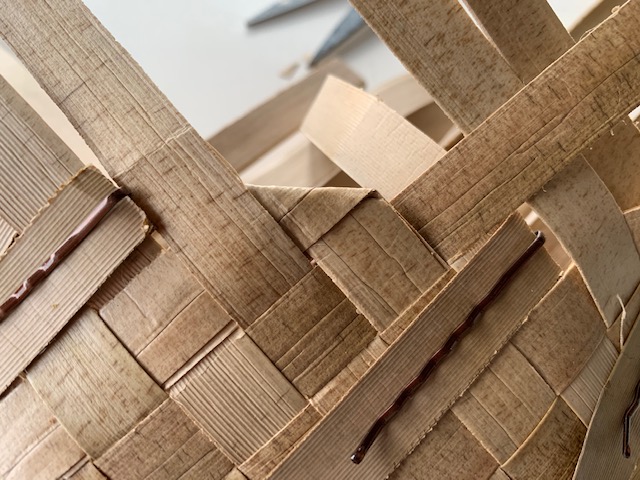
OK, we’re back on the outside again looking at koana 1 now completely folded into the bag. The fold is smooth and ready for koana A to be folded over it in the opposite direction of koana 1.
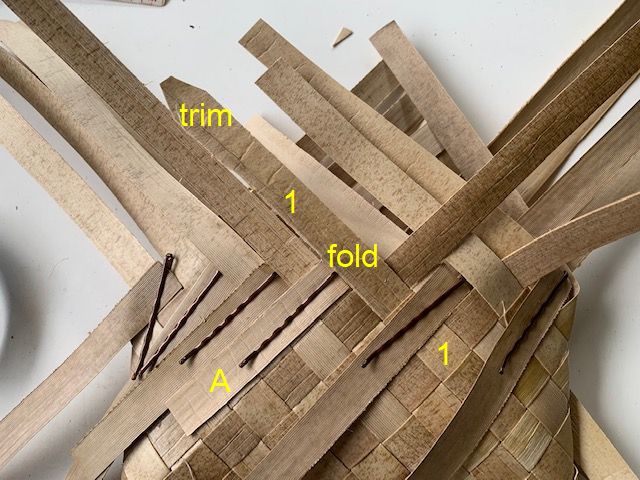
 koana A labeled, the fold area marked and the end of koana A trimmed.
Koana A is now trimmed at the end, ready to be folded over koana 1 and then woven under koana 1.
 In the pocket view of koana A weaving under koana 1.
Here we’re looking from the inside of the bag again to see the trimmed koana A being woven underneath koana 1. There’s a bobby pin in the way of the second part of the weave which needs to be removed before weaving.
 finished fold of koana A over koana 1.
Here is the finished fold of koana A over koana 1. To finish the edge, we simply repeat the process all the way around the edge of the bag.
Let’s now look at option 4) Closing up the pocket as a rectangle
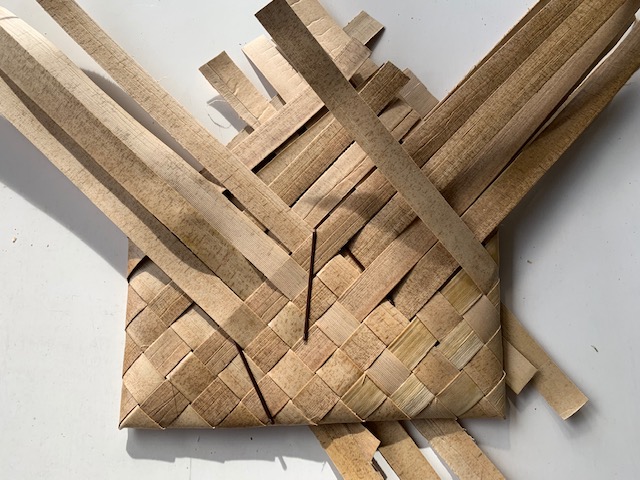
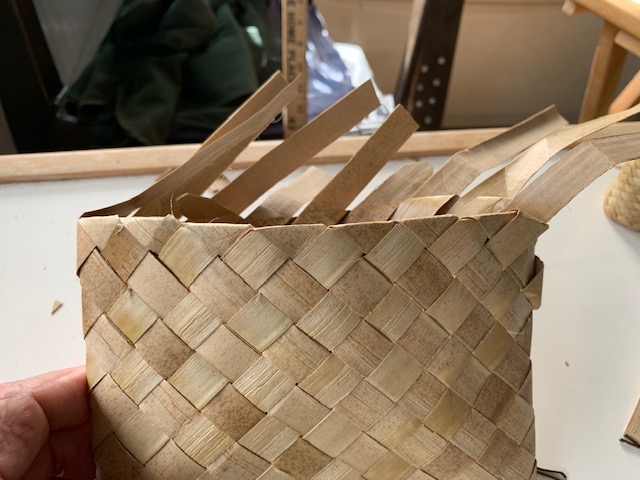
When we start weaving up from where the corners initially stopped, it soon becomes apparent that I didn’t make the koana long enough at the beginning. Here’s a lesson: it’s always easier to begin with pieces that seem too long than to have to add pieces in to make the short ones longer. So we’ll just close up a rectangle rather than a square. Looking at the front from the bottom edge, the weaving array looks (to me) like a diamond pattern. We’re going to stop weaving when we’ve reached six “diamonds” from the bottom edge as shown by the placement of the bobby pins below.
 The bobby pins are places six “diamonds” up from the bottom edge.
We’re now going to take all the koana which go from the lower left to upper right direction, fold them into the pocket and weave them under the way we did earlier in finishing the edge. I believe these are called dextral strips. The figure below shows the inside of the pocket with the koana partially folded over and woven under one koana.
 First weaving of dextral strip into the pocket.
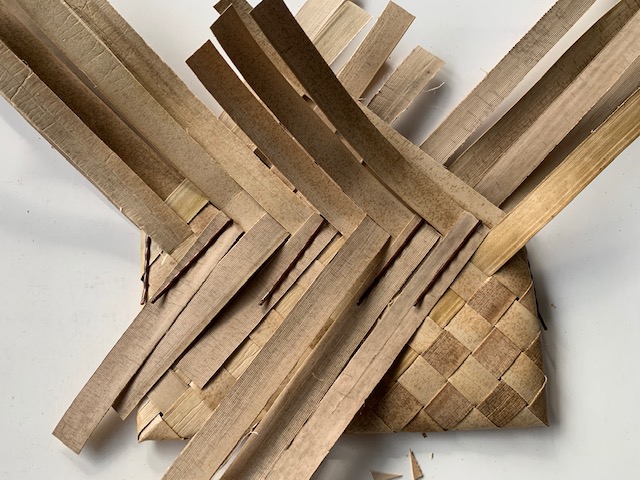
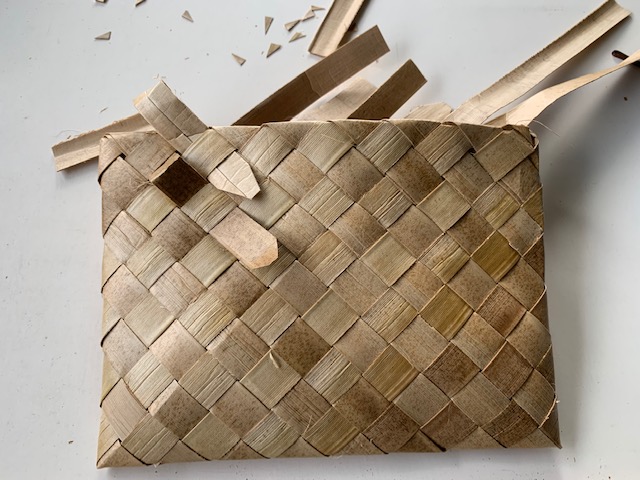
Continue to weave all of the dextral strips into the pocket both front and back.
 Front half of the project distral weaving nearly finished.
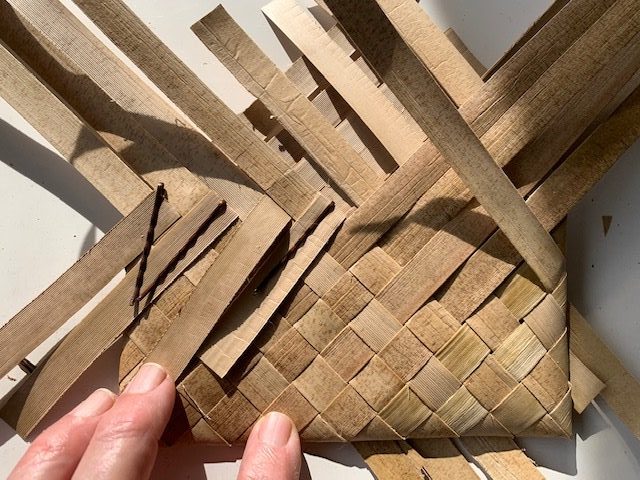
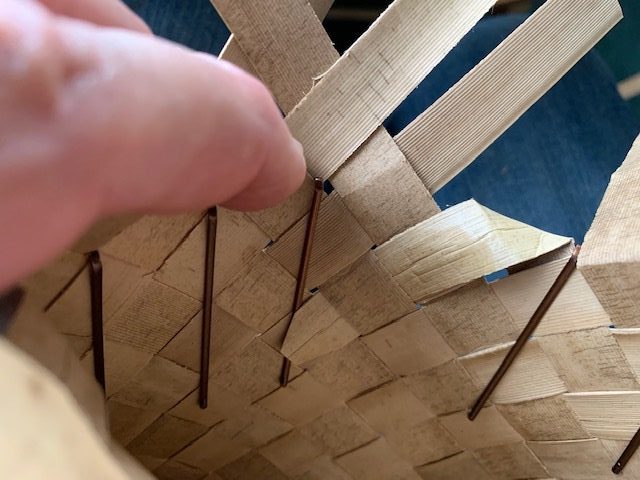
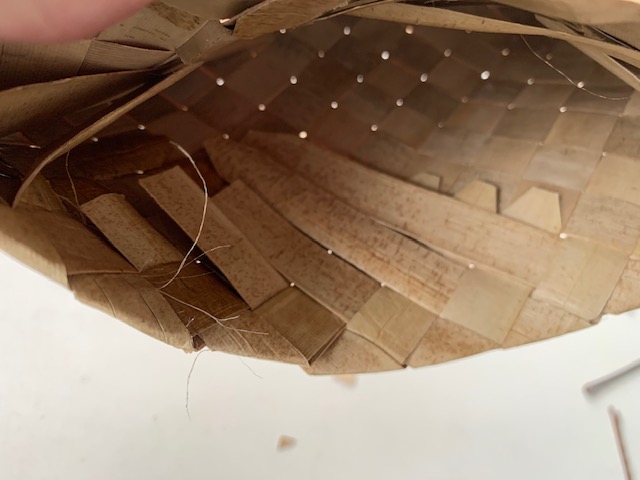
Weaving in the dextrals into the pocket at the left and right edges can be difficult. When you get to that point, temporarily flatten out the edge as much as possible so that it looks more like the rest of the pocket. At that point, which koana to weave under will become more apparent.
 A view into the edge of the pocket during the weaving process.
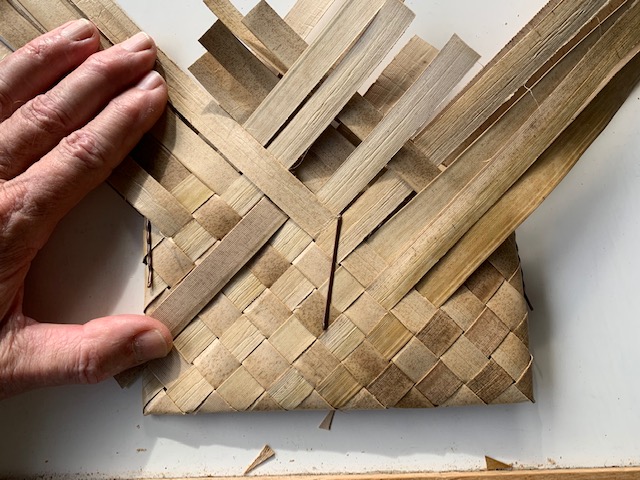
Now weave in the lower right to upper left koana (also called sinistrals) along the whole front edge of the project, leaving the back sinistrals unwoven at this time.
 Project showing the front of the bag with the sinistrals woven in.
Below shows the sinistral koana woven into the pocket for the front edge of the bag.
 Inner view of the pocket showing sinistrals woven in for the front on the bag.
Closing the Pocket
Now we’re going to close up the bag. This is the time to decide whether to put in an insulator (corrugated cardboard) or not. I’m not going to this time. Pinch the bag closed and begin weaving the matching back sinistral koanas into the front of the bag as shown below.
 Back sinistral koanas being woven into front face of bag.
Continue weaving in the back sinistrals until there are no more.
 All back sinistral koanas woven in.
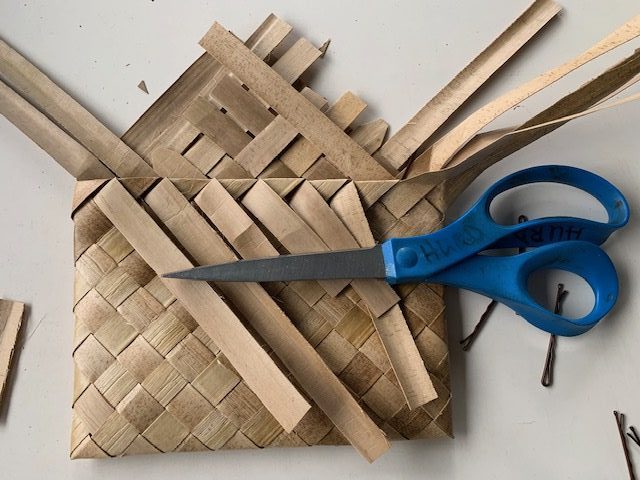
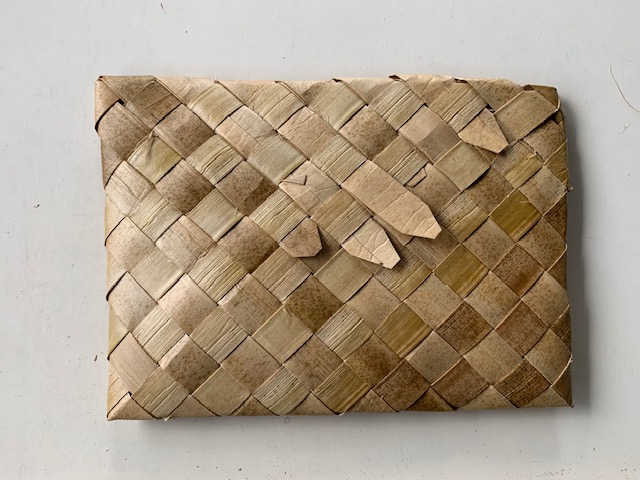
Using the single edge razor blade or small scissors, trim off all the excess koana material.
The finished trivet.
The finished trivet! Well clearly there are some good parts and other sections, notably the upper corners, need more practice. Also the weave is a little loose in some sections. I needed to be tugging at the koana in both directions as I was finishing the edges. But at least you now have a couple of ways to work with the diagonal weave.