Introduction
In this project we’re going to make another coaster, this time with nihoniho (toothed) edges. The weaving the nihoniho coaster approach is referenced in the Bird et al. (1982) weaving book in Sources of Information. In chapter 6, the authors make a place mat. You can download the pdf for that chapter from the link. We’re going to make a smaller version so that you can understand the weaving technique. After that you can make any larger or smaller size that you choose. See below for the finished coaster.
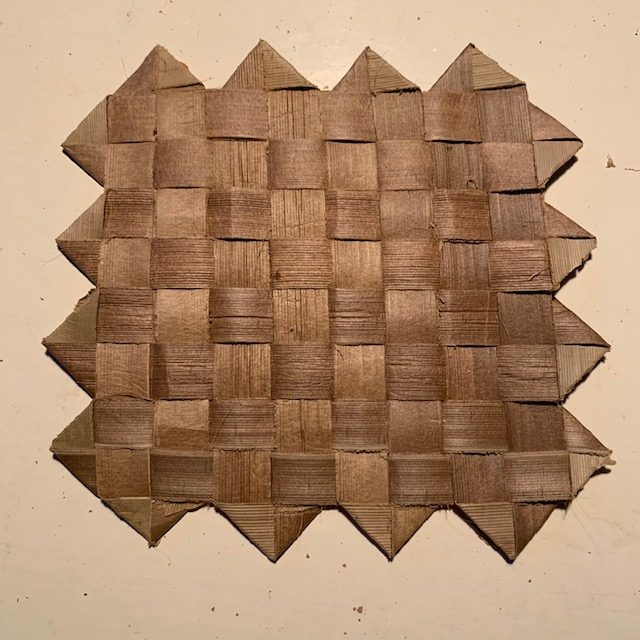 The finished nihoniho coaster from Bird, et al. (1982)
For this project you will need eight (8) pieces of lauhala (koana). Each koana will be 1/2″ wide and 16″ long. In the pictures, the edges look a little rough because I used a pin stripper to cut the koana. The edges at the bends also look a little rough because the lovely brown color of the leaves also meant in this case that the underside might be a little brittle. Let’s begin.
Beginning the Nihoniho Coaster
Figure 1 shows the first step in the process. The koana will all be woven so that the smooth upper side will be on top. About 5-6″ from the end of the koana, make a 90 degree bend to the right. This bend will show a triangle of underside in each niho when the work is finished. It is important at this point that the longer part of the koana is on the right side. That is, after bending, the short side will be on the left and the longer side will be on the right.
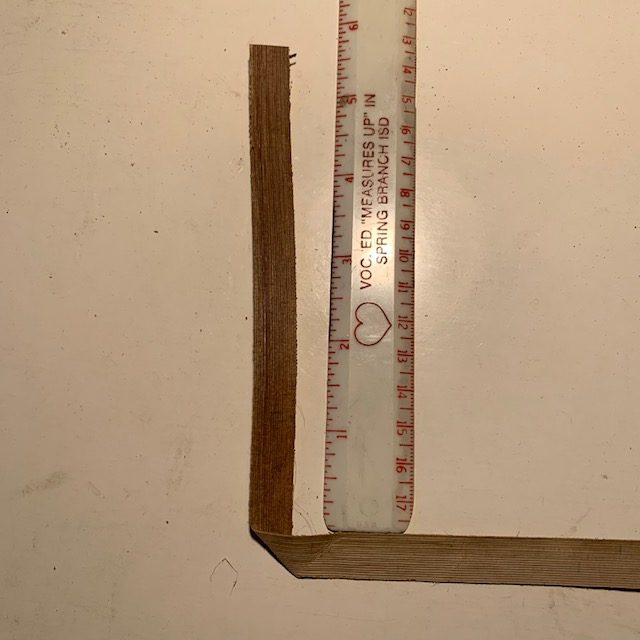 Figure 1. Making the first bend 90 degrees to the right with the smooth side up.
Figure 2 shows the second bend. It’s another 90 degree bend. At this point both strips should be parallel and very close to each other.
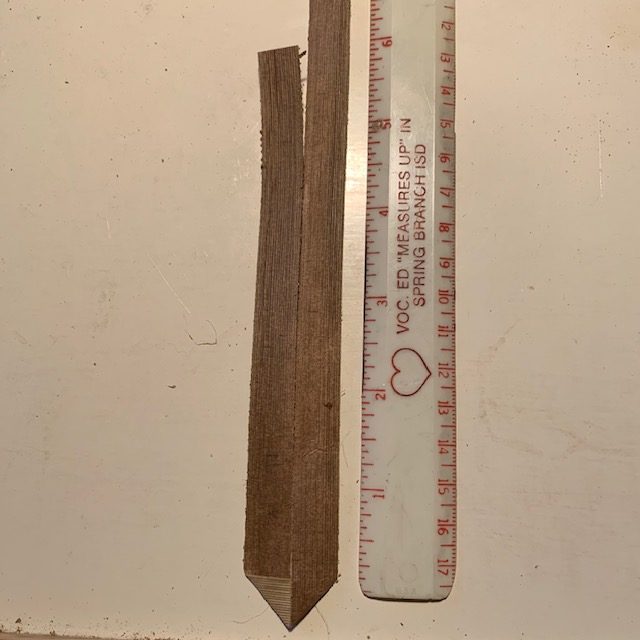 Figure 2. Making the second bend. Now the upper side of the koana is on top for both sides.
Repeat this bending/folding process for the other 7 koana. After you have finished that line four of them up side by side as shown in Figure 3.
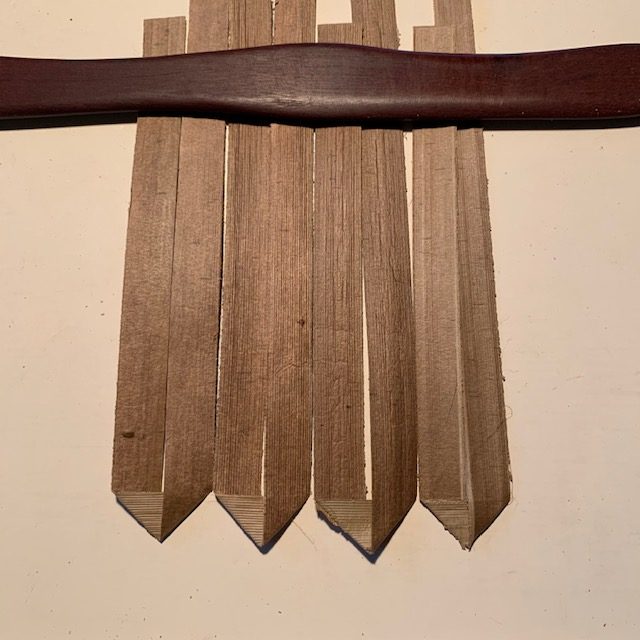 Figure 3. Four koana are lined up beside one another.
Now fold the left-hand side of each strip down as shown in Figure 4. Wooden pieces hold the koana in place for photographic purposes. As you become more skilled with weaving, you probably won’t need such things to help you.
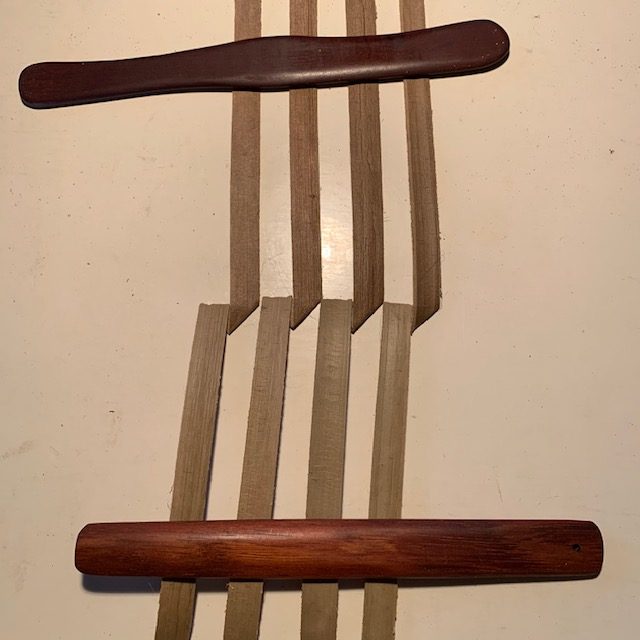 Figure 4. Fold the left-hand side of each koana down. The strips aren’t exactly parallel but that’s ok.
Beginning the Crossing Strips (moe)
Take koana number 5 and also fold back the left-hand side. Now place it on the first four strips as shown in Figure 5.
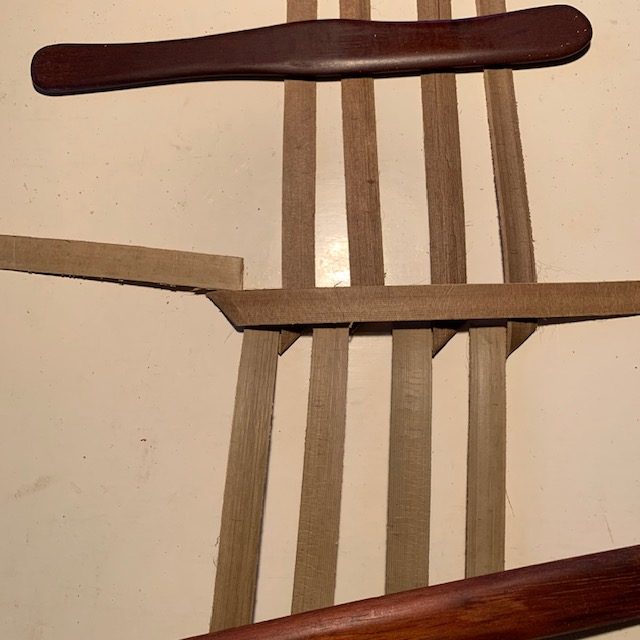 Figure 5. The fifth koana rests on top of the first four.
Now begin weaving the bottom strips over the fifth koana. Then weave the top koana down. See Figure 6.
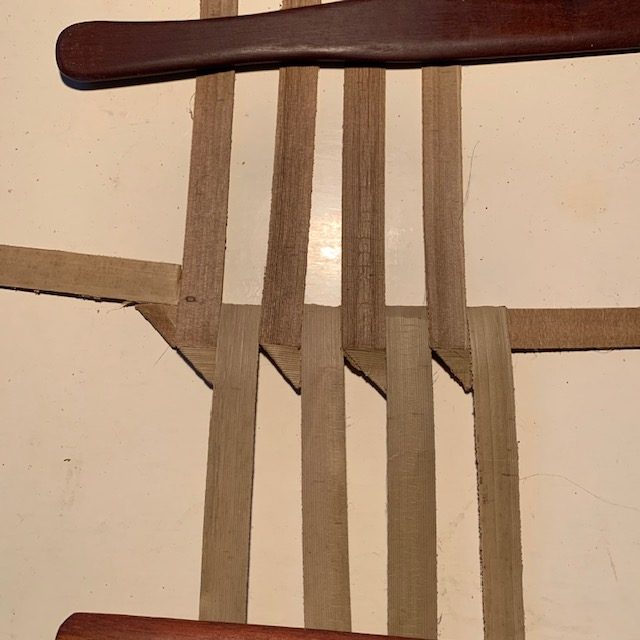 Figure 6. The bottom strips have been woven over the first half of the koana pair and the tops strips woven down.
Now fold the end of the first koana twice as you did in the beginning for each koana. See Figure 7. When you have done this, trim the piece near the end of the left side so that the end will lie below a koana which will be woven over it. Figure 11 shows one location for trimming.
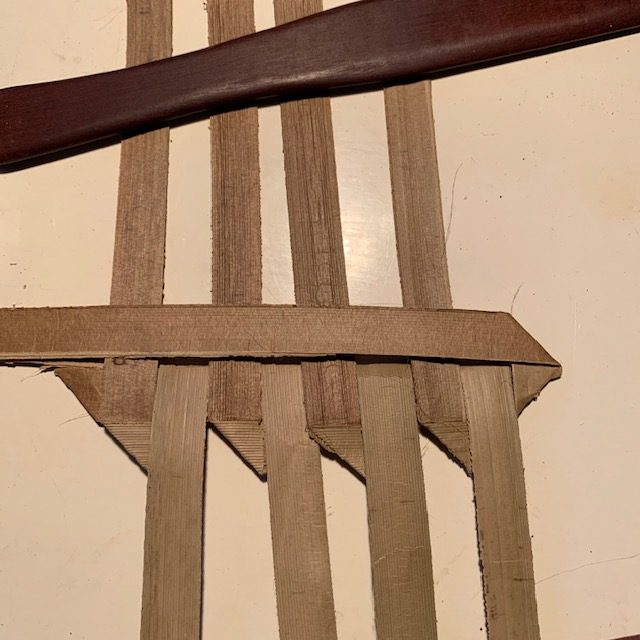 Figure 7. The second half of the fifth koana, folded twice and parallel to its other portion.
Now fold the left side koana over the piece you just folded and weave both the bottom and top koana over the pair of koana. It’s ok if the second folded koana sticks out at this point because we can trim it off later. See Figure 8 and 9 below. It’s important to continue to keep the koana tight against one another during the weaving. Figure 8 shows that they are a little loose (left side), and this needs to be corrected as the sixth koana is woven in place.
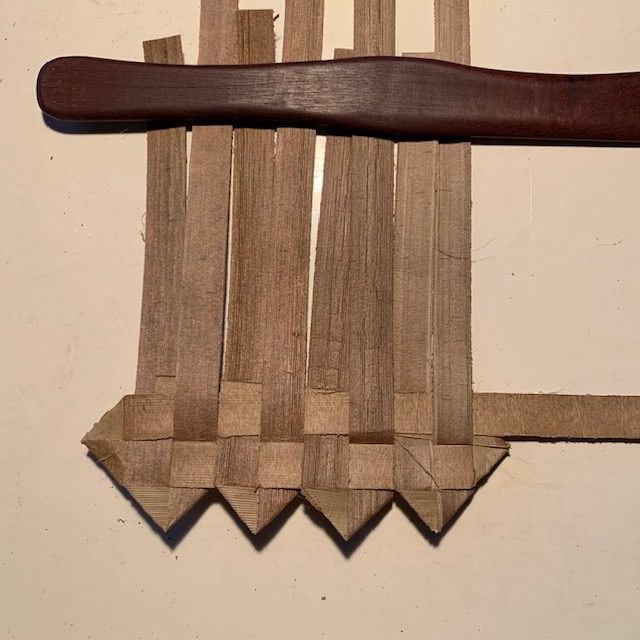 Figure 8. Shows the bottom koana folded over the pair of fifth koana.
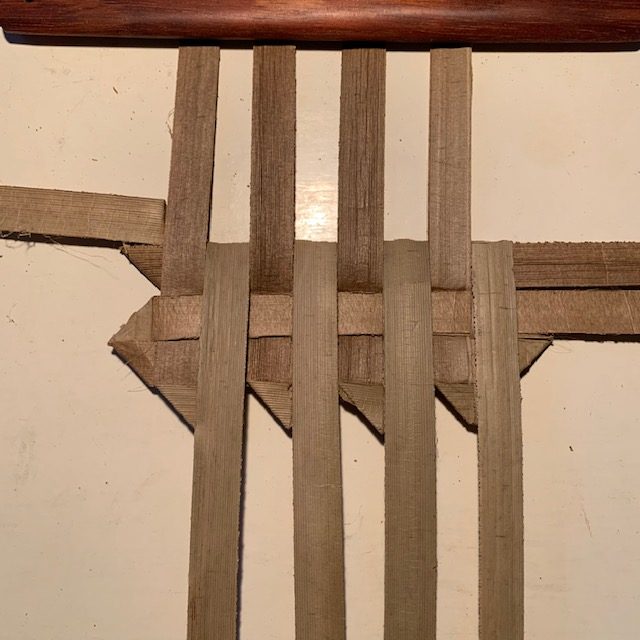 Figure 9. The first part of the sixth koana has been lain down and the weaving begun just like the fifth koana. The end of the sixth koana is ready to be double folded and turned back the way that you did the first one.
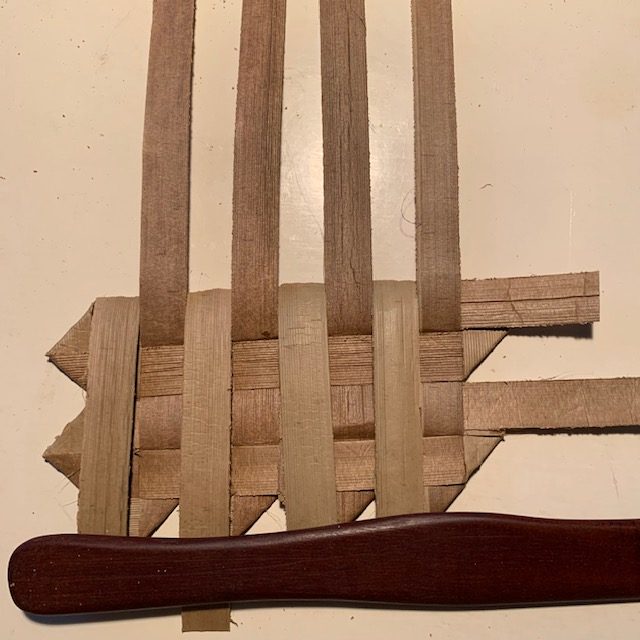 Figure 10. Sixth koana in place and ready for the seventh.
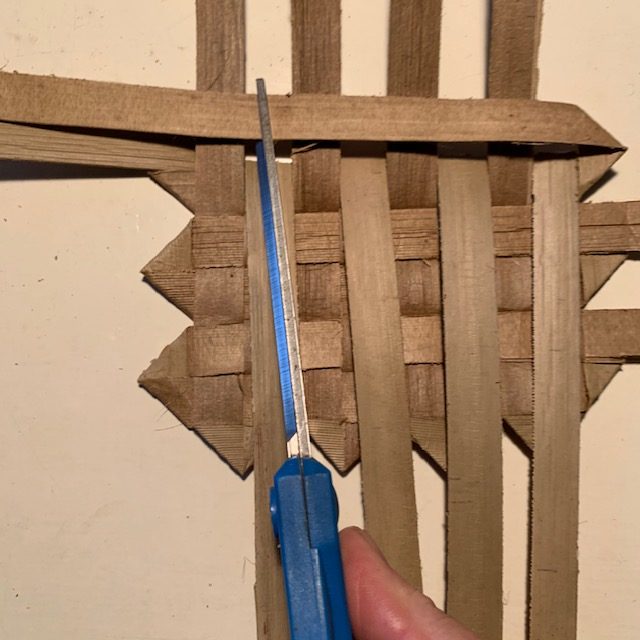 Figure 11. Seventh koana during folding process showing one place to trim the end.
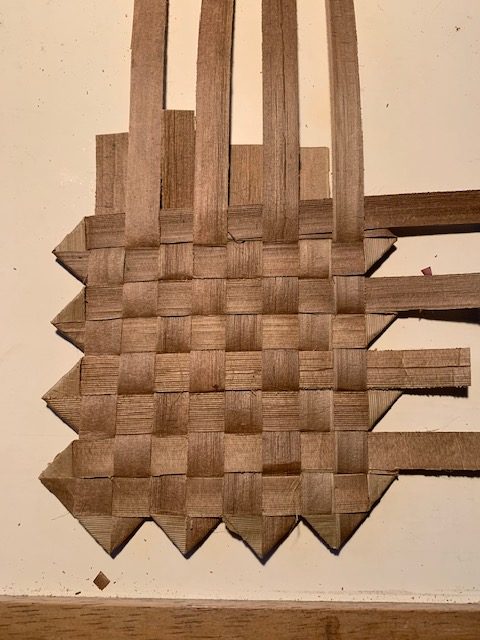 Figure 12. All remaining koana woven into place and ready for closing up.
Closing up the Nihoniho Coaster
Now we’re ready to close up the loose ends. Trim each of the ends of the first four koana as shown in Figure 13 below.
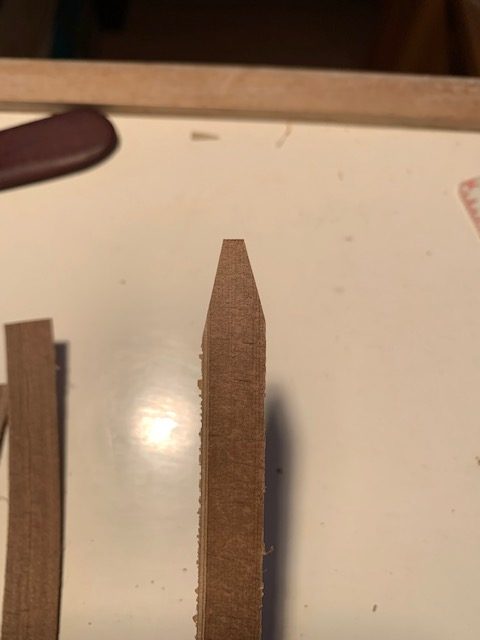 Figure 13. The trimmed end of the koana makes it easier to weave under the crossing koana.
We’ll now double fold the ends of each of the first four koana as we have done before and begin weaving under the crossing koana. See Figure 14 below.
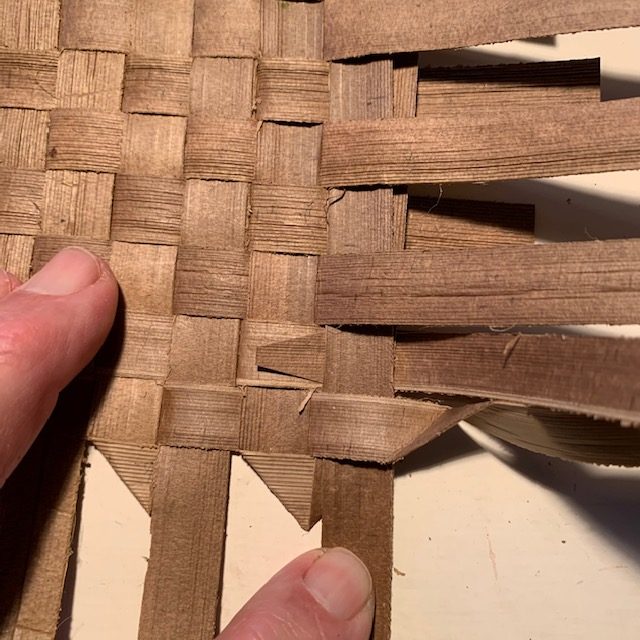 Figure 14. The double folded koana will now go under the crossing koana.
The first crossing koana is usually pretty easy to go under but the subsequent three are, at least for me, more difficult. So a little device is necessary to go under the crossing koana to make space for the incoming one. See Figure 15 for ideas.
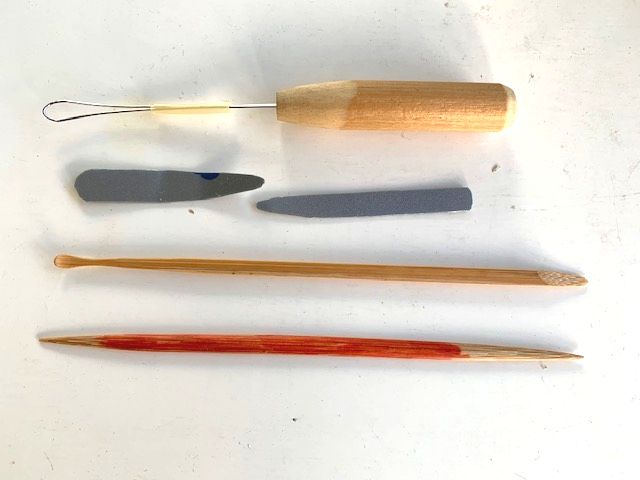
Figure 15. Different tools for helping to weave koana under one another. These include pieces of credit card, a bamboo ear cleaner (!) and a double ended commercially available stiff bamboo pick.
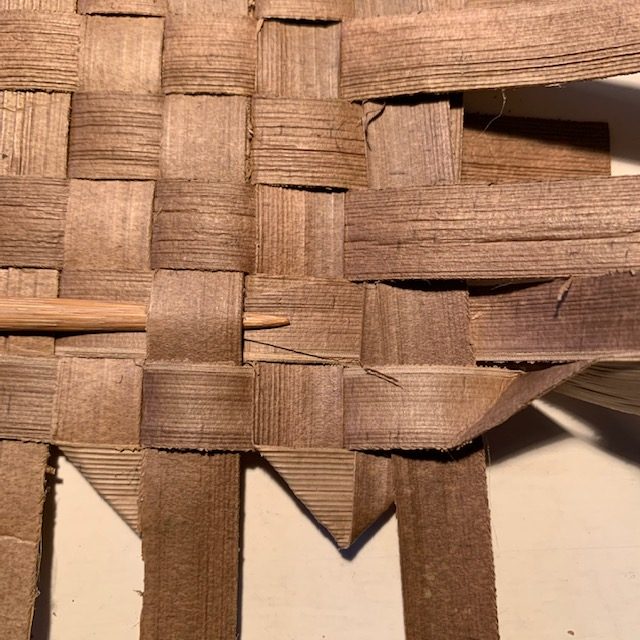 Figure 16. Shows the bamboo pick being used to make room for the incoming koana. The shaped credit card pieces would work just as well.
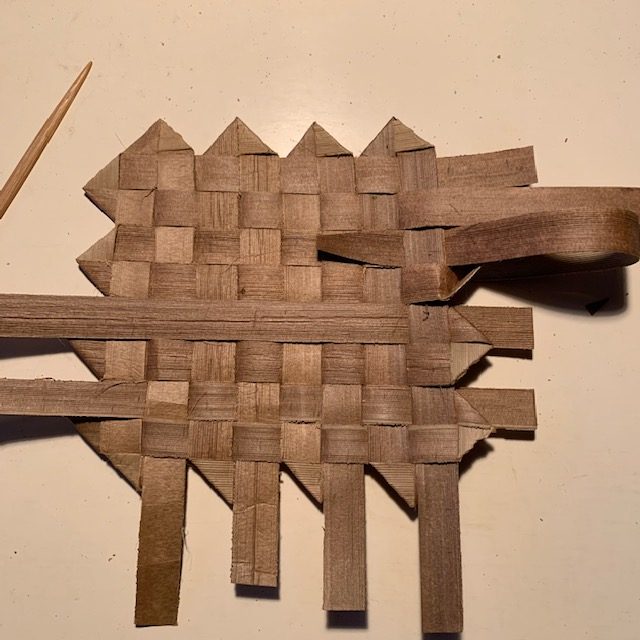 Figure 17. The weaving continues.
 Figure 18. All remaining koana have been woven into place. Time to trim.
With all the remaining koana woven into place, it’s time to trim off all the loose ends. As mentioned earlier, I use a single edged razor blade that’s firmly pressed against the edge of a crossing koana to trim. If possible, pull the koana to be trimmed a bit so that after trimming, the trimmed edge will go under the crossing koana. Figures 19 and 20 show the razor blade in use.
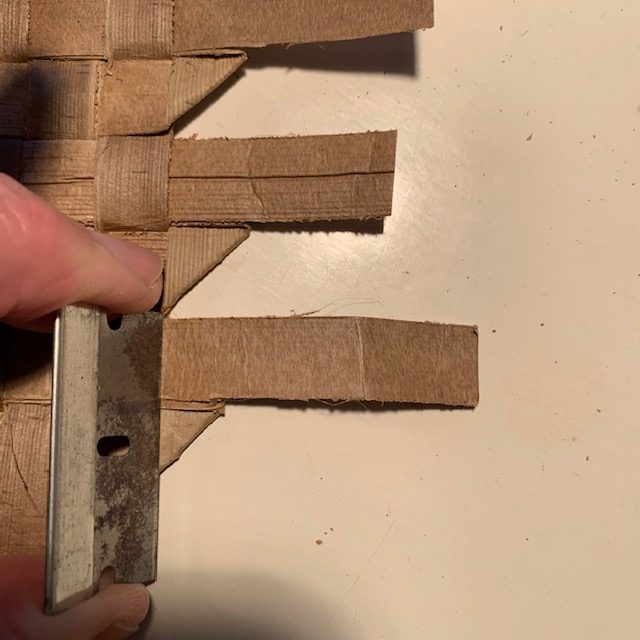 Figure 19. The razor blade is in place.
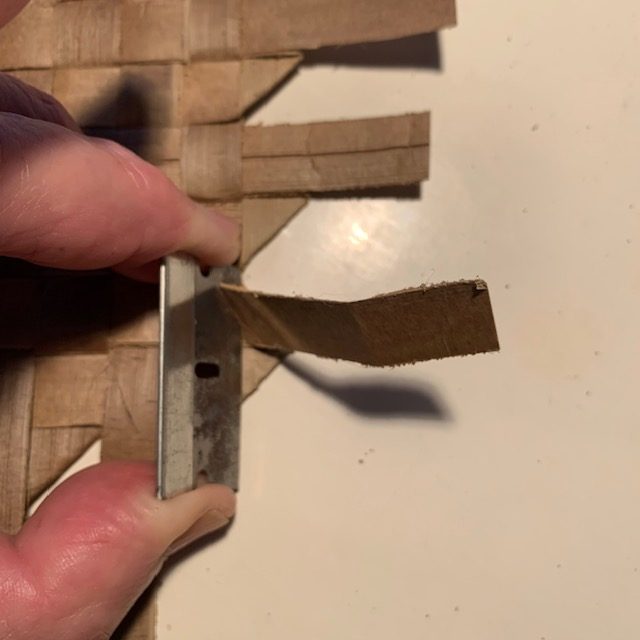 Figure 20. The trim is partially complete.
Figures 21 and 22 show both sides of the completed nihoniho coaster.
Figure 21. The top side of the completed nihoniho coaster.
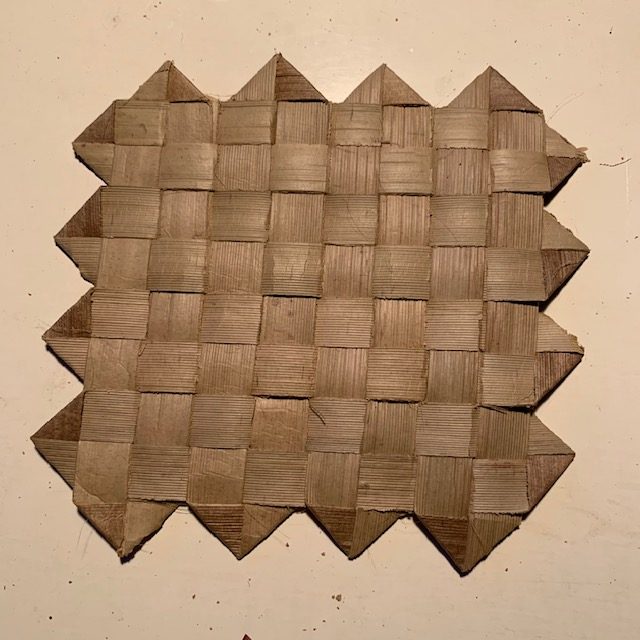 Figure 22. The underside of the completed nihoniho coaster.
Well, that wasn’t too hard I hope. I think that a 3×3 koana weaving might also do just as well for a coaster. You might think that the double thickness for every other weaving direction would be a little awkward in the final piece, but since the same double thickness occurs at 90 degrees when finishing it seems to even out.