Introduction to Whakakitaratara – serrated edge plaiting
Approximately 100 years ago, Sir Peter Buck ( Te Rangi Hiroa ) wrote an article about Maori plaiting techniques. Near the end of the article (p. 737) he discussed a way of finishing the edge of a kete termed whakakitaratara. Figure 1 shows an example of the whakakitaratara edge. I thought it would make an interesting way to hiʻi or finish the edge of a hat brim, hence the following article.
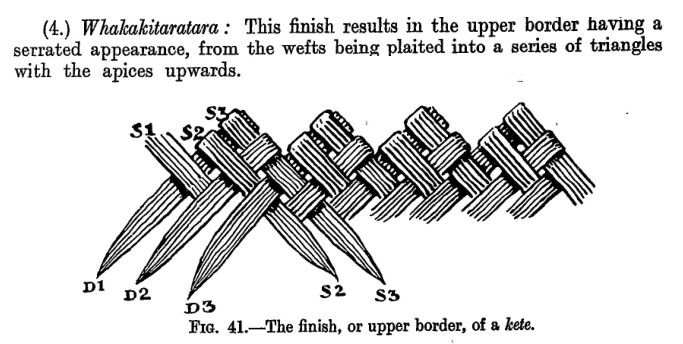 Figure 1. An example of a whakakitaratara edge
What follows is a series of pictures using a practice plaiting setup after the fashion of kumu Jim Skibby. I really like his approach for creating a practice board. These boards can be made with just a few koana as shown below or with several dozen for more complex designs.
Plaiting the Whakakitaratara Serrated Edge
We will be plaiting on the underside of the brim and from left to right. Just go slowly and observe the sequential changes in each figure and Iʻm sure youʻll be able to make this work for you.
We begin by plaiting several rows of maka moena. Figure 2 shows maka marked orange and green. These maka are those which koana will later be plaited under in order to lock the weave for each unit in place.
 Figure 2. Color marked maka for locking the weave.
First fold one koana down. This is the beginning of a little patch of maka moena
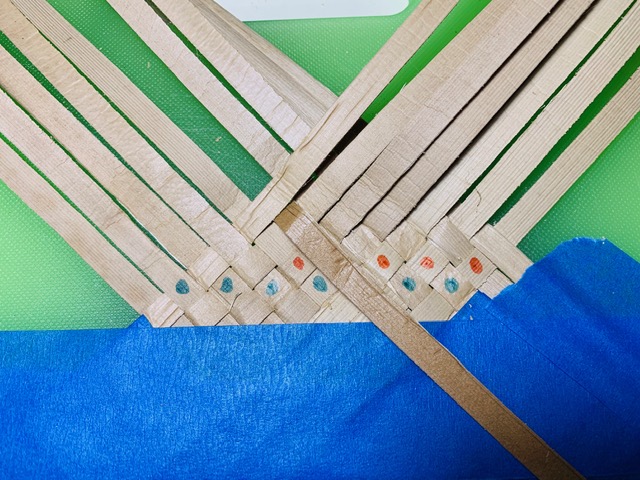 Figure 3. Showing the starting point for the plait.
Then fold it back up and fold the one at right angles to it down as in Figure 4.
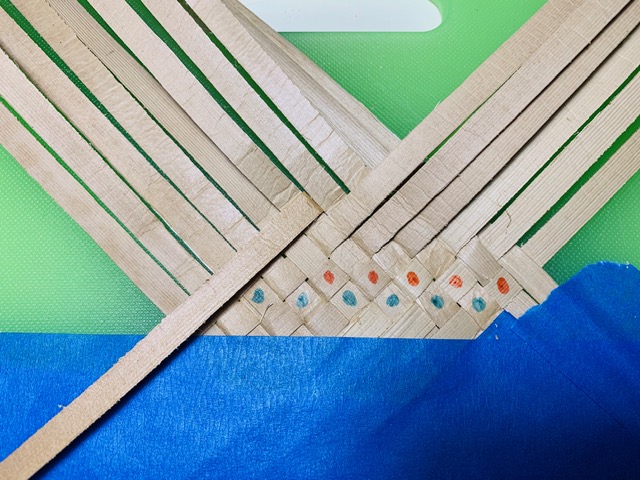 Figure 4. The beginning of the whakakitaratara edge
Now fold the very first koana that you folded up back down again covering the second koana as in Figure 5. So far we have only used two koana to begin the process.
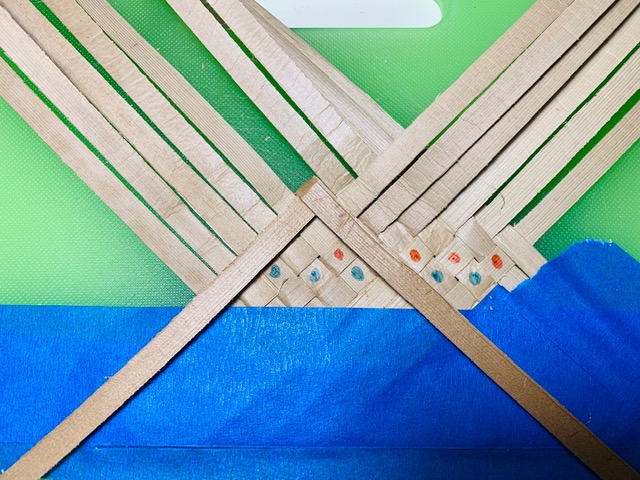 Figure 5.
In Figure 6 we fold the third koana down to cover the one you just folded down. Weʻre working in a clockwise manner.
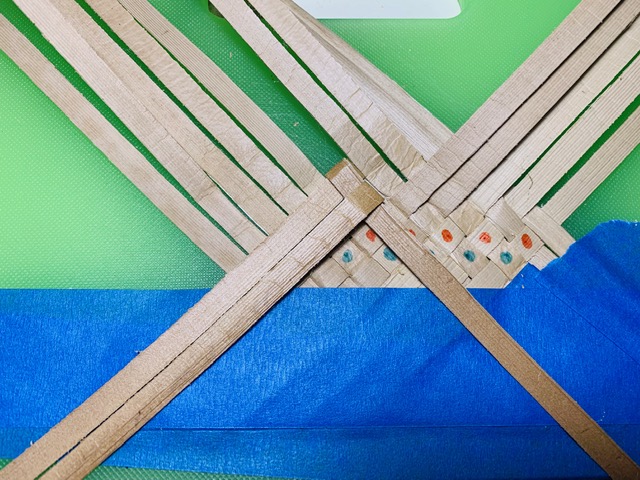 Figure 6. Showing the third koana folded down.
In Figure 7 we fold the fourth koana down so that it covers TWO strips. Look at the original whakakitaratara picture in Figure 1 to convince yourself that this is the right thing to do. At this point we have made a total of four folds and itʻs time to lock in the pattern.
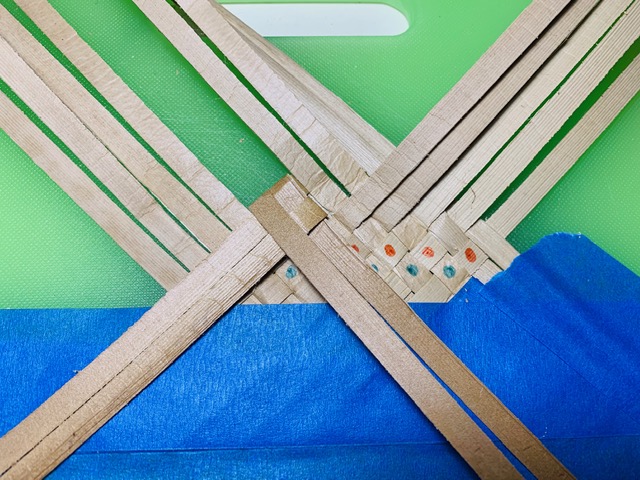 Figure 7. The fourth koana is now folded down over TWO other koana
Figure 8 shows two koana plaited under the “orange dot” maka to lock them in. Itʻs possible just to go on to the next weave at this point or you can lock the other two shown in Figure 9.
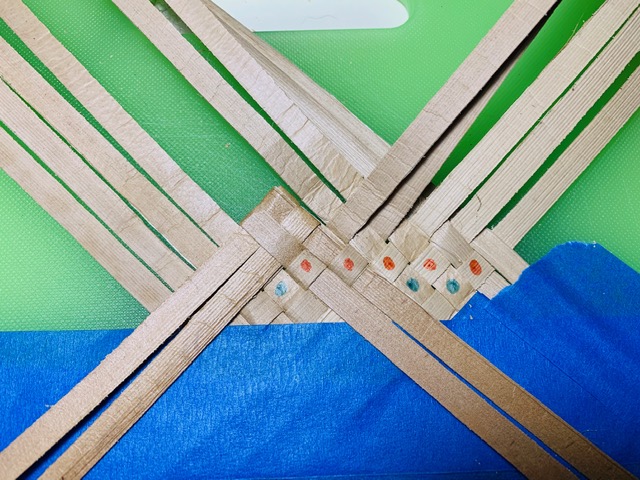 Figure 8. Shows the first two koana woven under two locking maka.
Figure 9 shows both of the remaining koana plaited under their “green dot” maka.
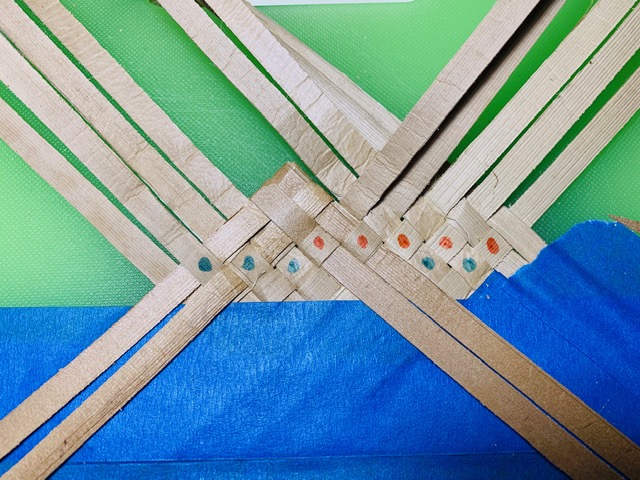 Figure 9. The remaining two koana plaited under their locking maka
Figure 10 shows three of the serrated units plaited and locked.
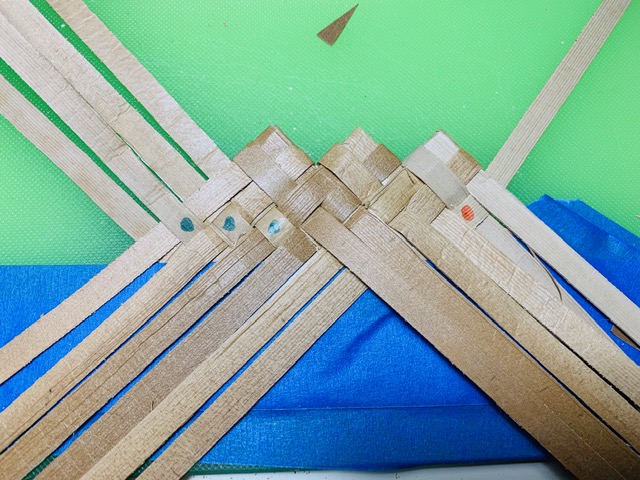 Figure 10. Shows three of the whakakitaratara finished.
Of course I had to try this on a hat brim and Figure 11 shows the underside of the brim with the whakakitaratara plait. The eagle eyed among you may have noticed that I went under two maka to lock in each koana. In the future Iʻll just be using one maka as shown above.
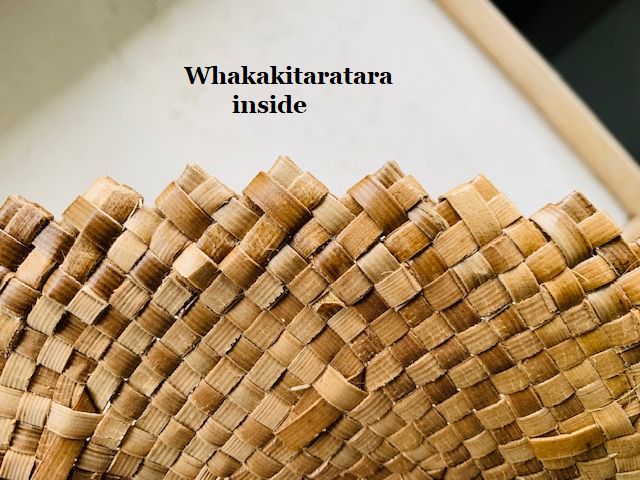 Figure 11. Shows the whakakitaratara plait on the inside of the brim.
Finally Figure 12 shows the outside of the same brim. I think that each of the folding units could have been pulled a little tighter but weʻll remember that for the next brim.
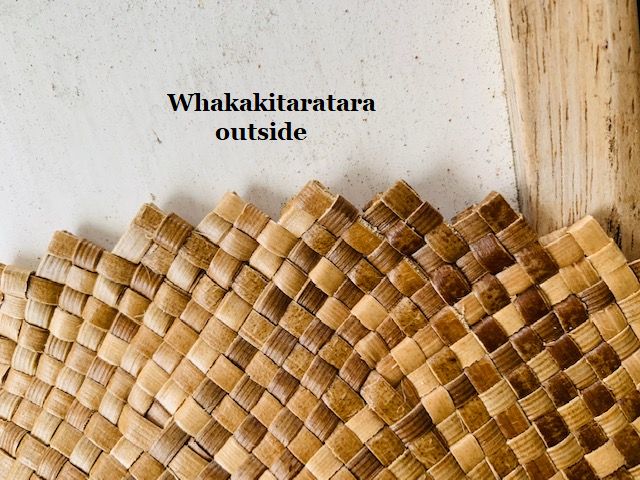 Figure 12. Shows the whakakitaratara plait on the outside of a brim