Introduction
Over time, the perspiration and oils from user sweat can degrade the inner side of lauhala hats where contact is made. A partial solution to this problem is to sew a sweatband into your lauhala hat. What follows is a detailed description of how to measure and sew in a sweatband.
I based the following procedure on instructions by Brad Powers (Brad Powers – https://www.thefedoralounge.com/threads/stitch-awl-tutorial-sweatband-installation.38010/ ). Additional email advice was given by Cherie Okada-Carlson.
Materials and Tools
I use sweatband materials available (at this writing) from Cherie Okada-Carlson on her website: sweatband material. It’s easy to work with and the light brown color goes well with the range of lauhala colors.
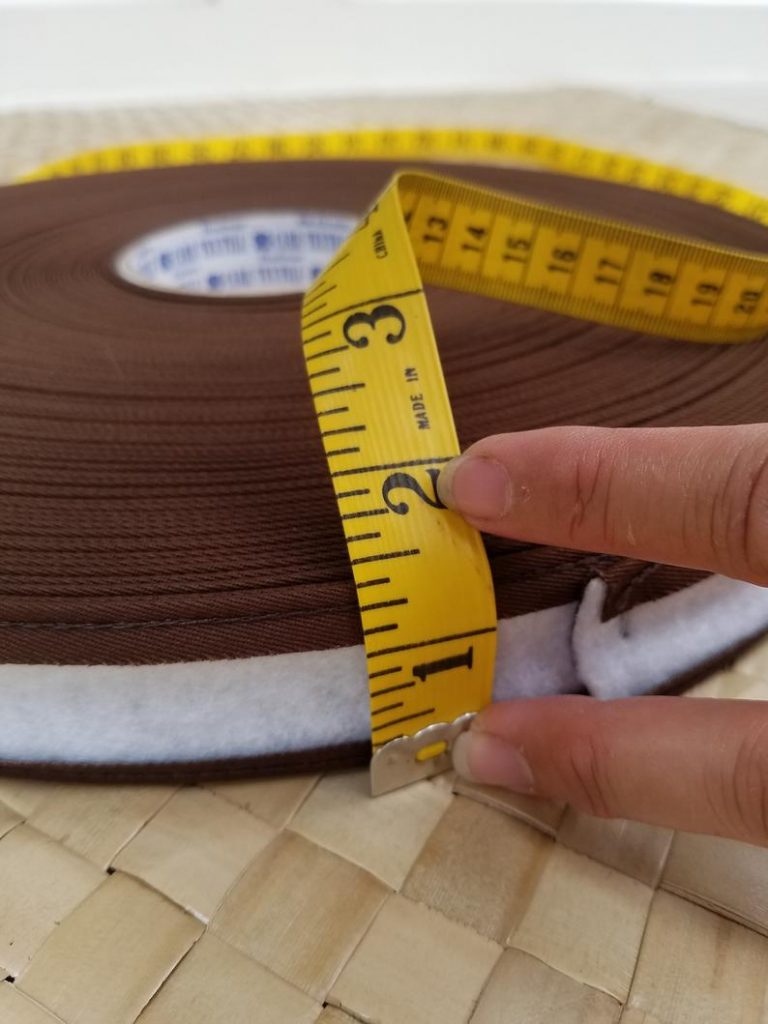 Figure 1. Sweatband material
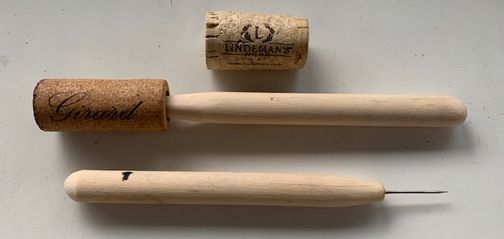
I made stitching awls out of the largest Singer sewing machine needles available to me (size 18/110, sharp point) and ½” shaped wooden dowels ~ 5″ long (Figure 2). If you make your own, the awl should extend at least 1-1 1/4″ beyond the end of the dowel so that the loops formed during the sewing process will be easy to deal with. For safety, I cover the awl with a cork when not in use.
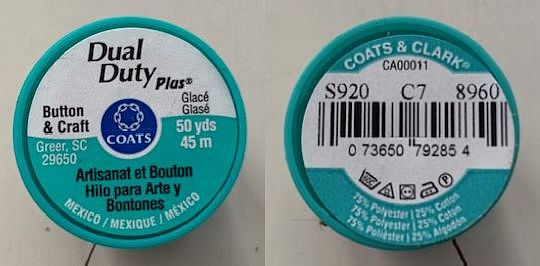
I use Coats and Clark button and craft dark brown thread. See Figure 3 for purchasing details.
Sizing the Sweatband and Hat
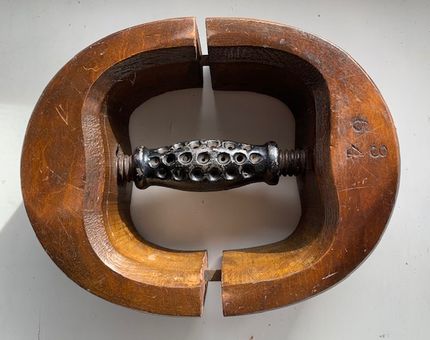
If you already have a lauhala hat that you want to line, it may be necessary to open up the hat a little so that the final fit will be the same as that without the sweatband. Loosen the string at the base of the sides a little by hooking a series of string loops and gently open up the inner circumference of the hat. A hat stretcher (Figure 4) is very useful for this. These devices are common on Ebay ( use “hat stretcher” as the search term) and are commonly less than $25.
If the hat hasn’t been made yet, measure the comfortable circumference of the owner’s head where the string section of the hat will be. Then add 1″ to that length and cut the sweatband material to that length. The 1″ allows for the 1/8″ seam overlap which may be straight or slightly diagonal with the shorter side oriented toward the crown of the hat. The diagonal orientation reduces the likelihood of wrinkles in the sweatband. Zigzag sew the seam.
The inner diameter of the hat where the string is should be made ¼” larger than the “comfortable circumference” of the owner’s head to allow for the thickness of the sweatband. You will need to find, modify or make a form of this size for the hat. If the comfortable fit of the sweatband is 22 ¼” then the circumference of the mold where the brim and sides join should be 22 ½”.
Sewing in the Sweatband
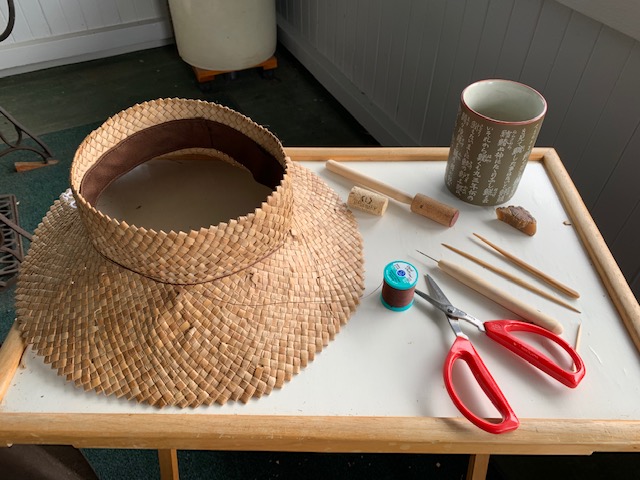
There’s a nice French expression: Mise en place. It means get all of the things you’ll need for your project together so you don’t have to stop and look for things in the middle of the project. Figure 5 shows what we’ll need (although the hat shown already has a lining).
You can baste in the sweatband if you wish, but I haven’t found that necessary. I just let it rest within the hat with the smaller circumference edge facing the crown.
Measuring the thread; threading the needle
Following Bob’s advice (link above) I use four times the circumference of the hat where the string is for the thread length. Trust me, you don’t want to have to tie another piece of thread on a short length and then have to pull the knot through the material.
Thread the awl and bring it to the midpoint of the thread. I usually wax the end of the thread to make it a little stiffer and easier to thread the awl.
Sewing through the hat and sweatband
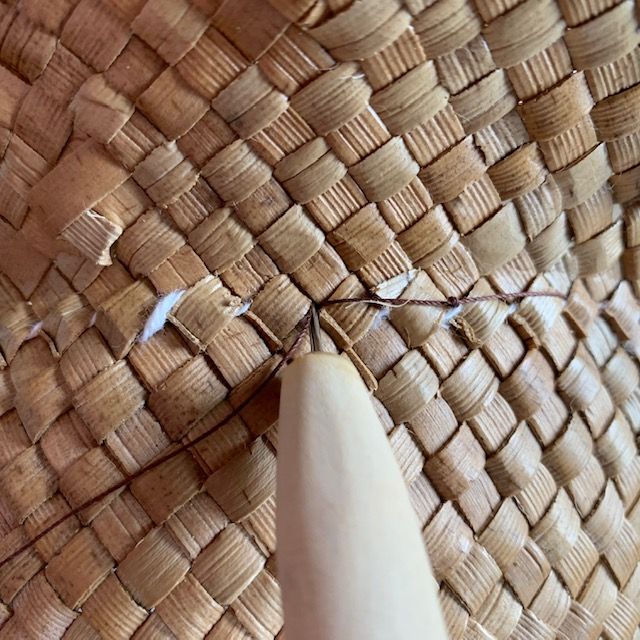
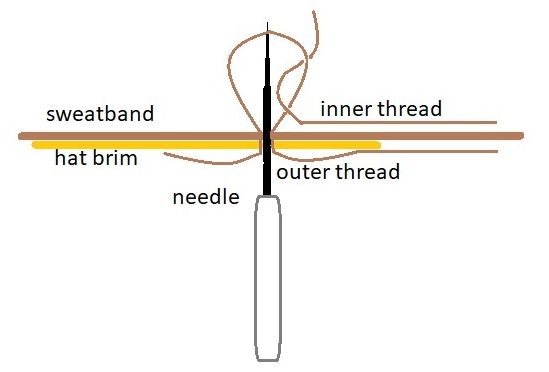
It’s important not to pierce the lauhala strips (koana). But it’s easy not to do that. Just go through the small gap where four lauhala strips cross the cotton string (Figure 6). You may need to push the string aside from time to time in order to go through. Depending on where the string is relative to the beginning of the brim, you may need to begin 1 or 2 rows above the string.
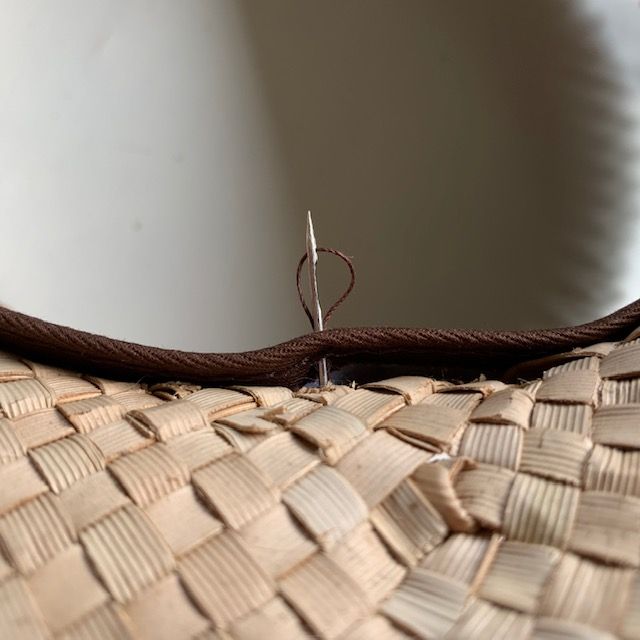
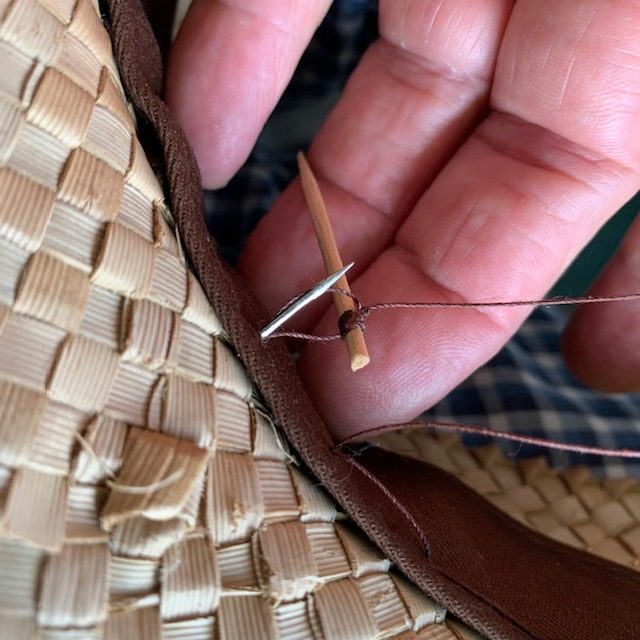
Coming out the other side pierce the sweatband about 1/8″ below the sweatband stitching. Now pull the right hand loop thread (Figure 7) so that ~ half of the thread is now completely on the inside of the hat and the other half is on the outside. I tie a toothpick to the end of the thread inside the hat (Figure 8) to make it easier to keep track of but other approaches would also work. Pull the awl out, with the thread still in the eye, and you’re ready to begin the regular stitching process.
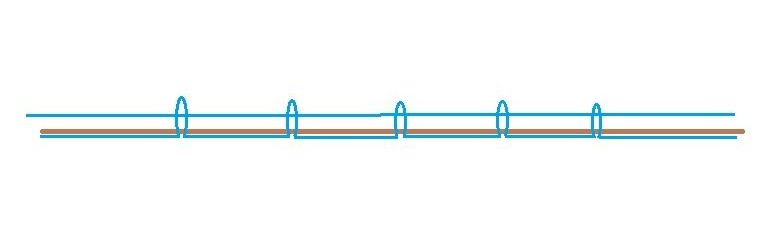
Go to the left two strips (Figure 6) and go through the interstices and the fabric again. Pull back slightly to make the loops (Figure 7) and put the inside thread through the right loop (Figure 8 and Figure 9) and pull it all the way through. The sewing process will end up with a series of loops made by the outer thread that the inner thread will go through (Figure 10).
It’s very important to get into the habit of not twisting the awl as it goes through the hat and sweatband. If you do twist the awl and go through the wrong loop, then it will be MUCH harder to pull the thread through later when it comes time to firm everything up. Further, when the awl is pulled out, it will also be on the wrong side of the loop. That is, the awl will be between the previous stitch and the current one rather than on the open side of the current one.
Pull the awl out. The awl should be to the left of the hole you just went through so that you can go over two more strips and repeat the process. If the awl is on the right of the hole, gently pull the loop made by the inside thread to the outside until it is large enough to fit the awl and handle through. Then thread the awl and handle from right to left through the loop and out the other side.
Firming up the thread as you go along
The awl and handle will now be on the left of the loop and you can gently tug on both the inside and outside threads to firm things up. This firming should be done every 3-4 loops so that not too much slack builds up within the stitching.
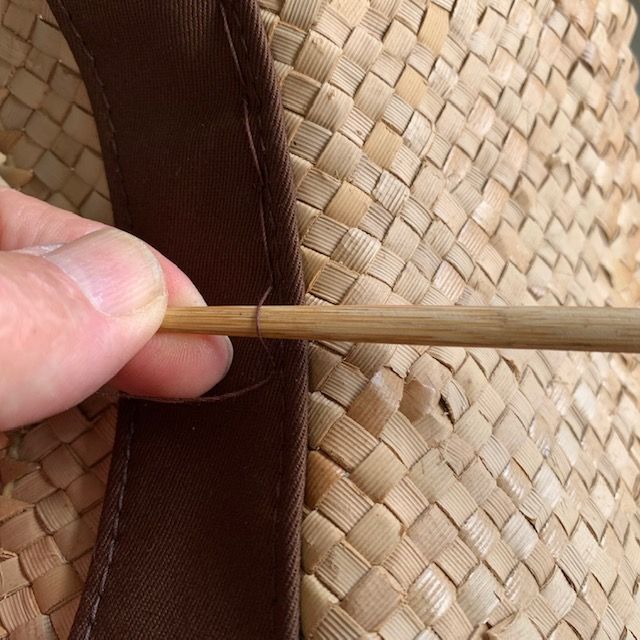
Figure 11 shows a slender piece of bamboo to do the job but as Bob points out, a letter opener or some similar such device would also be just fine. When you’ve finished the sewing, begin at the beginning and firm up both sides until you’ve reached the end. You may end up with an inch or two of slack as you go along.
Finishing the process
When you’re all done, bring the outside thread inside or vice versa and tie a firm knot. I usually but a small amount of clear nail polish on the knot to help keep it closed.
Figure 12 shows how neat and professional the stitching looks. The sweatband is also still available for folding up for cleaning as needed. Here’s a link for good advice on this (and many other things): https://www.thespruce.com/how-to-care-for-hats-sweatbands-3861412 .

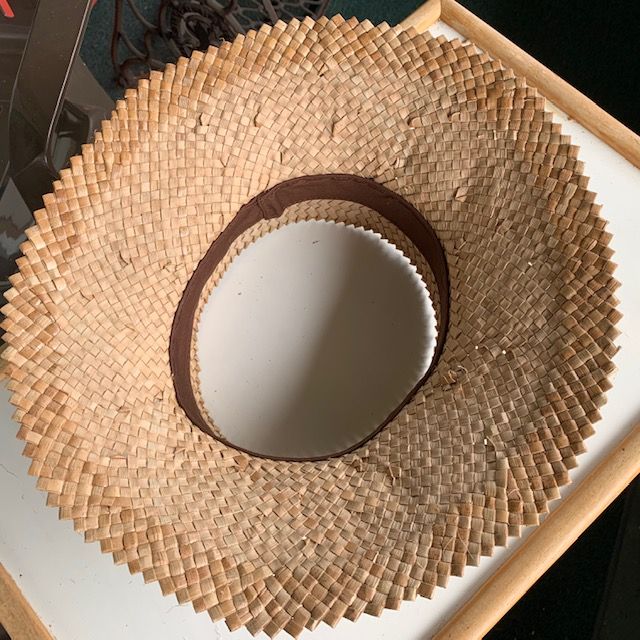 Figure 13 shows the finished product for one of my recent attempts at hat making with a sweatband in place.