Tips and Tricks
Making Double Wire Leaders
I think we all suffer from the paradox of trolling: if we use too light a leader, toothy fish cut it like butter; if we use too heavy a leader, fish are more leery about hitting the lure. I have struggled with this for some time, going back and forth between wire cable and very heavy monofilament for ono (wahoo) fishing with predictable results: many lost lures with mono and fewer hits with cable. In desperation, I began trying to use wire leader but had many kinks and fouling problems. Then three Internet url’s changed everything for the better.
In the first url: http://www.leadertec.com/strand_wire.html
Captain Spike describes briefly how to make a double strand leader. In the second url Steve Hicks and Jim Rizzuto describe a process for making a small eye on the haywire twist which will fit through a 1/8″ i.d. lure leader channel down the center of a lure:
http://www.gulffishing.com/tips_haywiretwist.html and
http://fire.worldpub.net/PRD/WPI/SF/SF_Main/1,3214,5-1-1-21306-327-334,00.html
The purpose of this page is to expand on these three descriptions with photographs and show some additional techniques for making the process easier, at least for me.
Using short lengths for wire leaders is not a new idea. One idea behind using short leaders for ono is that as the ono runs, the leader is next to the body and thus less liable for cutoffs from other ono striking the swivel or leader itself. Pinning the lure with a toothpick in the leader channel or some such approach also keeps the lure from riding up the leader and again, reducing the likelihood of cutoffs.
In the procedure that follows you’ll need the following tools: a bench top vise, a couple of 7/8-1″ thick wood pieces, 1/16″ thick washers, 6″ of broomstick or 1″ diameter dowel and a type of vise-grip pliers (found at most hardware stores) which has pivoting plates at the ends of the gripper arms. The smaller size (~8″ long) will suffice and should be less than $10. The broomstick acts as a handle to hold one of the washers. This washer has a slot cut into it to remove the wire after making the first Haywire twist. I’ve cut a notch in the end of the broom stick into which the washer goes and then drilled, pinned (with a small finishing nail) and epoxied the washer into place.
 There are five different twisting and wrapping operations needed to form the double leader with three of them being the familiar Haywire twist. The other two include a loose braid and the final barrel wrap.
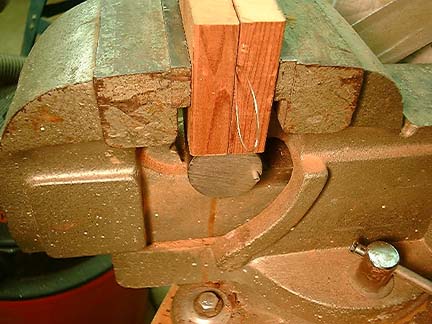
I use a 40-48″ length of #10 stainless wire to form each leader. This seems like pretty sturdy stuff yet it’s visibility in the water appears low — I’ve routinely caught small aku (tuna) in the 3-4 lb range on feather lures with these leaders. The first step (above) is to make a gentle bend in the middle of the leader, then firmly clamp the wires in between a pair of wooden blocks with about 2″ of wire loop sticking out. Note that the block wood grain is vertical to reduce slippage of the wires.
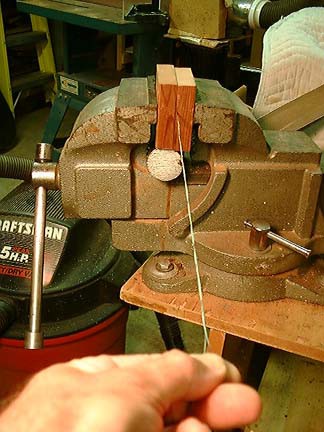
 The washer is slipped onto the loop, pulled firmly and 8-10 turns made. Un-hook the washer and put the small loop in between the blocks. Now loosely braid the line until ~ 6″ remains as Captain Spike suggests.
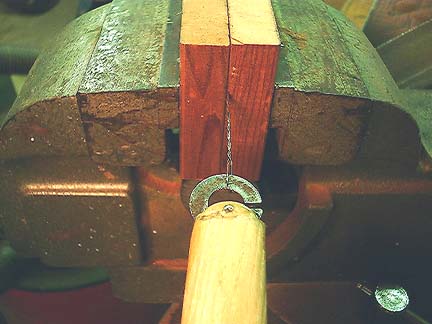
Then put the loosely braided line in the wooden block with the 6″ pigtail sticking out and firmly clamp once more. About 2″ from the block clamp the wires with the vise grips and the second washer such that a wire is on either side of the washer (above). Now make another 8-10 turns to make the locking twist that will hold the loose braid in place.
Firmly tighten the hook shank in the vise and thread the pair of wires through the eye, leaving about 1 1/2 – 2″ for the Haywire twist and barrel wrap.
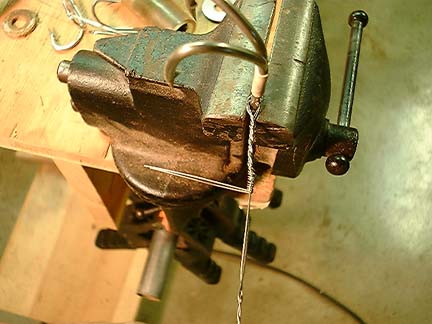
Again clamp the wires on both sides of the washer with the vise grips, being careful not to clamp the wires on top of one another. That is, the wires on each side of the washer should be parallel to one another. Pull firmly and twist 8-10 times.
Now barrel wrap the pair of wires 4-5 times around the main leader wires and bend to finish.
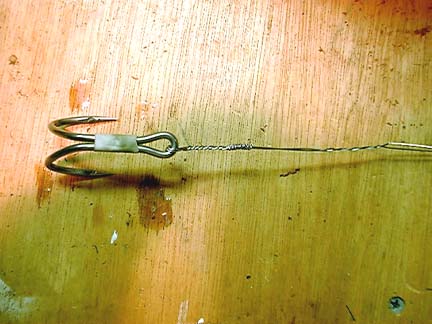
If the wires are cut rather than broken by bending, use pliers to shape the ends around the main leader wires, being careful not to nick the wires. Note that if you cut the wire, there will be sharp ends to worry about regardless of how carefully you shape the ends. Keeping these ends inside the lure and pinning the lure will minimize risk.
At this point, depending on the exact thickness of the washer used for the first twist you may or may not have to gently squeeze the leader eye slightly to fit into a 1/8″ i.d. lure leader channel.
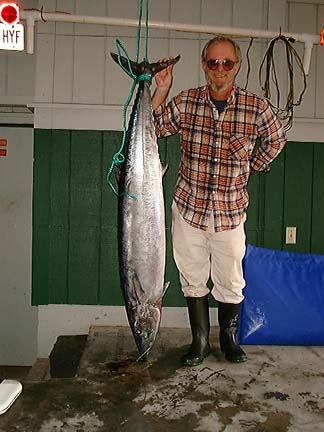
56 lb ono
Here’s the first real test of the double leader for me and I must admit that I was quite pleased with the results. I used a small jet head with 4″ skirt and 1 oz egg sinker just above the hook to put the lure somewhat below the surface. Skirt colors are purple, blue, green & yellow over orange & yellow. The leader bent slightly as a result of the struggle but no obvious damage was done to either lure (since the ono inhaled it and the Japanese double hooks lodged in the gill rakers) or the leader. Prudence does suggest a new leader however…