Preparing Lauhala for Weaving
There are a number of basic steps for working with lauhala. They can roughly be separated into several groups: gathering the lauhala, preparing the lauhala for weaving and using during the actual weaving process. In this article we focus on preparing the lauhala for weaving.
Gathering the Lauhala
I use a bamboo pole about 10-15 feet long to pull loose leaves from the tree. Some sort of hook that sticks out 8-10 inches is fastened at right angles to the end of the pole. I use a sickle but coat hangers, bicycle hooks and other devices work just as well.
Also it’s necessary to look at many leaves and sometimes even work with bad ones on very small projects so that you understand why they shouldn’t have been chosen in the first place. Overly dry, brittle leaves will break during and after weaving, making your careful efforts for naught. Learning to choose good leaves happens throughout the preparation process.
If time avails, using heavy scissors or garden shears, cut off the first foot or so of the bottom of the leaf as well as the section of the leaf above the bend or when the leaf changes color. Also look at the underside of the leaf and discard any leaves that have grey mottling since that is the first sign of mildew and fungus attack. The cut off materials are returned to the base of the hala tree and the remaining shorter strips are stored in a large plastic bag or trash bin for easy transport.
Cleaning and De-thorning the Lauhala
After collection, the leaves need to be cleaned, de-thorned, softened and stored for later use. These processes are also described in the Bird et al. book (chapter 2) which can be downloaded below:
The YouTube videos (Wong-Gary and Kelii) mentioned in Sources of Information are also quite helpful in describing these processes.
Kelii video:
When my wife Helen was young, the lauhala gathered by her aunts and uncles at E. E. Brown beach park were washed in the ocean nearby to remove the dirt that the leaves normally collect. Other weavers routinely use fresh water at home for this purpose.
Before or after cleaning, remove the outer thorns and the midrib. There are a variety of tools for this as shown below. Auntie Rosie even used her thumbnail sometimes! Remember always to do the edge stripping going from the wide base to the narrow tail when using these tools.
I usually put the needle (top), bamboo (bottom) or other tool through the leaf about 3/16″ in from the edge when doing this operation. Sometimes when the leaf is curled over, it’s helpful to use your forefinger to separate the strip as shown in the Bird et al. reference above.
Lauhala which is suitable for weaving will separate from the thorns cleanly, while older, degraded material will tear or flake on the edges of the seams and should not be used.
It’s important to understand that the process of choosing good material occurs at nearly every step of the process including the choice of material during the actual weaving process. Often only 1/4 of the leaves initially chosen for example for hat material are finally used in the weaving.
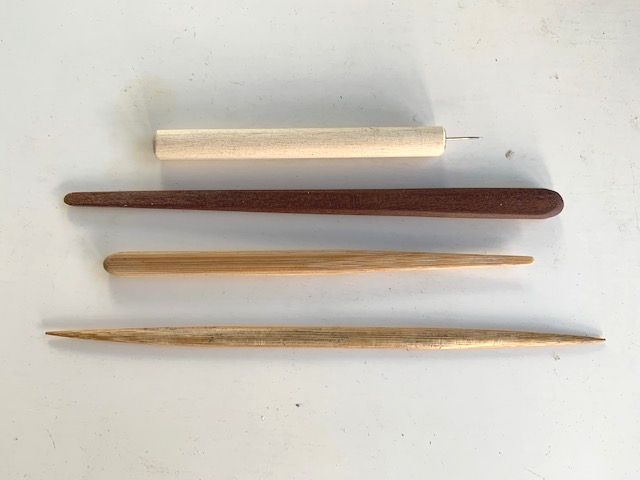 Stripping tools for removing the edge thorns. From top to bottom:
 pin in dowel, shaped milo wood piece, and two types of bamboo tools
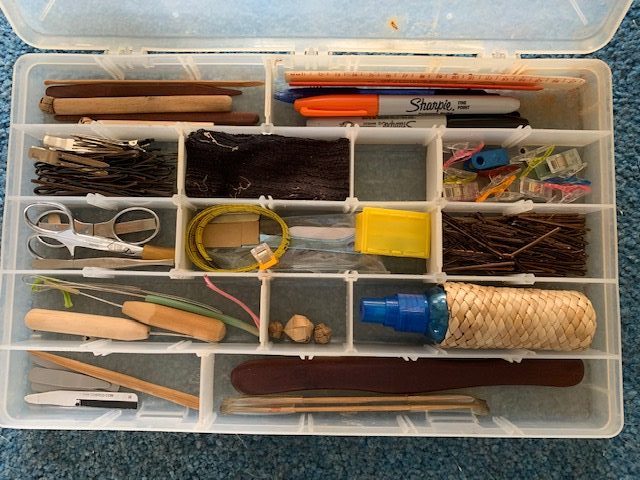
It doesnʻt take very long before you find the need for many more tools to help with your weaving/plaiting. Shopping in the fishing section of big box stores will often provide a great container as shown below:
After the edge stripping, the thorns in the middle of the leaf need to be dealt with. You can either use a knife or one blade of a pair of scissors to scrape them smooth. Always scrape from the tip towards the base.
Or you can use the same tool that you used on the outer thorns and remove the center section entirely by going along first one side of the center strip and then the other. Some weavers ( Kelii for example) use a tool that has a pair of cutters so that the job can be done in a single pass.
Now wipe the thornless leaves with a damp cloth to remove the dirt from the leaves and also to smooth the leaves somewhat. Leaves which are stiff and curled may need to be soaked in hot water. After that begins the flattening and softening process.
Flattening and Softening the Lauhala
Some folks wrap the leaf around their hand, forwards and backwards many times until the leave is uniformly pliable and the curled sections flattened. Others use a section of bamboo or PVC with slots cut partway down one side of one end and do a similar process.
Yet another approach is to use a pasta machine and let the machine rollers help with the softening. Care must be taken when using the pasta machine that the rollers are not too close together. An over compressed leaf can cause problems later during the weaving process when the leave is moistened and the leaf expands to its original size or delaminates.
The pictures below show a lauhala roller I believe made by my wife Helen’s uncle. The top picture shows the long view. The horizontal board is clamped onto a table top when in use. The next two views show opposing sides of the working mechanism. In practice, the thick end of the lauhala is inserted between the two dowels and the handle turned. When the end of the lauhala is reached the process is reversed as many times as needed to flatten and soften the lauhala.
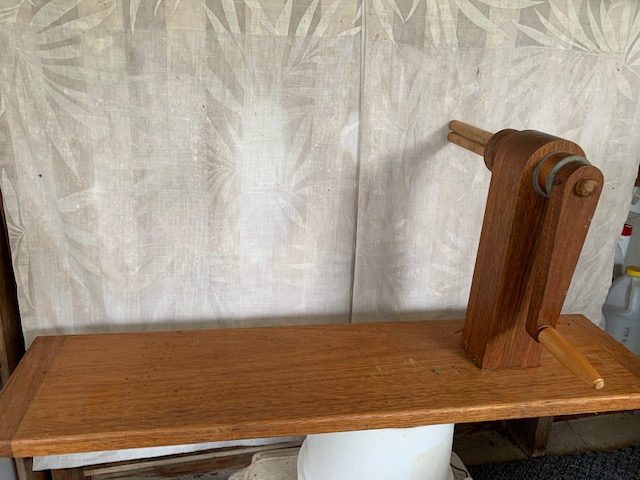 Long view of the roller
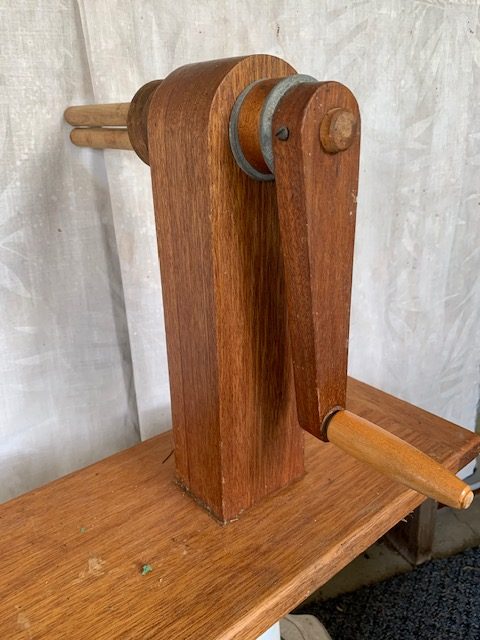 Handle side of the roller
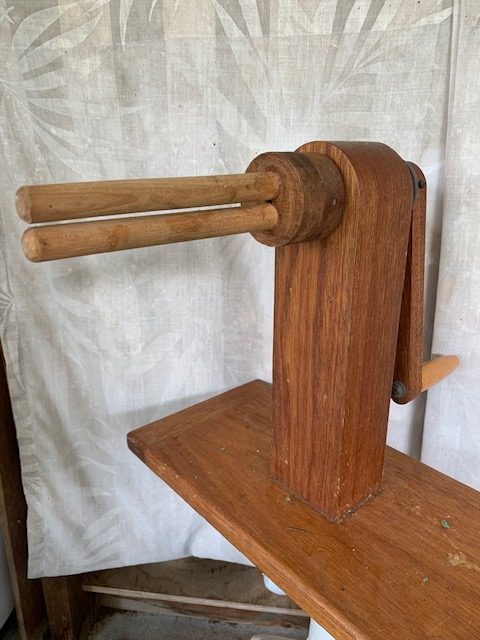 Lauhala holding side of the roller
Drying and Storing the Lauhala
If I have a choice in Hilo, I like to dry the leaves on the grass after washing them. When spread out, there’s space all around the leaves for the water to evaporate. Another approach is to use metal hangers which attach to a fence for drying as shown below.
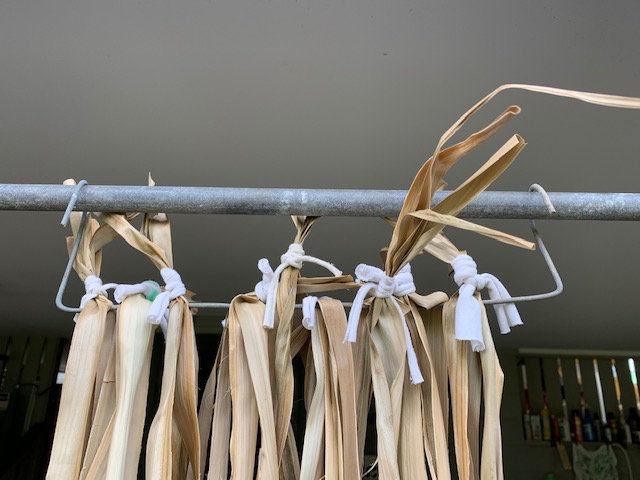 Lau attached to a metal hanger which fits over the top bar of a cyclone fence
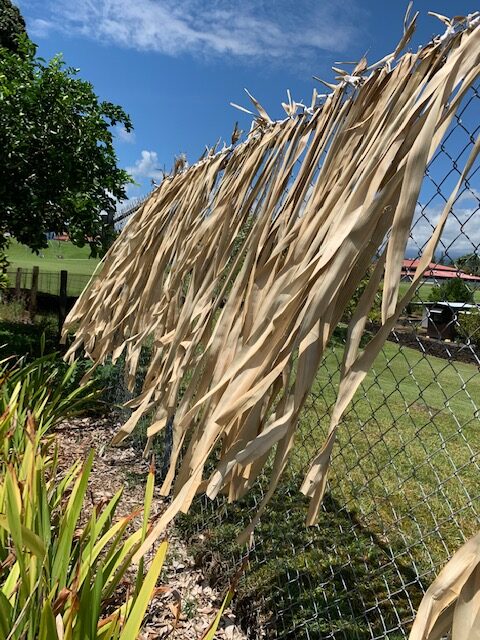 Lauhala attached to the fence, blowing in the wind…
When the leaves are pliable and dry, they are rolled into a kuka’a as described in the two videos mentioned above. Leaves should be stored for at least a week in the kuka’a before using so that the leaves will remain flat when they are unrolled.