Introduction
Let’s begin with something useful – a lauhala coaster using check weave that you can put hot coffee or a cold drink on. This project will involve basic skills that you will need for the rest of the items that we’ll make in the future. There are probably several different ways to weave this. Please don’t hesitate to ask others for suggestions.
If you are just beginning to weave, please check the pages on choosing and cleaning lauhala as well as those dealing with cutting the lauhala into strips (koana). We will be using check weave, called maka moena in Hawaiian.
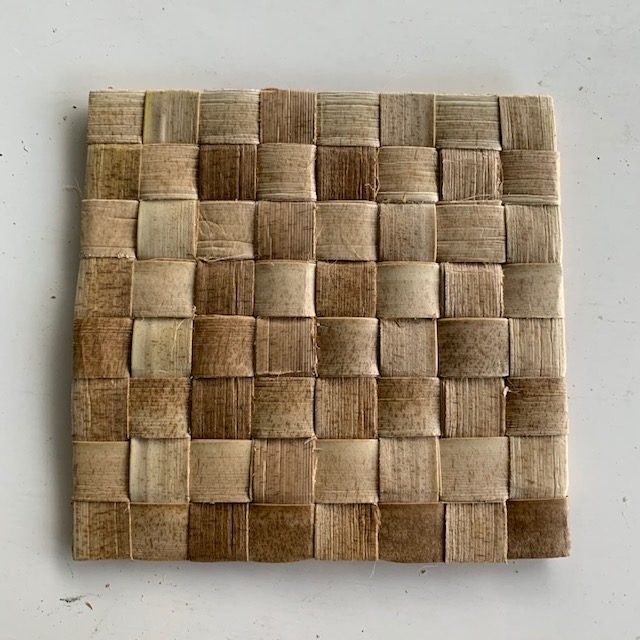
The project will require some patience. If things don’t seem to be going just right, take a break. Here’s what the finished product looks like:
Materials list:
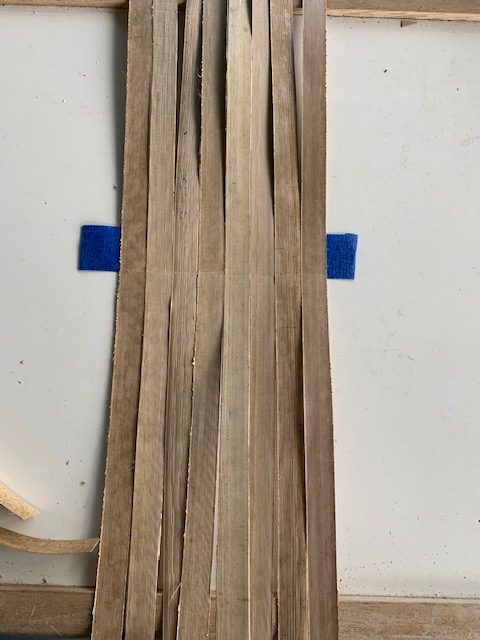
You will need 16 lauhala strips (koana) 1/2″ wide and 14-15″ long.
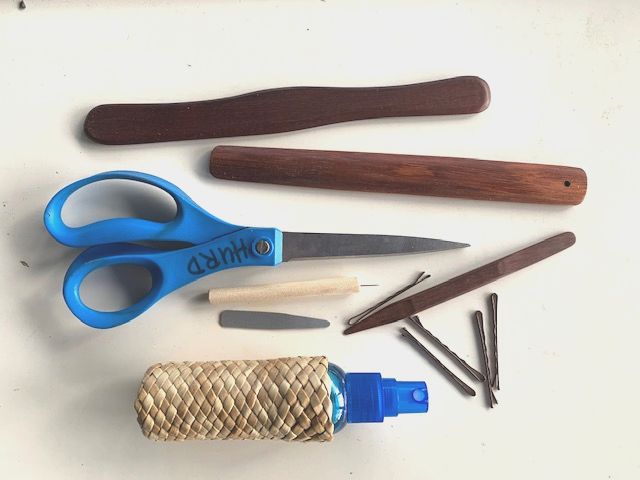
Tools list:
A tool for softening the koana before weaving
Either a pin stripper or a box stripper to cut the koana from the lauhala
Scissors for cutting the koana to length and trimming
A spray bottle ( a small one from the travel section is good )
1/2″ wide painter’s tape
Small hair pins ( those about 2″ long work well for me )
A tool to help push one end of the koana underneath another
A 12″ or longer ruler
It doesnʻt take very long before youʻve accumulated lots of tools for weaving/plaiting. Shopping in the fishing section of a big box store often provides just the right container, shown below
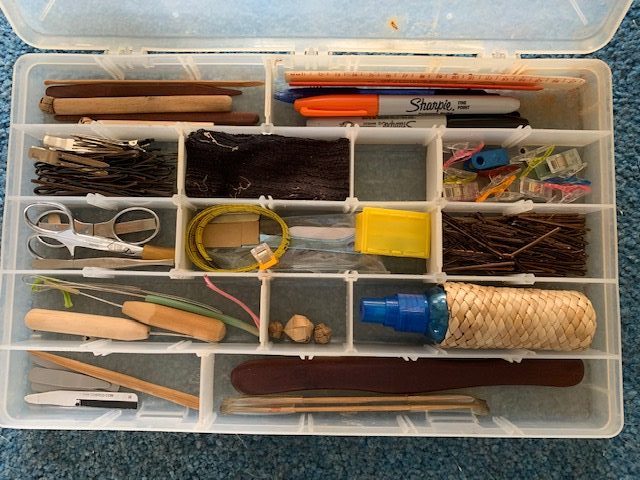 Figure 3. Tool box with assorted paraphernalia
Cutting the Lauhala strips (koana)
Using a pin stripper or a box stripper, cut the 16 koana into 1/2″ wide, 14-15″ long pieces. Then soften each piece by drawing it across the edge of a softening tool or the back edge of a knife as shown in the Wong-Gary video at about 8 minutes into the video. Do this firmly but gently. If the koana delaminates or tears, strip another one to replace it. Now fold each koana in the middle of its length and unfold it.
Beginning the Weaving Process
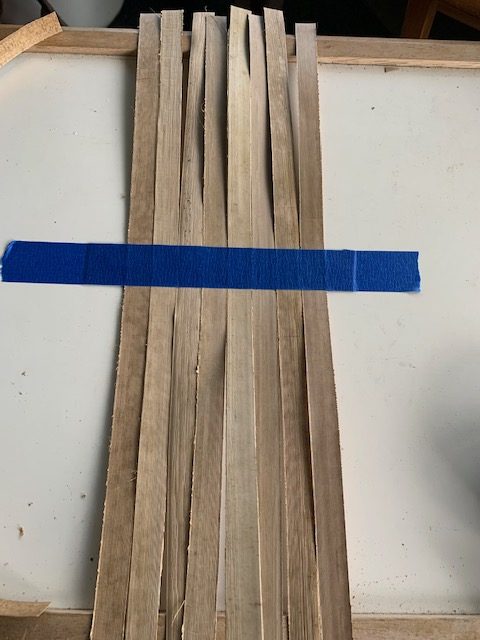
Take a 6″ long piece of painter’s tape, fold 1/2″ under each end with the sticky side up and put it on your working surface. Beginning ~1/2″ in from one end put 8 koana side-by-side with the fold of each piece lined up with the bottom edge of the tape. The shiny side of the koana should be facing down. The reason for this is that you are now going to moisten the koana with the spray bottle and the “not-shiny” side will allow water to enter more easily. Water will make the koana more flexible and less likely to break while you are bending it. The koana should be moist but not wet. If there are beads of water, spread them out.
Now take another piece of tape ~8″ long and place it over the 8 koana on top of the first piece of tape. At this point you have the 8 koana lined up with each other and also held firmly in place on the table. Lightly mist the lower sections of the 8 koana and wait a few minutes for the water to sink in. I usually cover the tape with something like the ruler so that it doesn’t soften when the koana are sprayed.
Now fold every other strip back at the bottom edge of the tape. Make each fold as sharp as possible. Lay the first horizontal koana across the first 8 with the middle of the strip halfway across, pressing against the edge fold.
Begin to bring the folded pieces back down starting from one side or the other. It is extremely important to lift each of the folded pieces up slightly before pressing the horizontal piece against it. You should see a slight gap when lifting up between the folded piece and the horizontal piece which disappears as you are putting the folded strip down.
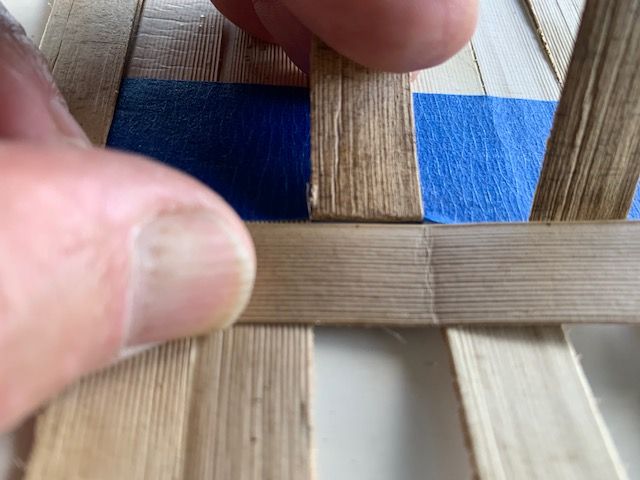
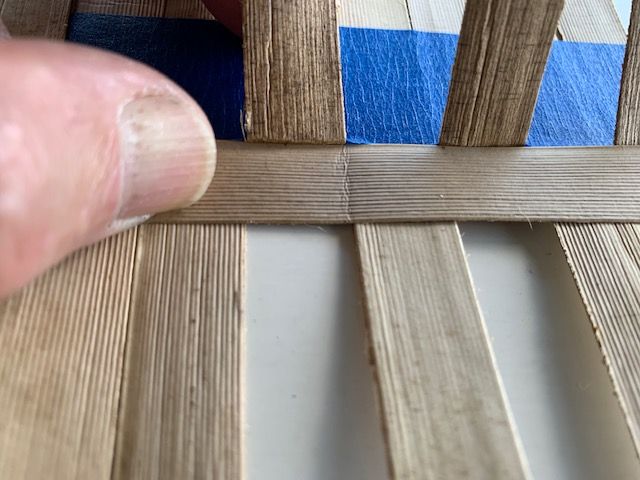 Figure 7. Now the horizontal koana is firmly in place
As you put each folded piece down, fold the koana next to it back. when you are finished with the first row, you will again have 4 koana folded back and 4 lying down. It’s often convenient to use something to hold the folded back koana down.
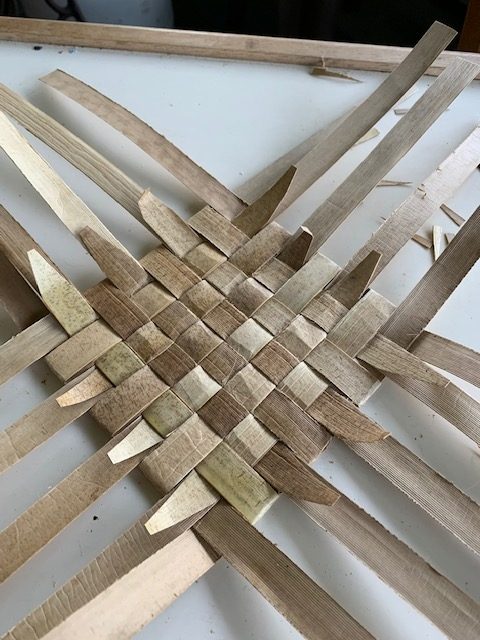
Repeat the process three more times so that you have 4 horizontal koana.
Now use the small hair pins to pin each corner. Notice how tight the weave is because we were careful to lift and push the top koana and then tightly fold the bottom koana as they were becoming the top ones.
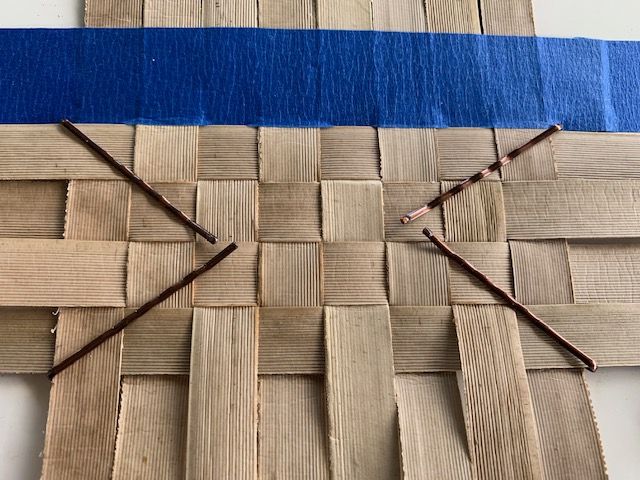
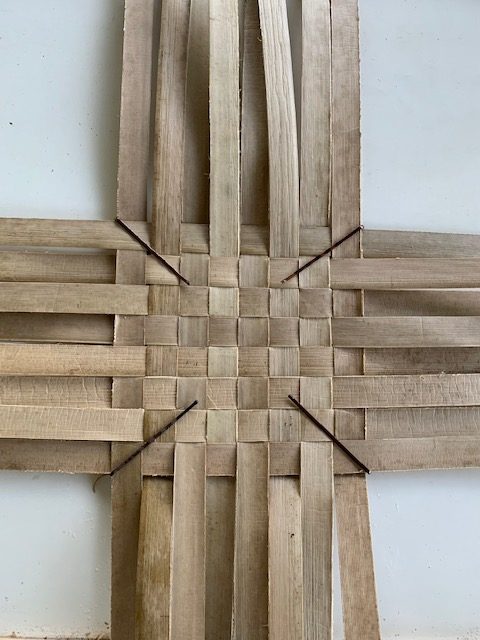
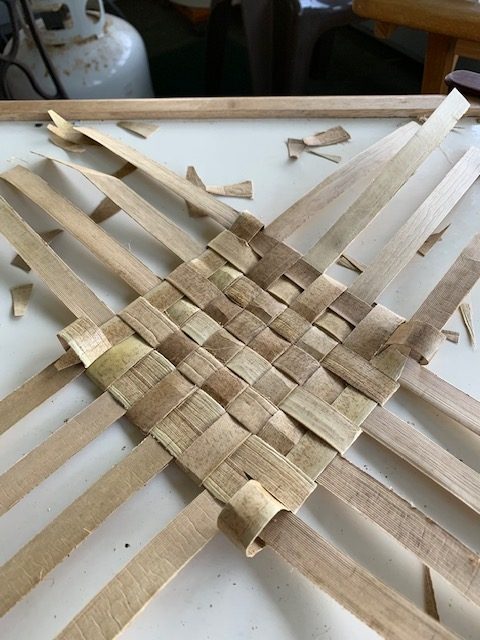
Remove the painter’s tape and add in the next four koana beginning where the painter’s tape edge was (also the location of the original fold in the middle of the koana). When you’ve finished, you will have a square with equal lengths of koana all around it. Move the clips so that they are now at all four corners.
Beginning the Second Side
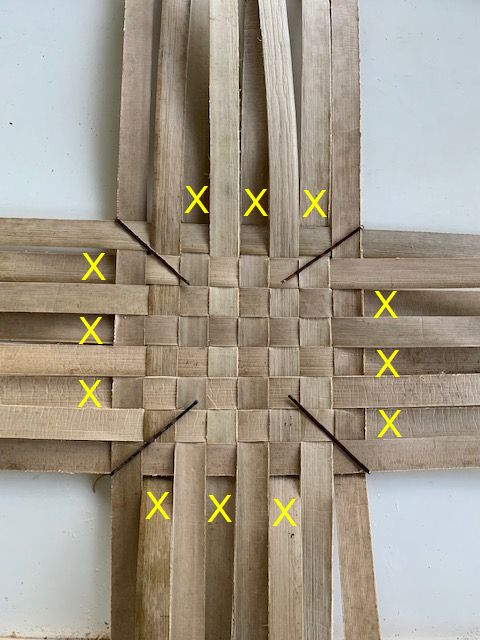
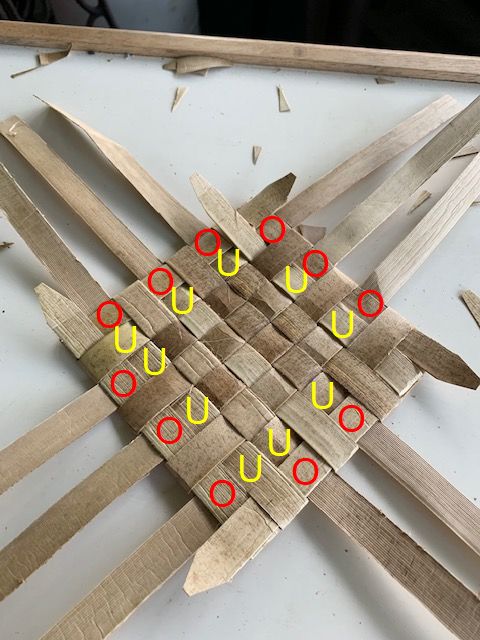
Now we’re going to begin folding the koana back on the square so that the shiny side of the lauhala will be on both sides of the trivet when we’re finished. The koana that we will first weave back into the framework are marked with yellow X’s below.
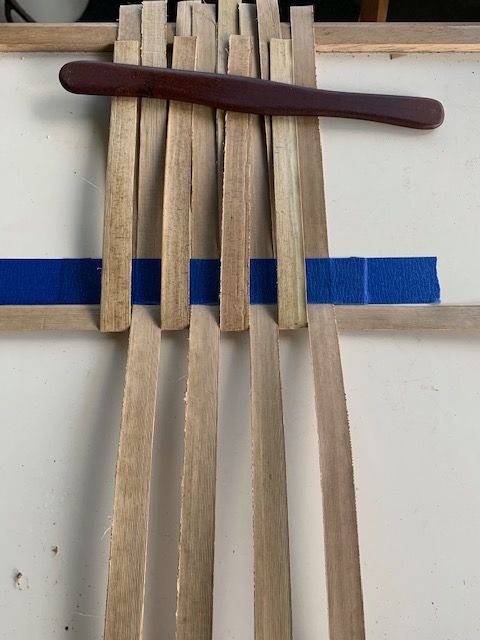
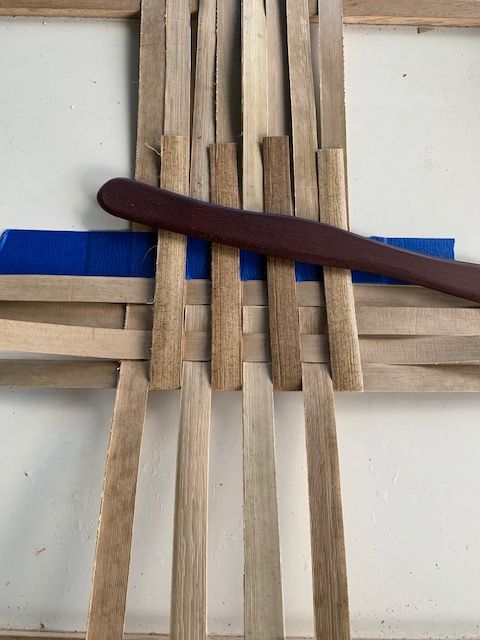
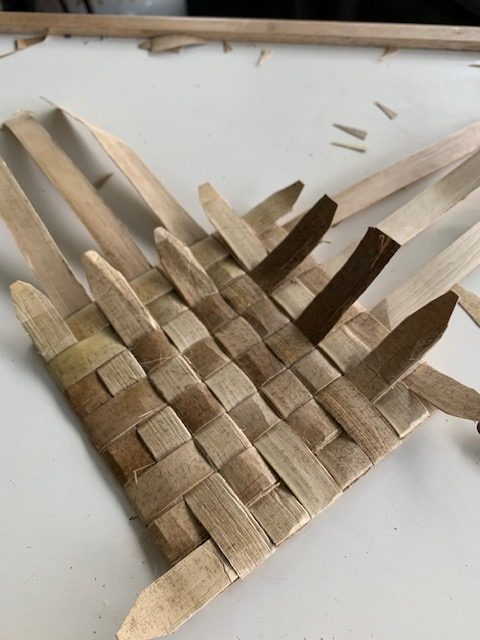
The next figure shows the weaving process begun. The brown object is a shaped piece of wood, plastic or bone that gently lifts a koana so that another can go underneath it. Three strips are in the process of being woven.
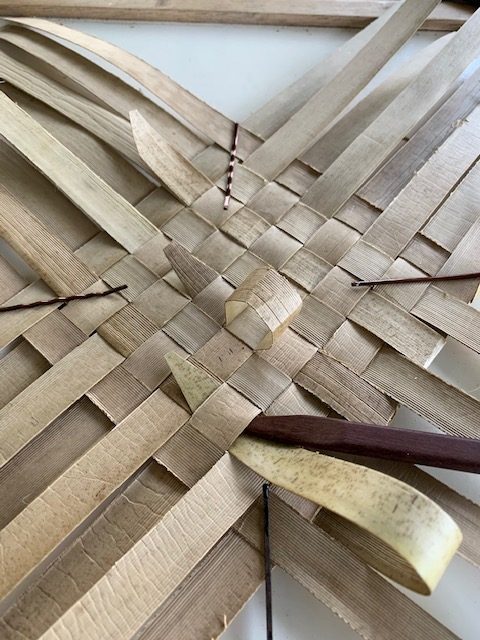
Continue weaving the koana for the other three sides. When you have finished, trim off the ends of the koana that you have been weaving with.
Now we’re going to start weaving the outside koana. When you have finished, the end of each koana will go underneath the beginning of the next one like a snake eating its tail.
Finish gently but firmly pulling on the edge koana. When that’s done trim off the ends sticking out. Now we will finish weaving in the remaining koana which are sticking out from the sides. Below, we’ve begun at the 3 o’clock position and gone to the 12 o’clock position. See the figure caption for instructions.
Below we are continuing the process. It’s more difficult now because there can be several layers of koana that we need to lift when we slide a crossing member underneath. Remember to moisten the koana continually. When you have finished, again trim all the ends off.
When all four sides are finished, trim off the ends. Here is the back side of the finished trivet below.
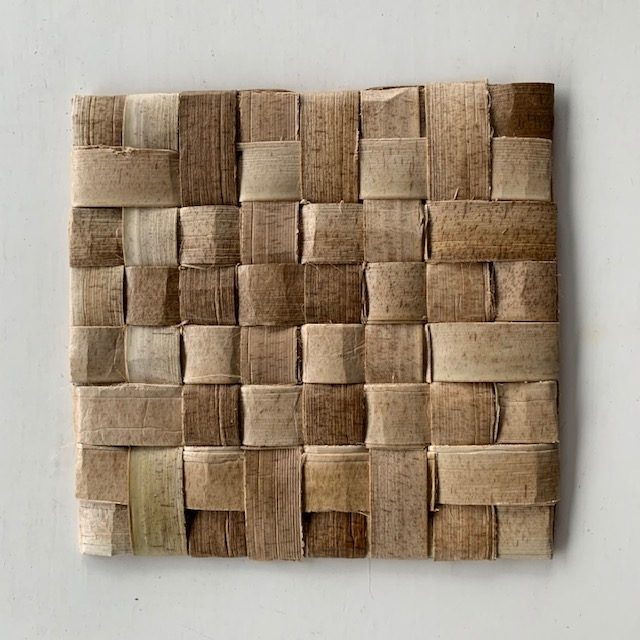
And here is the top side. It’s not quite square – next time perhaps… 😉

I hope that this has been an interesting exercise for you. This particular project can be made much larger, for example for an ipu heke pale, the pad for an ipu heke or gourd rhythm instrument for hula. In that case the size might be 16-18″ square and use 3/4″ wide koana.